[The Expert's Secrets to Bluefin Tuna]
Pursuing Greater Results for Years!
Charismatic Angler Hitoshi Suzuki’s
Bluefin Tuna Casting
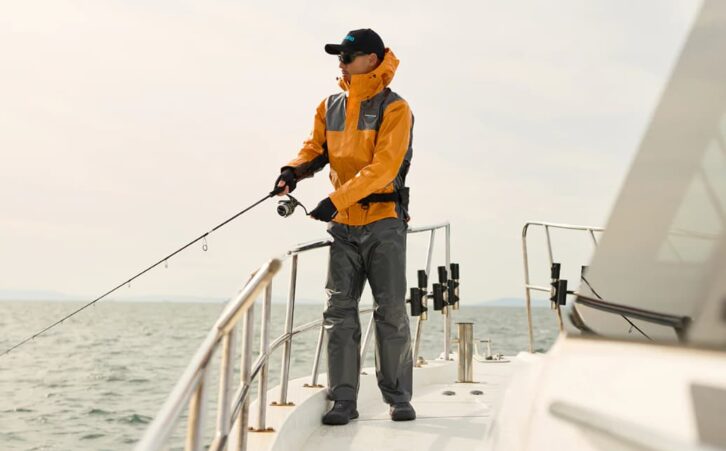
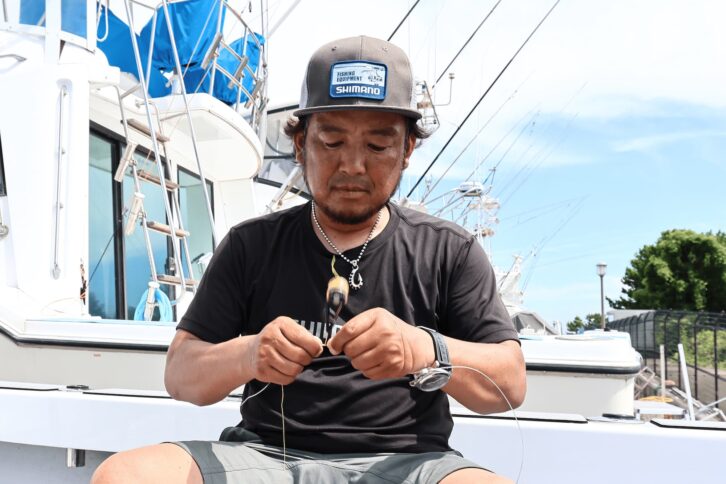
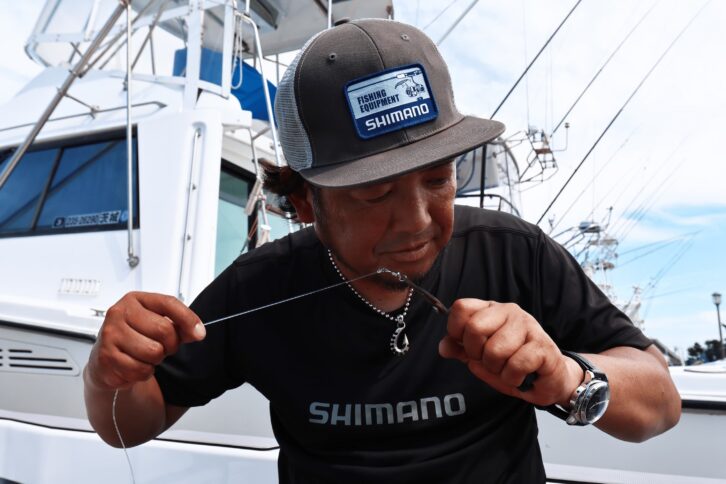
Professional angler Hitoshi Suzuki excels across a wide range of species, from large fish like bluefin tuna, yellowfin tuna, and amberjack to shore-based sea bass. Active on the front lines of the saltwater game scene since his youth, he has appeared in numerous media outlets and landed many memorable fish. His bluefin tuna catches have also been featured in videos, on the web, and in magazines. What bluefin tuna tackle and tactics does Suzuki choose as of late 2025?
Photos provided by Shimano ※Photos show catches from 2018-2019.
INDEX
- Hitoshi Suzuki’s Decisive Encounter with Bluefin Tuna
- Anticipated Size and Tackle Preparation
- Use a Longer Leader for Connection
- Prepare your spool thoroughly yourself
- To avoid regret, tackle it with fresh gear
- Line System Keeps It Simple with PR Knots
- Drag adjustment is crucial in tuna fishing
- Two Basic Approaches for Actual Fishing and Luring
- Lure Size
- He prefers triple hooks
- Bites and Strikes
- Handling the Hit
- Preparing Other Equipment for Bluefin Tuna Fishing
- For Anglers About to Take on the Challenge
Japan’s Bluefin Tuna Game as of Late 2025
For recreational bluefin tuna fishing in 2025, monthly catch quotas are set by the Fisheries Agency: an annual total of 60 tons, with a monthly limit of 5 tons (3 tons from September onward). This quota may fluctuate if the previous month’s catch exceeds the limit. The new quota period typically begins on April 1st each year. Anglers must report all catches. Tuna under 30kg are prohibited year-round. For tuna over 30kg, the limit is one fish per angler per month, and reports must be submitted within one day of landing.
The quota starts at the beginning of each month. If the catch is expected to exceed the quota, bluefin tuna fishing may be prohibited. Given this background, the quota is often reached within the first few days of the month, depending on the season. To allow more people to enjoy fishing, some boats encourage catch-and-release. Release should be done in consultation with the captain, who is experienced with release, and fellow anglers on the boat.
Furthermore, fishing for tuna, which are vastly larger than humans, carries risks of accidents during the fight or landing, and potential damage to equipment from unexpected use. Actual injuries and equipment issues are reported. Recognize that fishing is undertaken at your own risk, and enjoy it while ensuring adequate safety. For tuna fishing, approach it with solid knowledge and the physical stamina required to handle large fish.
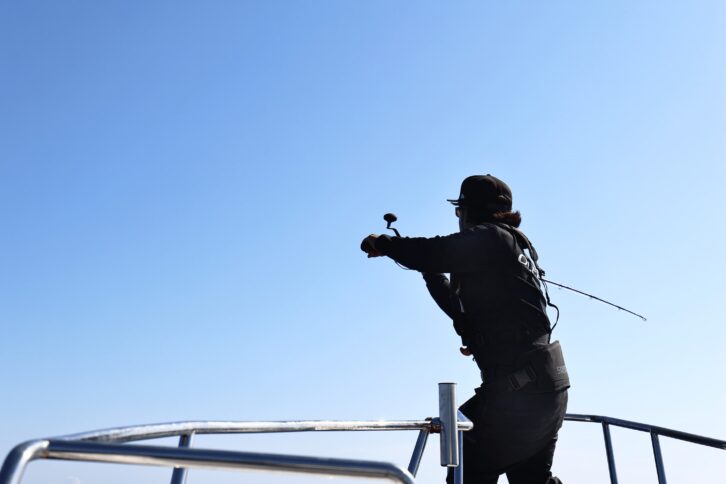
Hitoshi Suzuki’s Decisive Encounter with Bluefin Tuna
There was a time when catching bluefin tuna on lures was said to be difficult. That was over 25 years ago. It’s still not easy today, but back then, it was an era where a select few experts were experimenting with techniques and gear. It was during this dawn of the sport that Mr. Hitoshi Suzuki also began targeting bluefin tuna.
“I first went after bluefin tuna about 25 years ago. It was at Kyuroku Island, located on the border between Aomori and Akita Prefectures. Before that, I had seen in fishing magazines that people were catching them with lures at Matsumae Kojima, so I thought, ‘If it can be done with lures, I’ll give it a shot.’”
Back then, successful lure fishing for bluefin tuna was still rare, with only a handful of catches recorded. Techniques, information, and gear were scarce.
“I was used to casting for yellowfin tuna, so I prepared accordingly. But the captain guiding us said, ‘We fish them with jigging,’ so I tried jigging. When we got to the spot, though, it was completely covered in baitfish schools. Jigging was useless in that situation. Forty- and fifty-kilogram bluefin tuna were leaping everywhere, darting beneath the boat at incredible speeds, creating flocks of birds. Witnessing that scene, I distinctly remember thinking, ‘I absolutely have to catch one!’ Seeing the spectacle around Kyuroku Island ignited a fire within me.”
Back then, in the still-developing offshore game fishing scene, forty- and fifty-kilogram bluefin tuna were considered large. And achieving results wasn’t easy.
“It wasn’t guaranteed you’d encounter amazing conditions every time you went out. There were also considerations with the fishermen, making it hard to fully explore the area. Years passed without landing a satisfying size. About 16 or 17 years ago, I shifted my focus to the Tappizaki area, where it was easier to target them with lures. Back then, however, there was no management of the bluefin tuna resource, and the population was low. Even when we went out to the field, we couldn’t find tuna. It was such a difficult time encountering them that we’d talk amongst ourselves about glimpses we caught – just a momentary sighting, or a quick glimpse of a jump.”
Still, every year, July, August, September, I went out for Shimano tests and privately. To keep expenses down as much as possible, I sometimes slept in my car while waiting for the right time to head out. This era of extremely scarce tuna lasted until about ten years ago.
“About ten years ago, during a TV shoot, I encountered a pattern where they were feeding on mahi-mahi and managed to hook a decent-sized one. But lacking experience with big fish, with limited line capacity and poor drag adjustment, I broke the line and lost it. It was a reel I’d hand-spooled late at night at the inn with a Shimano representative, using a prototype STELLA 20000PG under development and about 220m of PE10 line. I thought it was around 100kg at the time, but looking back now, I believe it was closer to 200kg. It was a power and fight from a fish unlike anything I’d ever experienced before. This was incredibly frustrating. This fight made me keenly aware that gaining experience was the only way to become more reliable at landing such fish.
However, opportunities for large bluefin tuna were scarce domestically. Therefore, Suzuki decided to go to the US Atlantic coast, North Carolina, to gain experience fighting large tuna. He could experience about two fights per trip. After several years of visiting, he caught one weighing around 160kg. While gaining this valuable experience, he also learned by observing other anglers who had already gained experience in this area. He also identified challenges.
“I landed the tuna, but I was frustrated because I couldn’t fight it the way I wanted to. What I realized then was the importance of my own body weight. I weighed just over 60kg, the lightest among the group. When tightening the drag, I realized having body weight and being able to sink your hips was an advantage. My strengths lay in the delicate techniques honed through seabass and flathead fishing—agility and precise casting. But the American tuna game made me understand I needed the physique, power, and gear to truly confront large tuna.”
After that, Suzuki worked to build his physique and continued challenging himself. Then, just as bluefin tuna began appearing more frequently in Japan, the moment arrived when his American experience—the drag adjustments and techniques for fighting bluefin—paid off. In Aomori, he hooked a 100kg-class bluefin and landed it in just about 15 minutes. Since then, he’s delivered results almost every year. And he continues to evolve.
“I’ve pursued tuna for many years. The excitement of seeing my first school of tuna, the era when I couldn’t catch them, the days I spent relentlessly pursuing them, and the frustration of missing large tuna during filming – all became the springboard that kept propelling me forward. For me, tuna fishing is pure ‘youth’. It’s exhilarating. Suddenly, a massive tuna leaps, and the sight of baitfish scattering wildly unfolds before your eyes. You chase it down and land it with your lure. It’s closer to hunting than fishing. It’s the pinnacle of game fishing, packed with elements that get your blood pumping.”
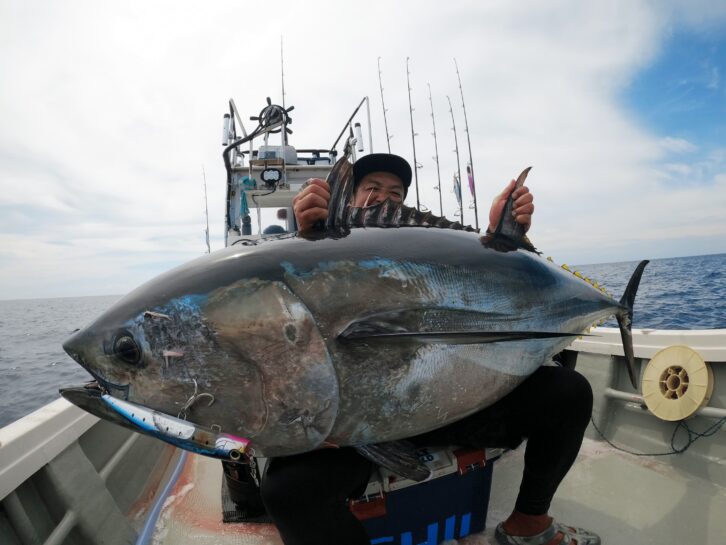
Incidentally, Mr. Suzuki’s goal in recent years was to catch a 200kg tuna, a personal record within Japan. That goal was finally achieved in November 2025 during a Shimano development location shoot. He hooked a 250kg-class tuna and released it from the boat’s edge. He is now aiming to set a new record.
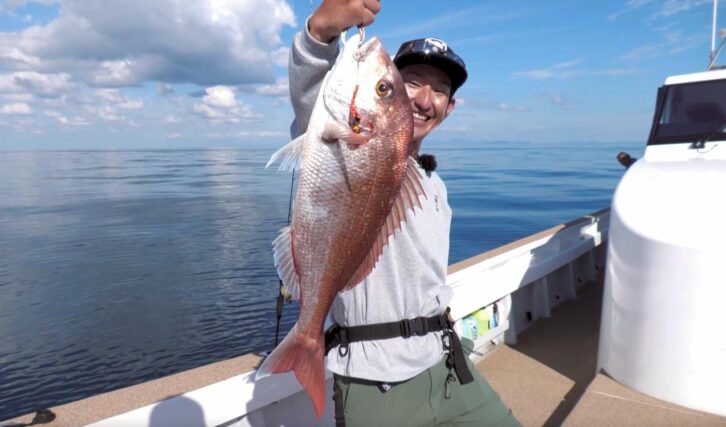
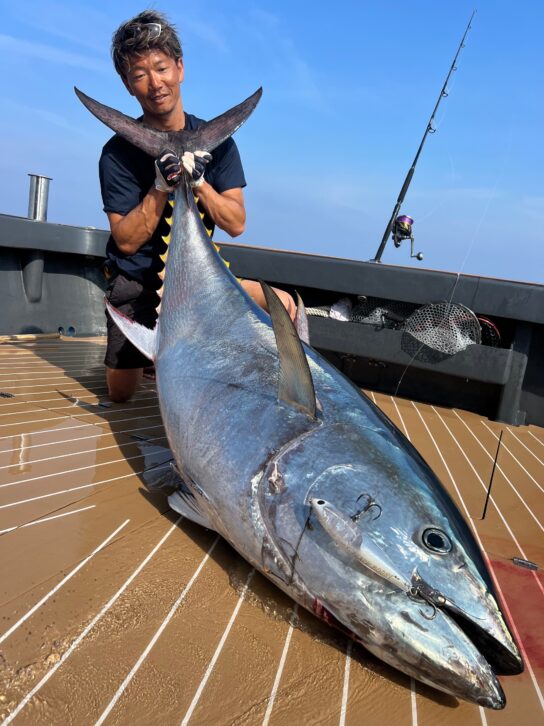
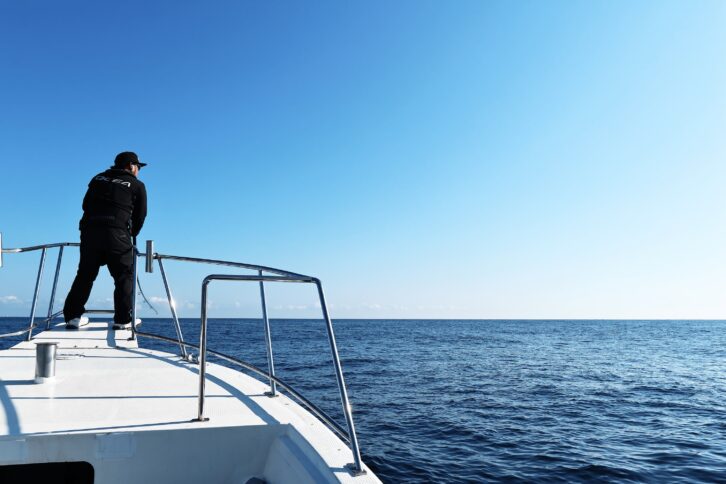
For Mr. Suzuki, bluefin tuna represent a target he’s pursued for years through trial and error. He credits his accumulated experience for making success more attainable. In recent years, he’s challenged bluefin tuna across Japan and overseas. Pictured is one he caught while piloting his own boat. Photo courtesy of Shimano ※Photo shows catches from 2018-2019.
Anticipated Size and Tackle Preparation
In Suzuki’s bluefin tuna game, the anticipated size is 200kg or even larger, so currently the strongest setup is PE12 tackle. However, since the tackle is prepared for nature, adapting to the situation is essential.
“While I always target large fish, if migrating schools include 50-80kg specimens, I prepare one dedicated tackle set for them. This setup also handles casting smaller lures when bait is scarce. I prepare two additional tackle sets for large tuna. I always bring three casting tackle sets. Plus, I carry one jigging tackle set as backup.”
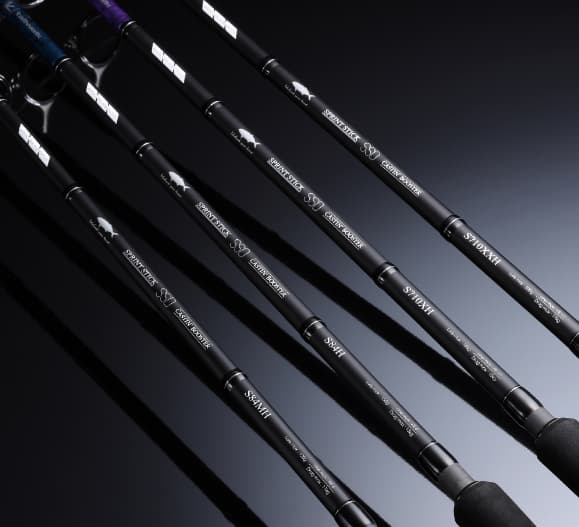
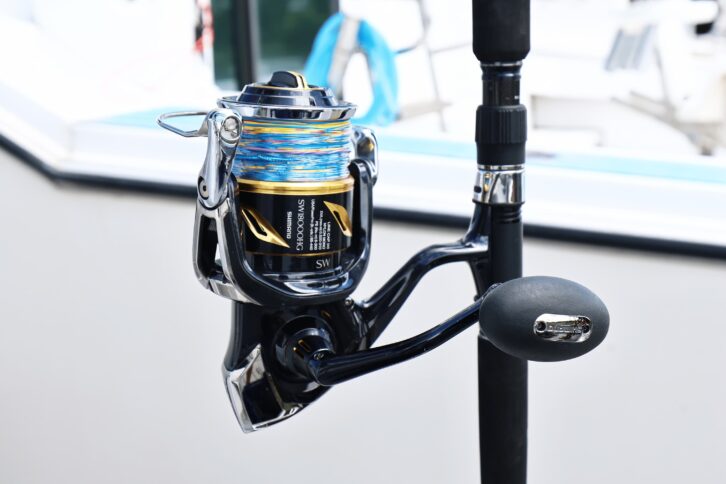
For casting tackle targeting the 50-80kg class, the rod is the Shimano OCEA PLUGGER BG Series FLEX ENERGY S83H. It handles casting lightweight plugs around 60g while also managing larger plugs around 120g. It’s a model with excellent long-distance casting performance. This is paired with a STELLA SW18000HG reel. For the spool, I prioritize casting distance and use the standard model. The main line is PE #8, tied to a 150lb nylon leader.
“Regarding leader thickness, even if you tie on 180lb to prevent fish from swallowing it whole, it will still break when it breaks. For #8 tackle, I prioritize casting distance over that. Depending on the season, a stiff, thick leader can hinder distance.”
While it’s ideal when highly active fish are close, we often target isolated fish that suddenly surface further away. In such situations, tackle that allows for quick, full-swing casts and extended distance lets you get your lure right where the fish surfaced.
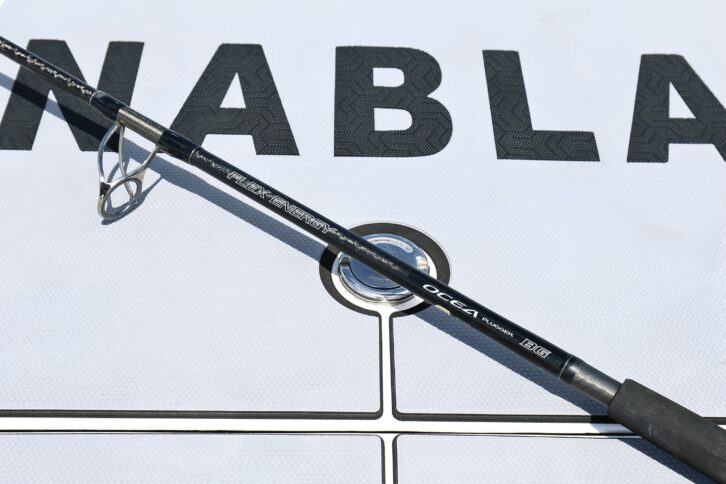
Next, the main tackle for large tuna. Here, I’ve selected the Shimano OCEA PLUGGER BG series’ FLEX ENERGY S710XH. It accurately casts 100-200g plugs while offering excellent maneuverability. I prepared two of these, each spooled with PE line (10-12 lb test) on a STELLA SW18000HG reel. For the PE10 line, I spooled it onto either a Yumeya 20 STELLA SW 20000MAX spool or a standard 20000 spool, then tied on an 180lb nylon leader. For the PE12 line, I spooled it onto a Yumeya 20 STELLA SW 20000MAX spool and tied on a 220lb nylon leader. The PE line used for both is the top-performance OCEA 17+PE.

The basic casting tackle setup consists of three rods. The main rods are two OCEA PLUGGER BG Series FLEX ENERGY S710XH rods spooled with PE12 and PE10. One tackle is an FLEX ENERGY S83H spooled with PE8 for smaller bait. The OCEA PLUGGER BG series is designed for catching tuna, GT, and yellowtail amberjack, comprising three types: MONSTER DRIVE, FLEX ENERGY, and BLUEFIN TUNA. The FLEX ENERGY model emphasizes stable handling and fighting performance, characterized by its tenacious power for bending and landing fish. Mr. Suzuki selected this model for its maneuverability and tenacity.
【OCEA PLUGGER BG】
https://fish.shimano.com/ja-JP/product/rod/offshoresalt/casting/a075f00002llolkqac.html

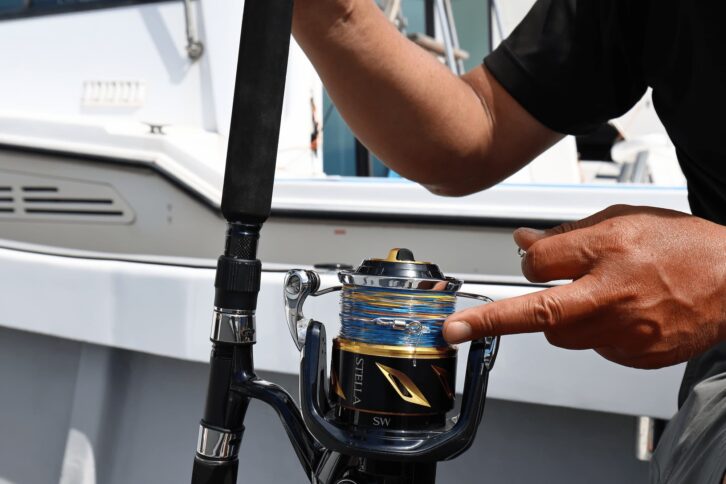
The reel is the reliable STELLA SW, the only choice. For the PE8 tackle, the 18000 size was selected for its slim spool profile, enabling greater casting distance. For 10-pound line, I use either the Yumeya 20 STELLA SW 20000 MAX Spool or the standard 20000 spool. For 12-pound line, I use the Yumeya 20 STELLA SW 20000 MAX Spool. The MAX Spool holds 300m of 12-pound line. All bodies are 18000HG.
【STELLA SW18000HG】
https://fish.shimano.com/ja-JP/product/reel/largespinning/a075f00002nt4thqai_p.html
【Yumeya 20 STELLA SW 20000MAX Spool】
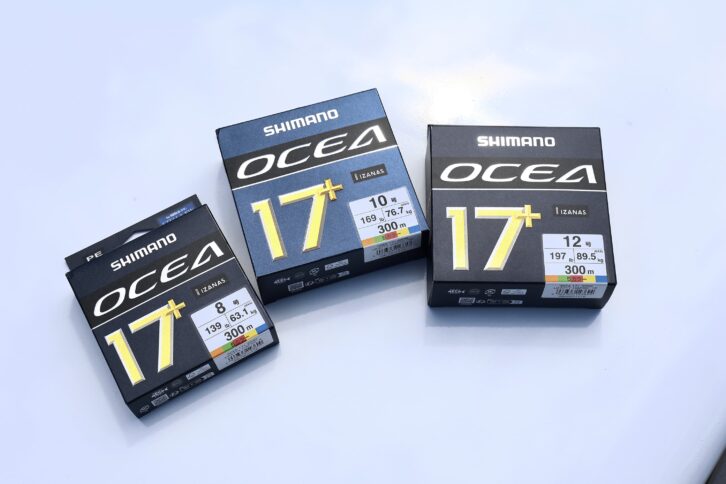
My go-to line: OCEA 17+ PE. This PE line uses the latest SF700 base material and features a 16-strand construction with a single core. It delivers incredible strength and durability. The core prevents flattening, while the smooth surface dramatically increases casting distance. Its superior abrasion resistance allows for confident, extended fights.
【OCEA 17+PE】
https://fish.shimano.com/ja-JP/product/line/saltwater_egi/pe/a155f00000enwg8qal.html
“I prepare many spools pre-spooled with PE8, PE10, and PE12 to build line systems. This is to swap them out immediately if line trouble occurs. Also, I don’t want to use line that’s already been hit once. Line that’s been worked with strong drag settings, like 20kg, risks breaking high no matter how strong it is. If time allows, I swap the spool to prepare for the next battle.”
PE #10 and #12 are used on the same rod, but what determines when to switch between them?
“I switch based on casting distance. If the wind carries the lure, even #12 casts nicely. But on windless days or with crosswinds, #12 won’t fly. Normally I can cast 60m with #12, but without wind, it only goes 40m or 50m. That forces you to get the boat closer to the tuna, and when you get close, the tuna dives. If I see a jumping tuna that looks under 150kg or 200kg, I switch to PE10 tackle. People ask, ‘Won’t the 10 break?’ But there’s a big difference between a used 10 and a brand new 10. That’s why it’s crucial to always use brand new line. Of course, No. 12 is more reliable once hooked, but if you don’t hook it, you can’t win.”
Incidentally, jigging rods are for situations where the fish finder shows a reaction but casting is impossible, such as when the tuna is not jumping or floating. Prepare a slow-action rod, and after jigging, use a Faure action to search. He recommends choosing something like the OCEA JIGGER ∞ 8 Power.
“You can drop jigs with casting tackle, but dedicated tackle is still more reliable. When jigging, I don’t try to catch big bluefin tuna. I mainly cast, and only try jigging as a last resort when the tuna won’t surface and I can’t do anything else.”
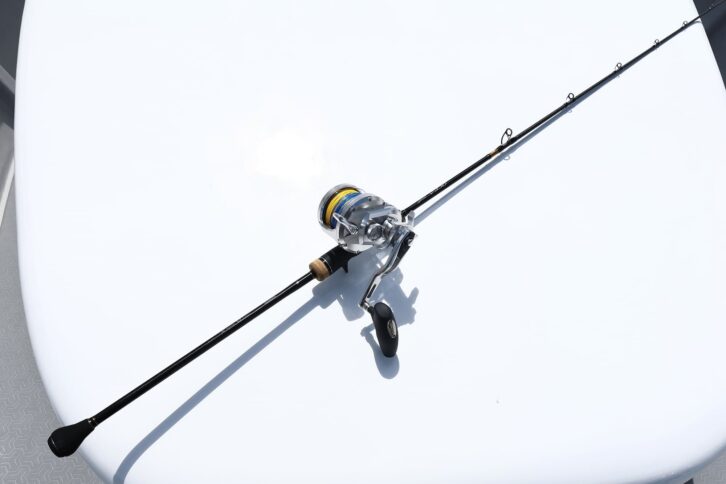
To deal with situations where the tuna are reacting but not rising, he also brings one jigging rod. He uses the slow jigging rod OCEA JIGGER ∞ to jerk the jig up and let it fall to attract predators. For the reel, he chooses the OCEA JIGGER 4000, which has a large line capacity and allows him to keep jerking. The line used is PE8 + fluorocarbon leader 100lb, No. 30.
[OCEA JIGGER ∞ (Infinity)]
https://fish.shimano.com/ja-JP/product/rod/offshoresalt/slowjigging/a075f00003cuiquqal.html
【OCEA JIGGER 4000】
https://fish.shimano.com/ja-JP/product/reel/ryojikuoffshorefuneishidailarge/a075f00002wgo0gqaa.html
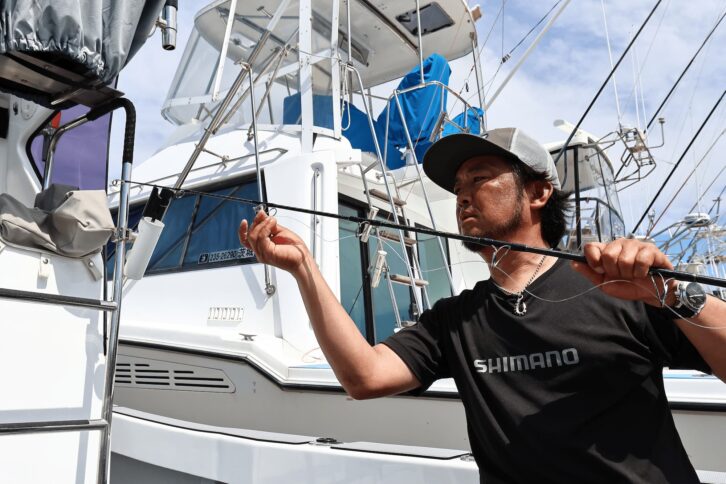
Use a Longer Leader for Connection
How long do you make the leader when tying it to your casting tackle?
Suzuki says he sets the leader length so that when he extends the leader from the rod tip and hangs the lure in the casting position, the leader knot fits inside the spool. During the cast, his index finger hooks onto the leader.
“If I shorten the leader to reduce resistance like guide interference during the cast, for some reason I just can’t get the distance. Maybe it’s because I cast barehanded without gloves, but hooking my finger on the PE line means I can’t fully commit force when swinging the rod, resulting in less distance. Shortening the leader to prioritize distance isn’t wrong, but for me, tying it longer and hooking my finger on the leader during the cast works best. I perform a pendulum cast with a leader droop about the same length as the reel position. This length allows about two turns of leader on the reel spool, making the total length roughly two and a half Hiro. This length also ensures the knot enters the spool during landing. With the knot on the spool, I can hold the spool down to prevent line from feeding out while guiding the tuna to the landing position. I also believe the extra length helps absorb some of the shock during the fight. I feel it reduces issues like line breaks and lessens the strain on the swivel or split ring where the leader is tied. However, the longer length does increase the chance of casting problems. I’m accustomed to this length, but finding the best length for each angler is crucial.
The leader length is about 2.5 Hiro. When casting, position the suspended lure at about the same height as the reel, making the leader long enough to wrap around the spool about two times. A longer leader allows it to wrap around the spool during landing, enabling you to hold the spool down and guide the fish more powerfully. The extra length also provides cushioning. However, it increases the likelihood of casting problems. You need to get used to it to avoid casting issues.
Prepare your spool thoroughly yourself
Mr. Suzuki brings multiple spools on his fishing trips. He uses the “UOYA Line Winder Factory” and a drag checker to measure the load when winding line. But how much load does he apply?
“I start winding with about 3kg of load. I used to think 5-6kg was necessary, but maintaining that load makes turning the handle continuously difficult. I realized 3kg is sufficient and now stick with this load. After winding about halfway at 3kg, I slightly loosen the spool factory dial to reduce the load a bit. Then, for the final 60m section released during casting, I wind at about 1kg load. When finishing the winding, winding greedily right up to the limit causes problems, so I stop slightly below the edge of the spool.”
Incidentally, if you wind with extremely high tension to squeeze out even a little extra line capacity, you end up pulling the line very hard. This causes the line to flatten as it’s wound onto the spool, accelerating the line’s wear limit. It also puts stress on the reel’s gears, potentially shortening the reel’s lifespan. By the way, it’s important to wind the line yourself first.
“Even if you wind with high tension, once you cast, the released line will be wound loosely, causing it to overflow the spool edge and leading to frequent line problems. Recently, a companion of mine had a problem where someone removed the spool at the store, set it on a machine, and wound the line, causing casting problems because they wound the line on a new spool. This is because spinning reels have slight winding quirks depending on the individual reel, and you wind the line parallel while adjusting it by hand, but you can’t see that with machine winding, and as a result, problems occurred.”
Spinning reels are less likely to cause problems when casting if the line is wound parallel on the spool, but depending on the individual reel, there are “quirks” that cause the line to be wound in a ‘V’ shape or an “inverted V” shape. In such cases, the line is adjusted by inserting or removing washers. However, if you are unaware of this tendency and set a new spool on the machine and wind the line so that it looks parallel, the part that was released after a few casts will be wound in a “V” or “reverse V” shape, causing the line to come out in a bundle when casting. If you ever set a spool on your reel and hand-wind it, noticing any bias, adjusting it then is no problem. However, I don’t recommend winding a brand-new spool solely by machine.
“If you have a spool wound by machine, I think it’s best to cast a few times by the water before heading to the fishing spot to confirm the line is wound perfectly parallel. You want to avoid a situation where a tuna is leaping right in front of you, but you can’t attack it because of casting trouble. Personally, to prevent casting issues, I wind slightly less line and always consciously ensure it’s wound parallel.”

When winding line onto a spool, first attach it to the reel you’ll use and wind by hand. This is to understand the reel’s specific “winding quirks.” Verify the line is wound properly and parallel.
To avoid regret, tackle it with fresh gear
Suzuki keeps many spare spools ready to prevent line issues, each spooled with brand-new line. This is because line subjected to repeated fights and casts may be damaged. Furthermore, Suzuki sends any spool that has seen even one fight to Shimano for a full overhaul, including the body. While this serves his role as a Shimano instructor to gather valuable data on internal conditions, it’s also preparation to ensure perfect condition for the next fishing trip.
“Many reels remain undamaged even after battling numerous bluefin tuna. Often, even after a year of continuous use, the rotation stays smooth and the drag performance remains unchanged. Still, sending them in for an overhaul once a year provides peace of mind. Even if you don’t feel it, there could be hidden issues somewhere. Incidentally, many cases of trouble stem from how the reel is used. I use mine carefully to avoid breaking it, so I haven’t had major reel failures. When I talk to people whose reels have broken, they often describe operations different from normal use: like several people cranking it hard regardless of the fish’s movement, one person holding the rod while others forcefully turn the handle, or spinning the rotor by hand. Applying unexpected loads leads to trouble.”
Incidentally, Shimano occasionally runs overhaul campaigns, so if you don’t have immediate plans to use your reel, it’s a good idea to take advantage of those periods.
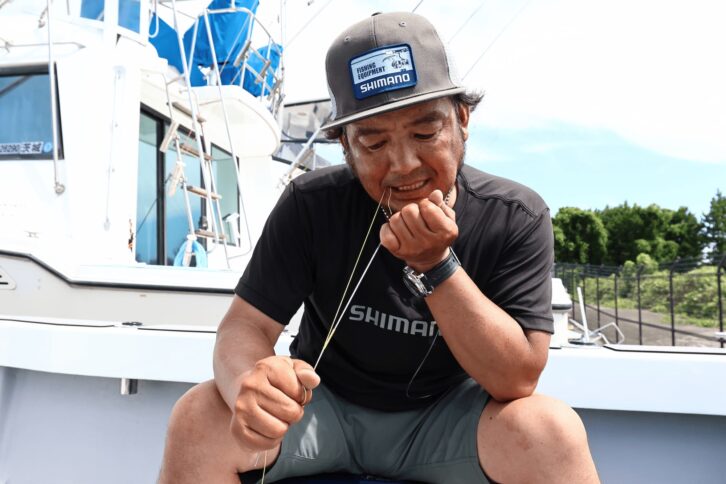
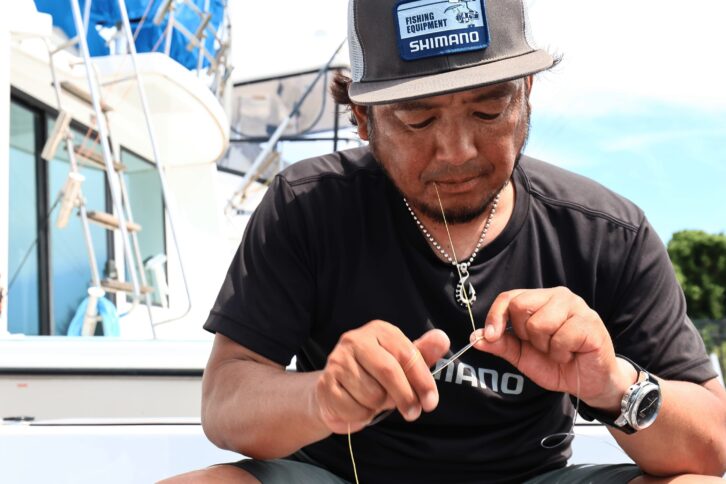
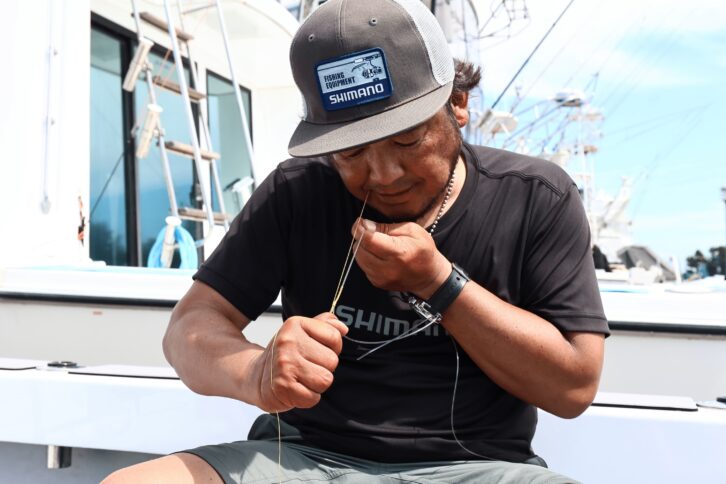
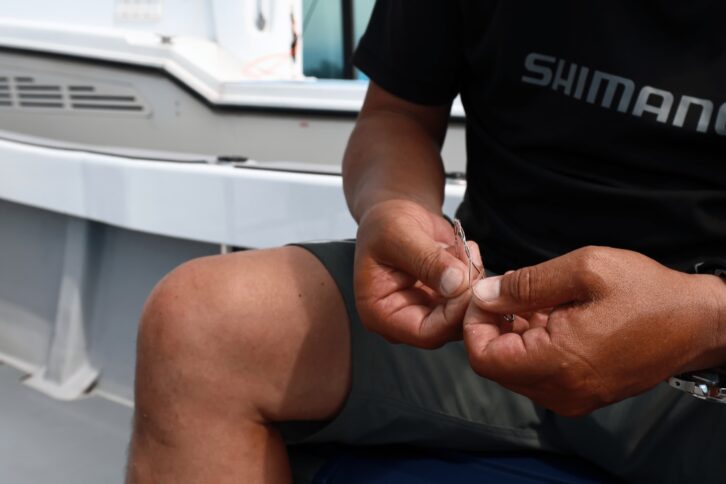
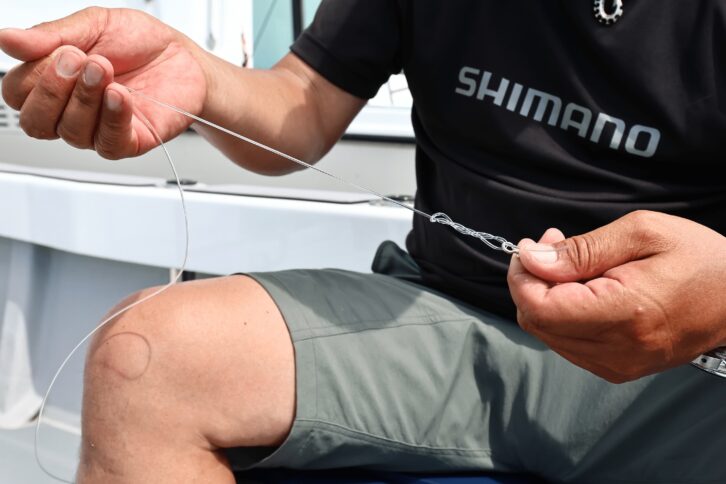
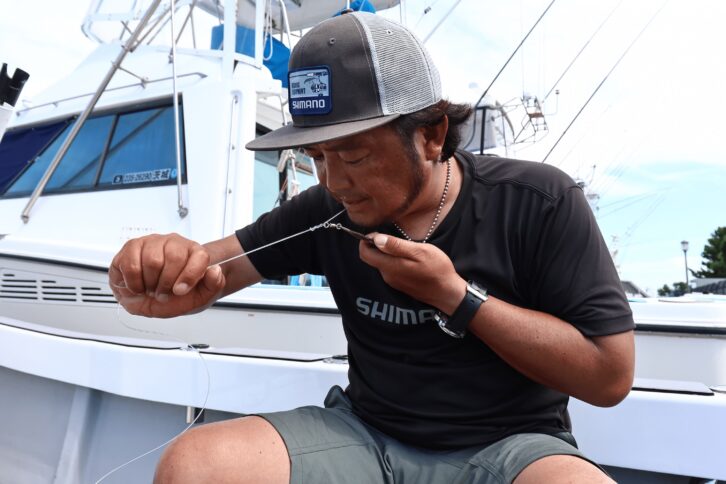
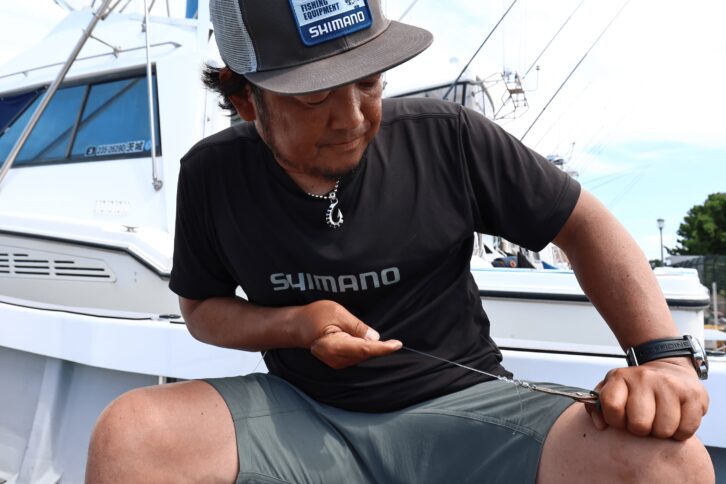
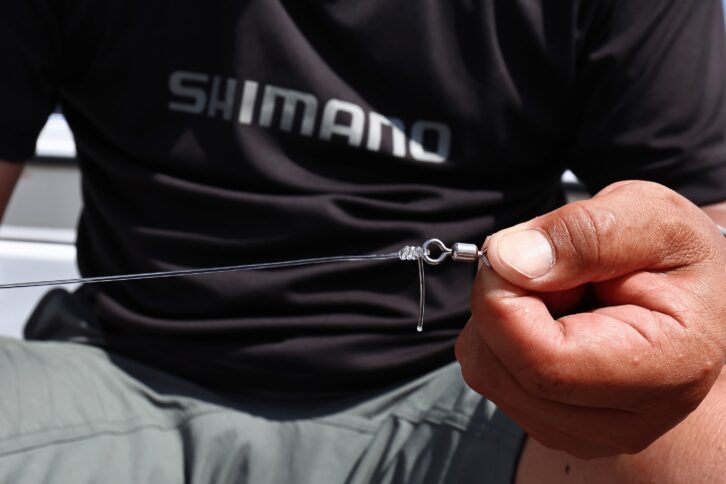
Line System Keeps It Simple with PR Knots
Many anglers targeting large bluefin tuna likely wonder, “Do I need a special knot to handle the powerful pull?” However, Suzuki’s line connection is remarkably simple.
“For both casting and jigging, I exclusively use PR knots. I use fewer wraps than standard and keep the connection section short. I used to make it longer, but after considering guide interference during casting, I concluded shorter is better. Fellow anglers ask, ‘Isn’t that too short?’ but it’s fine. The wrapped section is about 4cm. They say, ‘Won’t it come undone at that length?’ but it never has. Conversely, making it longer makes it hit the guides more easily, reduces casting distance, increases problems, and damages the PE line.”
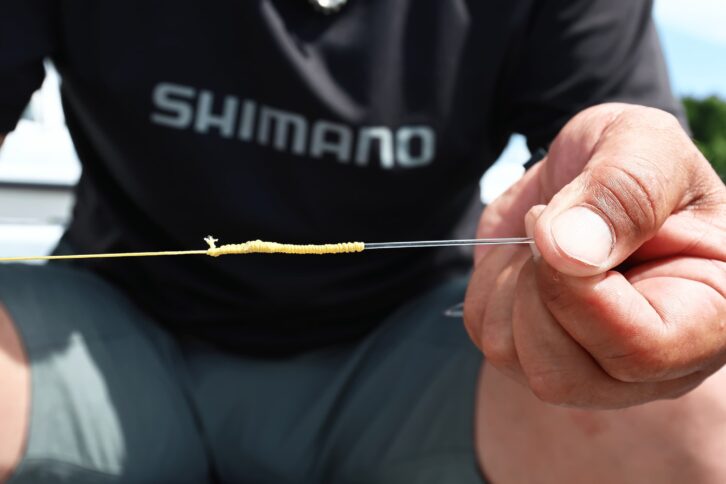
For the PR knot, I use a Shimano Bobbin Winder (heavy type). I don’t set a fixed number of wraps; after wrapping it around the leader for about 4cm, I secure it with a half hitch. At this point, it’s crucial to hold the leader in one hand and the PE main line tightly wound around the other hand. Hold the PE line’s tail with your teeth and pull firmly on the wrapped side to secure the knot tightly. From there, weave using alternating half hitches, repeating this sequence about three times. Pull firmly after each pass to ensure a tight fit. Then, using the PE line’s tail, weave 8-10 more half hitches onto the main PE line, depending on the length of the wrap. Finally, trim the leader’s tail and use a lighter flame to seal the end, creating a knot. Keep the knot small. A large knot can hit the guides during casting, creating drag.
Suzuki’s PE line and leader connection is simple. He uses a PR knot. For the knot bobbin, he uses a heavy type that is weighted and wraps securely around the leader. When wrapping, it’s crucial to adjust the tension firmly according to the thickness of the PE line.
【Shimano Bobbin Winder Heavy Type】
https://fish.shimano.com/ja-JP/product/othergears/tools/linegears/a155f00000c53ejqar.html
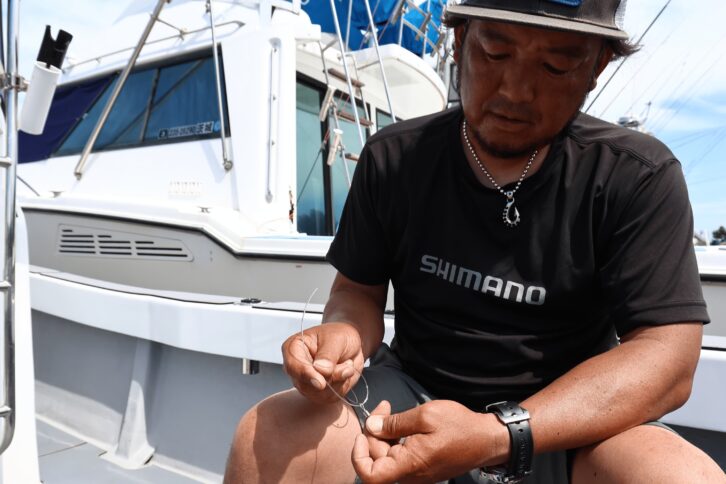
After wrapping the PE line around the leader, secure the half hitch knot by firmly holding the leader and main PE line with your hands. Bite the excess PE line between your teeth and pull it tightly toward the wrapped side.This knot is quite important.
When weaving in the subsequent half hitches, pull firmly at three points each time to secure them.
When finishing the weave, pull firmly on the knot side to tighten and secure it.
Suzuki’s knot is quite simple. Its simplicity allows the line to pass smoothly through guides and reduces wear from guide contact during casting. He reports no issues like line slippage so far.
“Anglers sometimes ask, ‘Don’t you use spacers?’ Personally, I believe if line trouble occurs, it’s better to cleanly cut the line and re-tie with a fresh leader. Freshness is crucial for both line and knots. While spacer systems do prevent wear on the line above the knot, they’re cumbersome to make on the water. Also, I worry that relying on spacers might make anglers complacent about retying knots, potentially leading to unnoticed weakening of the PE line or leader and causing line breaks. I’m the type who prefers the peace of mind that comes from retying.”
For connecting to the lure, a swivel and split ring are the basics. While sleeves are sometimes used to connect the leader to the swivel, I mostly connect the leader directly to the swivel using a “Single Clinch Knot.” This is also a simple knot. Please refer to the steps below for how to tie it. Also, if you can’t tie it, using a sleeve stop is fine too.
【Suzuki-Style Single Clinch Knot】
① Thread the leader through the swivel.
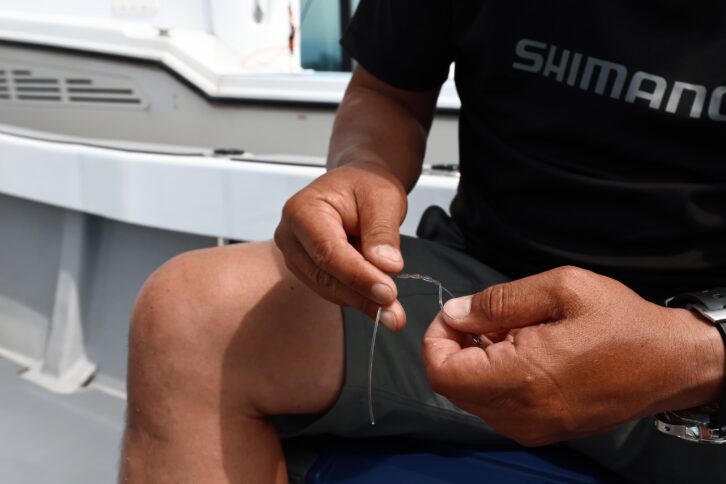
② Wrap the leader’s tail around the main line. Wrap it 4 times.
③ Pass the leader’s tail through the loop you created first.
④ Hold the leader main line and swivel and pull. Start by just lightly tightening the knot part.

⑤ Apply lubricant to the knot area. Lubricant prevents strength loss and ensures a cleaner tie. Vaseline or silicone won’t tighten it properly.
⑥ Hold the swivel with pliers and the main leader line in your hand. Bite the tag end between your teeth and gradually tighten the knot. Don’t tighten it all at once; do it slowly in 2-3 stages.
⑦ Release the leader tail from your teeth. While holding the main leader line, pull the swivel to tighten the knot.
⑧ Grip the leader tail again and tighten the knot. Repeat steps ⑥ and ⑦ until the knot is fully tightened.
⑨ Complete.
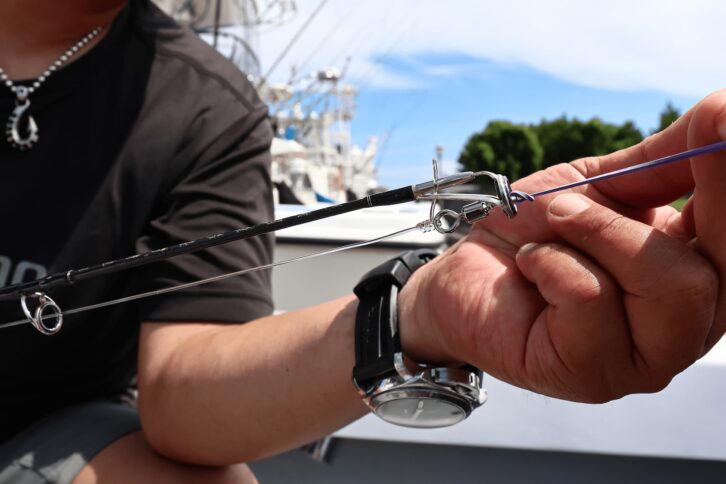
Use a swivel sized to fit through the top guide. Preparing a spare spool with the swivel already tied allows for quick spool changes at the fishing spot.
Drag adjustment is crucial in tuna fishing
Another concern during preparation is what drag setting to use on the reel. When fighting large fish, it’s important to have the drag set firmly to apply appropriate pressure. However, setting it too high from the start isn’t ideal. Gradually tightening it is best.
“Personally, I don’t measure the initial drag every time with a tool. I hold the spool in my hand, spin it, and adjust it to a load I remember from feel. Of course, initially measuring and getting a feel for the drag value is important. I also adjust the drag value flexibly depending on how the tuna is feeding. For example, if the tuna is aggressively taking bait and seems likely to run hard immediately upon striking, I start with a looser initial drag and gradually tighten it after the strike. As a rough guideline, what I tell most people is to set the initial drag to the same kilogram rating as the line’s number when using new line. For example, 10-pound line at 10kg, 12-pound line at 12kg. From there, tighten gradually upon hookup to apply pressure. I adjust intuitively based on the fish’s movements.”
Understanding how much pressure increases with each turn of the drag knob is crucial. While you’ll likely end up near maximum drag, knowing the numerical values allows for confident drag adjustments.
Two Basic Approaches for Actual Fishing and Luring
Bluefin tuna casting boils down to two patterns: targeting feeding frenzies or enticing them out.
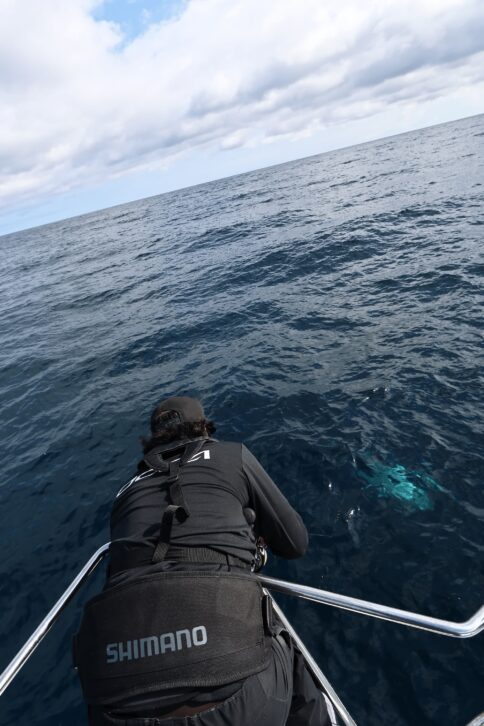
“When targeting a feeding frenzy, cast where the splashes are most intense. For large frenzies, you can’t see the center, so cast your lure to either side. Anticipate fish movement as the boat approaches, casting toward areas with dense tuna or where large fish have jumped. Size selection is crucial. If you feel a large fish is beyond your ability, targeting medium-sized ones is a sound strategy. Birds may be present over the feeding frenzy, so carefully observing their movements is vital. Also note what prey they are feeding on. Sardines tend to attract birds, while flying fish, marlin, and mackerel do not. In all cases, fish often dive quickly due to the boat’s pressure, so swiftly determining your casting position and casting as the boat approaches is key. Waiting for the captain’s “Okay, go!” is too late. You should be ready to cast the moment the boat slows down, keeping the line on your finger while the boat approaches the school. Conversely, if baitfish are boiling and tuna seem likely to surface soon, it might be better to wait before casting. This is because tuna are more likely to bite when they’re frantic from chasing baitfish to the surface.
Luring is done when tuna are present but reluctant to surface, or when there are isolated jumps. You often search areas where birds are circling or where there’s a reactive current line.
“When luring, people sometimes ask, ‘Is a popper best?’ I think either works. Sometimes a pencil bait is better, sometimes a popper. But poppers have the advantage of staying afloat. You can add a single action to create bubbles, and that appeal draws fish up from deeper ranges. Since poppers grip the water as they move, they’re also easier for beginners to work effectively.”
Once tuna are spotted, the boat approaches at full speed. Anglers prepare to cast immediately, casting swiftly as the boat slows. Work the lure a few times; if no bite, retrieve quickly. Tuna rarely chase and strike lures, so retrieving and moving to the next cast is often better.

Prepare lures of different sizes. First, select ones that achieve good casting distance.
Lure Size
The size of the baitfish tuna are feeding on varies widely—sometimes small sardines, other times they’re feeding on mahi-mahi. But can you perfectly match the bait size? In reality, it’s difficult. Even if tuna are feeding on small Japanese anchovies, choosing a small lure might not achieve sufficient casting distance with your tackle setup. Conversely, matching the size when they’re feeding on barracuda is also difficult. However, you can get reasonably close.
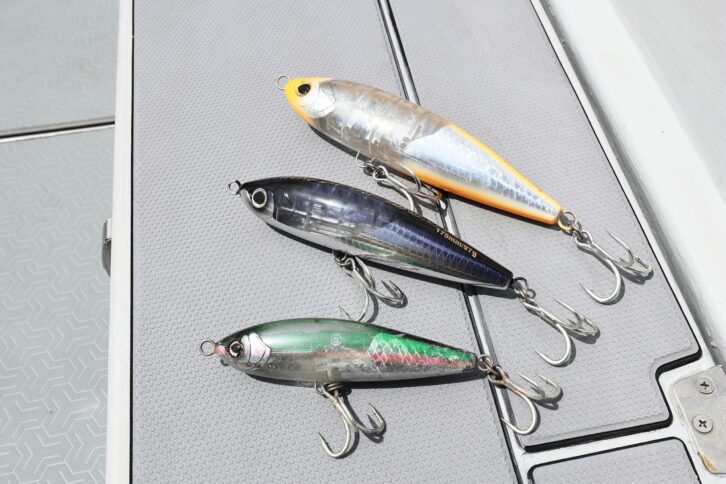
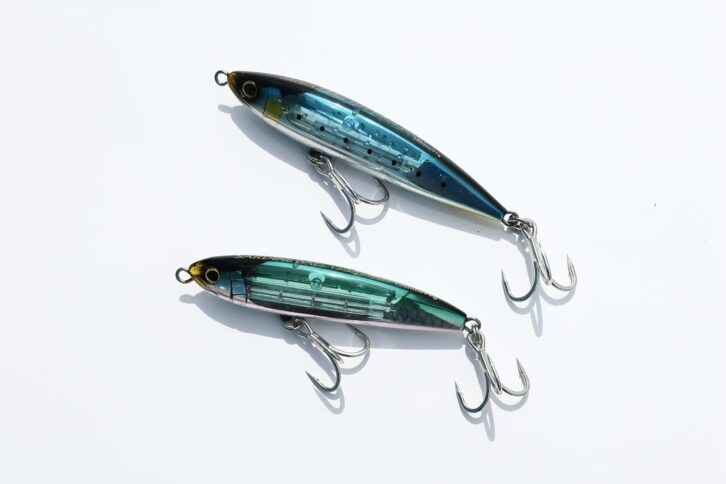
“Since there are limits to choosing small lures when they’re feeding on small bait, the smaller lures I select are around 14cm if floating. Unless the target is exceptionally large, I sometimes fish with PE8 line. For skipjack bait, I select larger lures like 240mm. They cast farther and have higher appeal. However, with bluefin tuna, I don’t obsess over matching lure size as strictly as in other fishing scenarios. I do switch between floating and sinking lures. Sometimes, even with sardine balls present, the tuna won’t rise to the surface and instead feed on bait lower down. In those situations, sinking the lure often results in an immediate strike. That’s why I always bring several sinking lures. I use Shimano Ocea Sardine Ball 150S (71g) and 130S (77g), which can be handled with size 8 or 10 hooks.
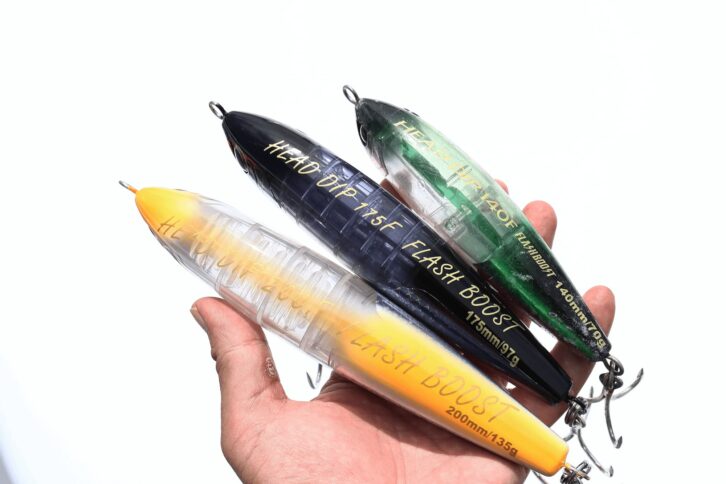
Head Dip Flash Boost in various sizes. Sizes vary to match small bait like sardines and medium bait like mackerel. The Flash Boost’s brilliance attracts fish even when simply suspended.
【OCEA Head Dip 175F / 200F】
https://fish.shimano.com/ja-JP/product/lure/offshorecasting/topwater/a155f00000c5d0oqav_p.html
【OCEA Head Dip 140F】
https://fish.shimano.com/ja-JP/product/lure/offshorecasting/topwater/a155f00000c5d0oqav.html
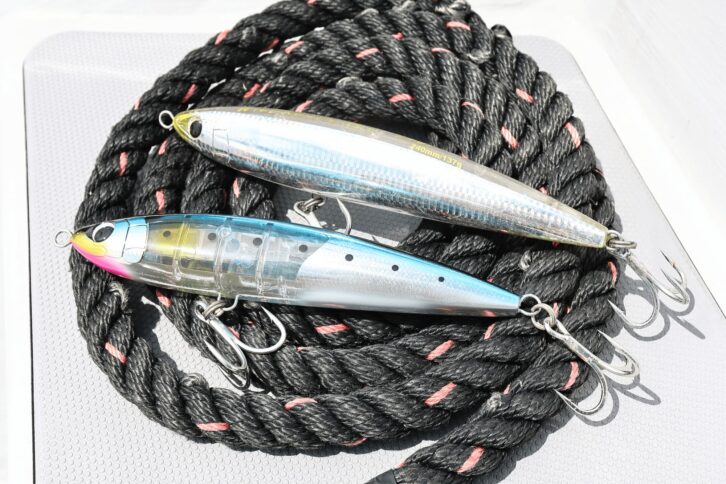
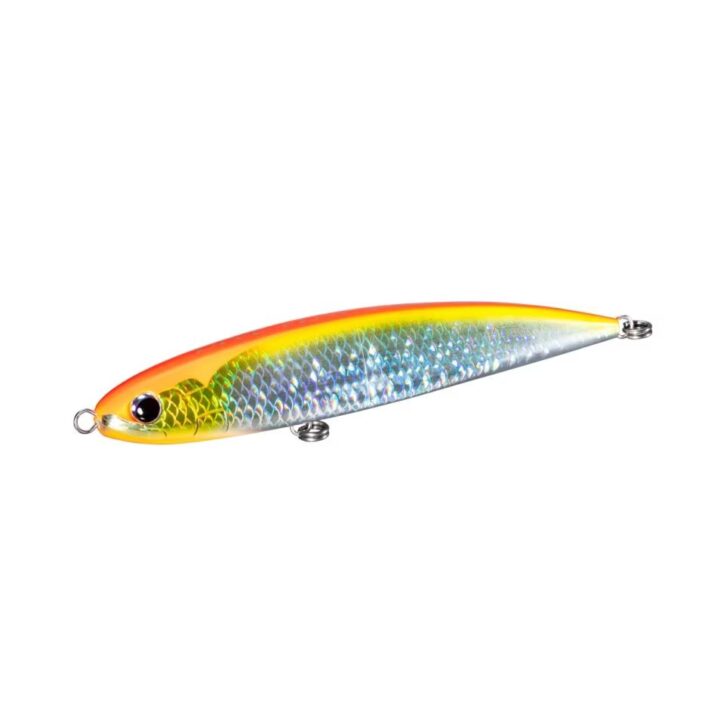
Wild Response 240F, OCEA BETSUCHU HIRAMASA 220F Flash Boost. While designed as a large lure for targeting big baitfish like mahi-mahi, its effectiveness often stems not just from matching the bait, but also from its sheer size creating a powerful appeal. Naturally, it also delivers excellent casting distance. This is the high-performance model that Mr. Suzuki used to catch his bluefin tuna.
【Wild Response 240F】
https://fish.shimano.com/ja-JP/product/lure/offshorecasting/topwater/a155f00000c5cvxqav.html
【OCEA BETSUCHU HIRAMASA 220F Flash Boost】
https://fish.shimano.com/ja-JP/product/lure/offshorecasting/topwater/a155f00000c6dcpqav.html
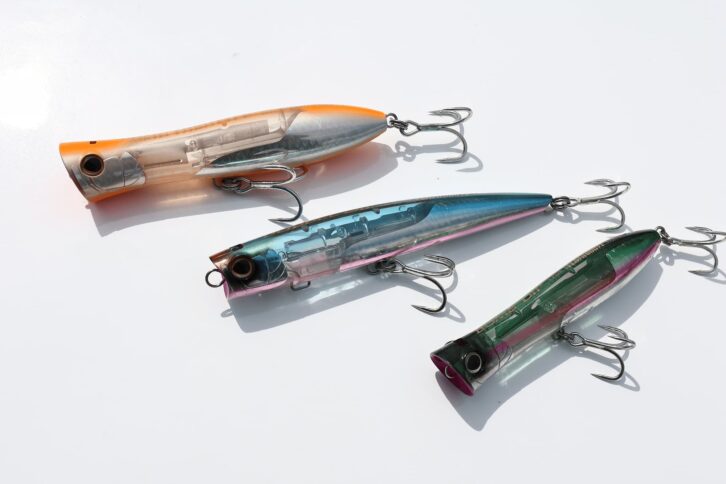
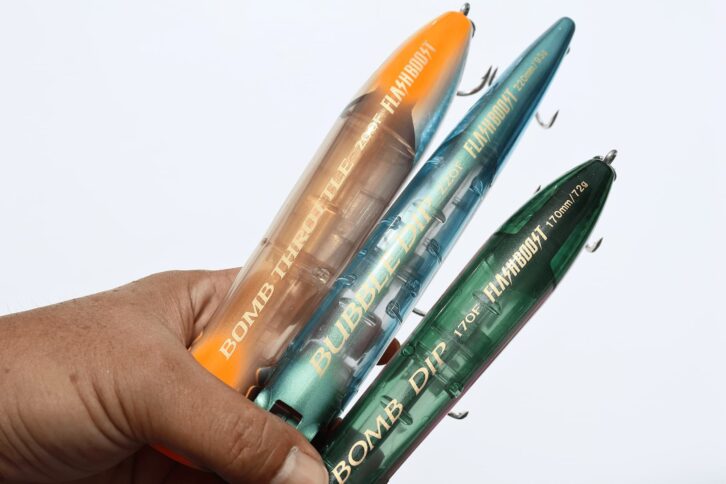
Bomb Throttle 200F, Bubble Dip 220F, Bomb Dip 170F. The Bomb Throttle 200F features a head-shaking action on the surface while producing bubbles. The Bubble Dip 220F alerts fish with splashes and stimulates their predatory instincts with its diving action. The Bomb Dip 170F generates bubbles and loud popping sounds over a short travel distance for strong appeal. All are effective models for tuna.
【OCEA Bomb Throttle 200F】
https://fish.shimano.com/ja-JP/product/lure/offshorecasting/topwater/a155f00000dotl4qaf.html
【OCEA Bubble Dip 220F】
https://fish.shimano.com/ja-JP/product/lure/offshorecasting/topwater/a155f00000c5czyqav.html
【OCEA Bomb Dip 170F】
https://fish.shimano.com/ja-JP/product/lure/offshorecasting/topwater/a155f00000c6dchqav.html
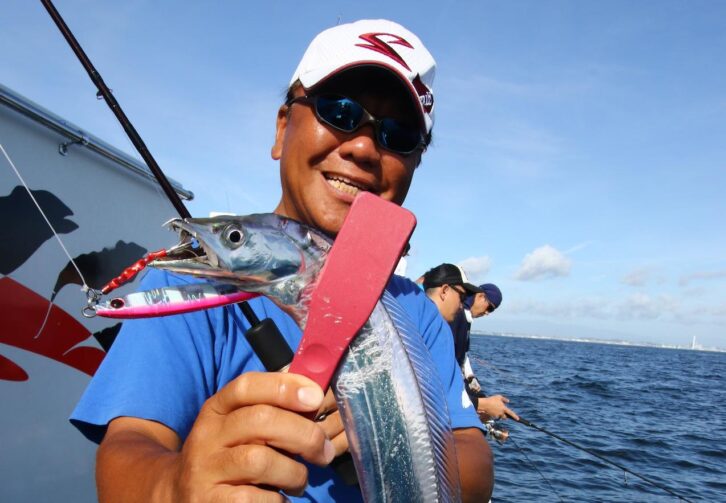
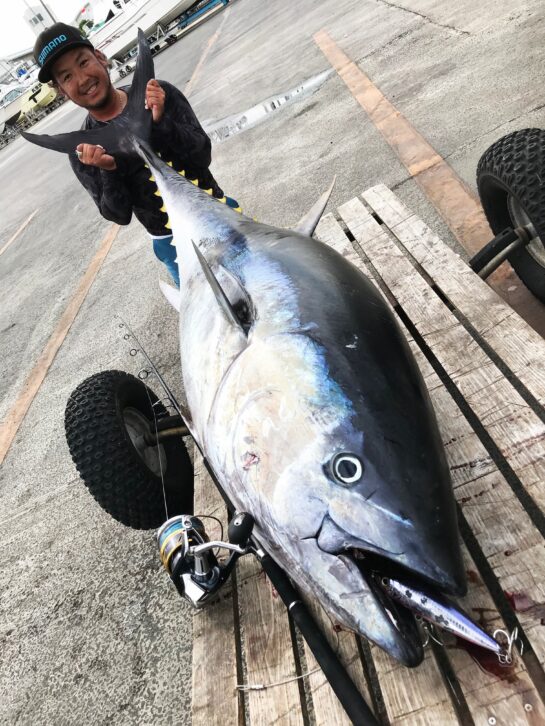
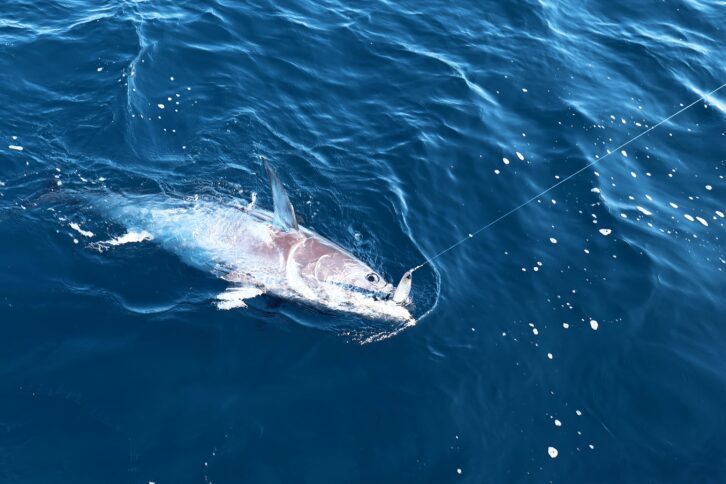
Catch using the Bubble Dip 220F. Photo courtesy of Shimano ※Photos show catches from 2018 to 2019.
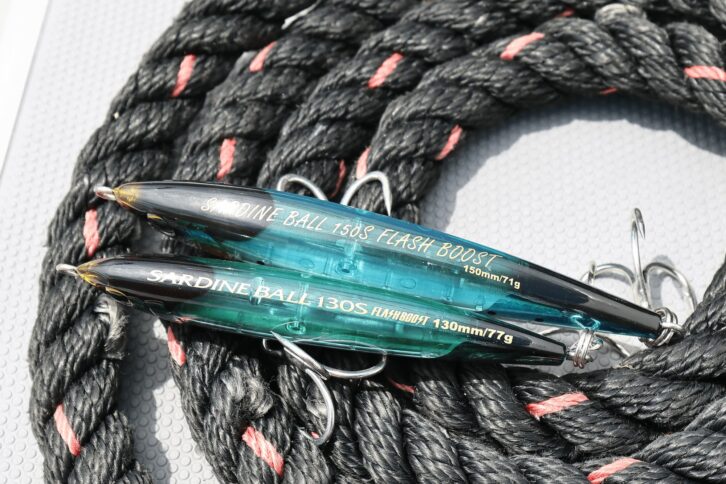
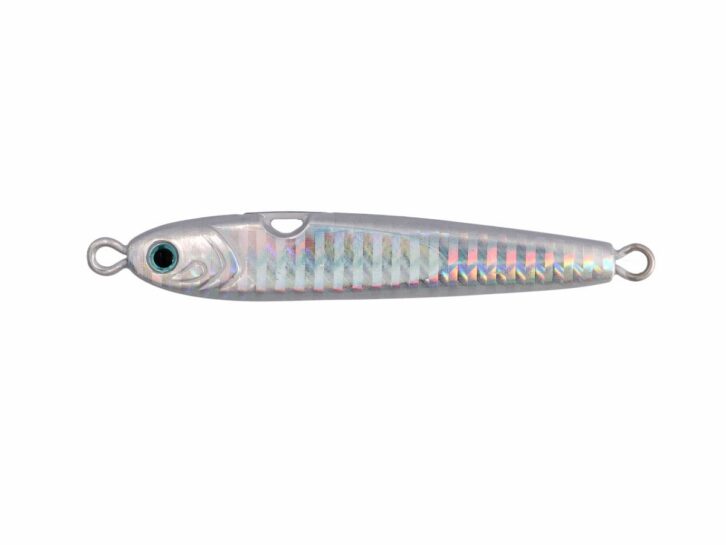
When bait schools are present but tuna are not rising to the surface, a sinking lure’s free fall is effective. The OCEA Sardine Ball has sufficient weight to be used with PE 10 and 8 lines.
[OCEA Sardine Ball 150S Flash Boost]
https://fish.shimano.com/ja-JP/product/lure/offshorecasting/sinkingpencil/a155f00000c5cxgqaf.html
[OCEA Sardine Ball 130S Flash Boost]
https://fish.shimano.com/ja-JP/product/lure/offshorecasting/sinkingpencil/a155f00000c6dclqav.html
He prefers triple hooks
When targeting bluefin tuna, anglers each have their own preferences for hooks based on past experience. Mr. Suzuki primarily uses treble hooks, but he finds hook selection challenging when release is the goal.
“When release is the goal, I often use barbless treble hooks. However, if the boat’s regulations or filming requirements specify single hooks, I comply. If asked whether single or triple hooks are better, I can’t give a definitive answer. It depends on the hooking point.”
While single hooks are often thought easier to remove, triple hooks can also be quickly removed depending on the hooking location. Conversely, if a single hook is deeply embedded, it can be difficult to remove and risks damaging the gills. In any case, if quick removal is the priority, barbless hooks are preferable regardless of type. However, Suzuki has noticed in recent years that barbless hooks lead to more issues with hooks bending or breaking.
“With a barb, it acts as a stopper, holding the fish flesh securely in the hook’s gape. But barbless hooks, lacking this barb, allow the hooked fish to slide around near the mouth. This changes the load distribution on the hook depending on the line angle. When the load concentrates on the hook point, it’s more prone to bending or breaking. I’ve experienced this firsthand. Incidentally, while single hooks are said to be less likely to slip off once hooked, this is because they often hook into the less prone-to-slip gill plate. The hookup rate itself is clearly lower compared to treble hooks. My personal experience suggests it’s about 10 to 1. Also, I believe the optimal hook type varies depending on the baitfish. If the bait is large, tuna swallow it whole, so single hooks still have a high hookup rate. However, when they’re swimming and feeding on smaller bait, they often get hooked on the outside, and while a triple hook will catch them, a single hook won’t. As for which is better, both have their pros and cons. I tend to use triples more often.”
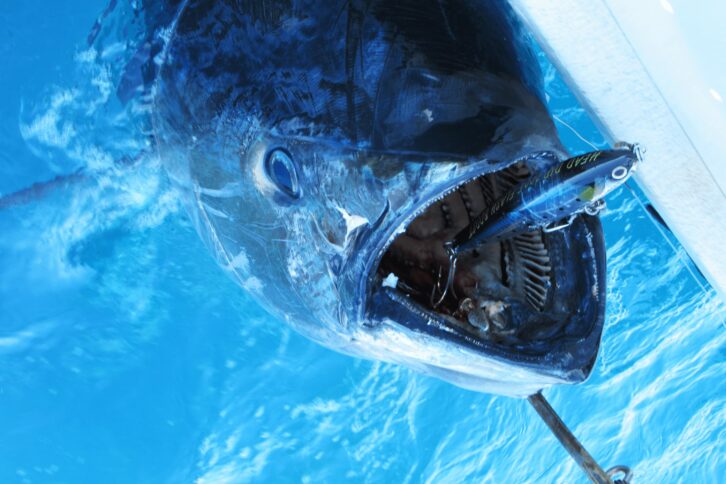
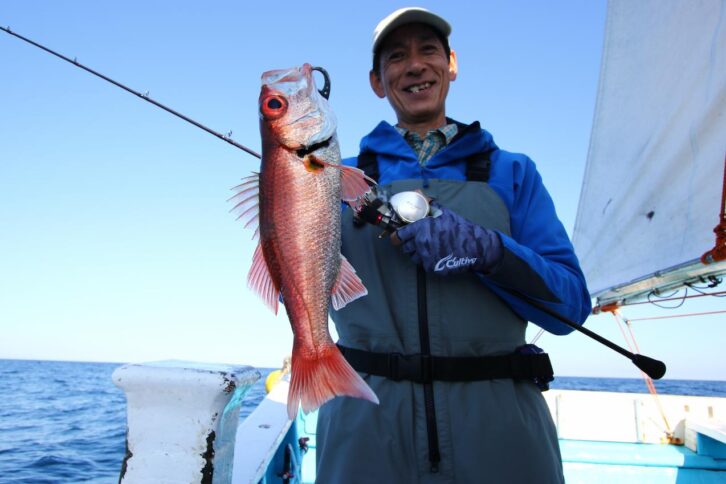
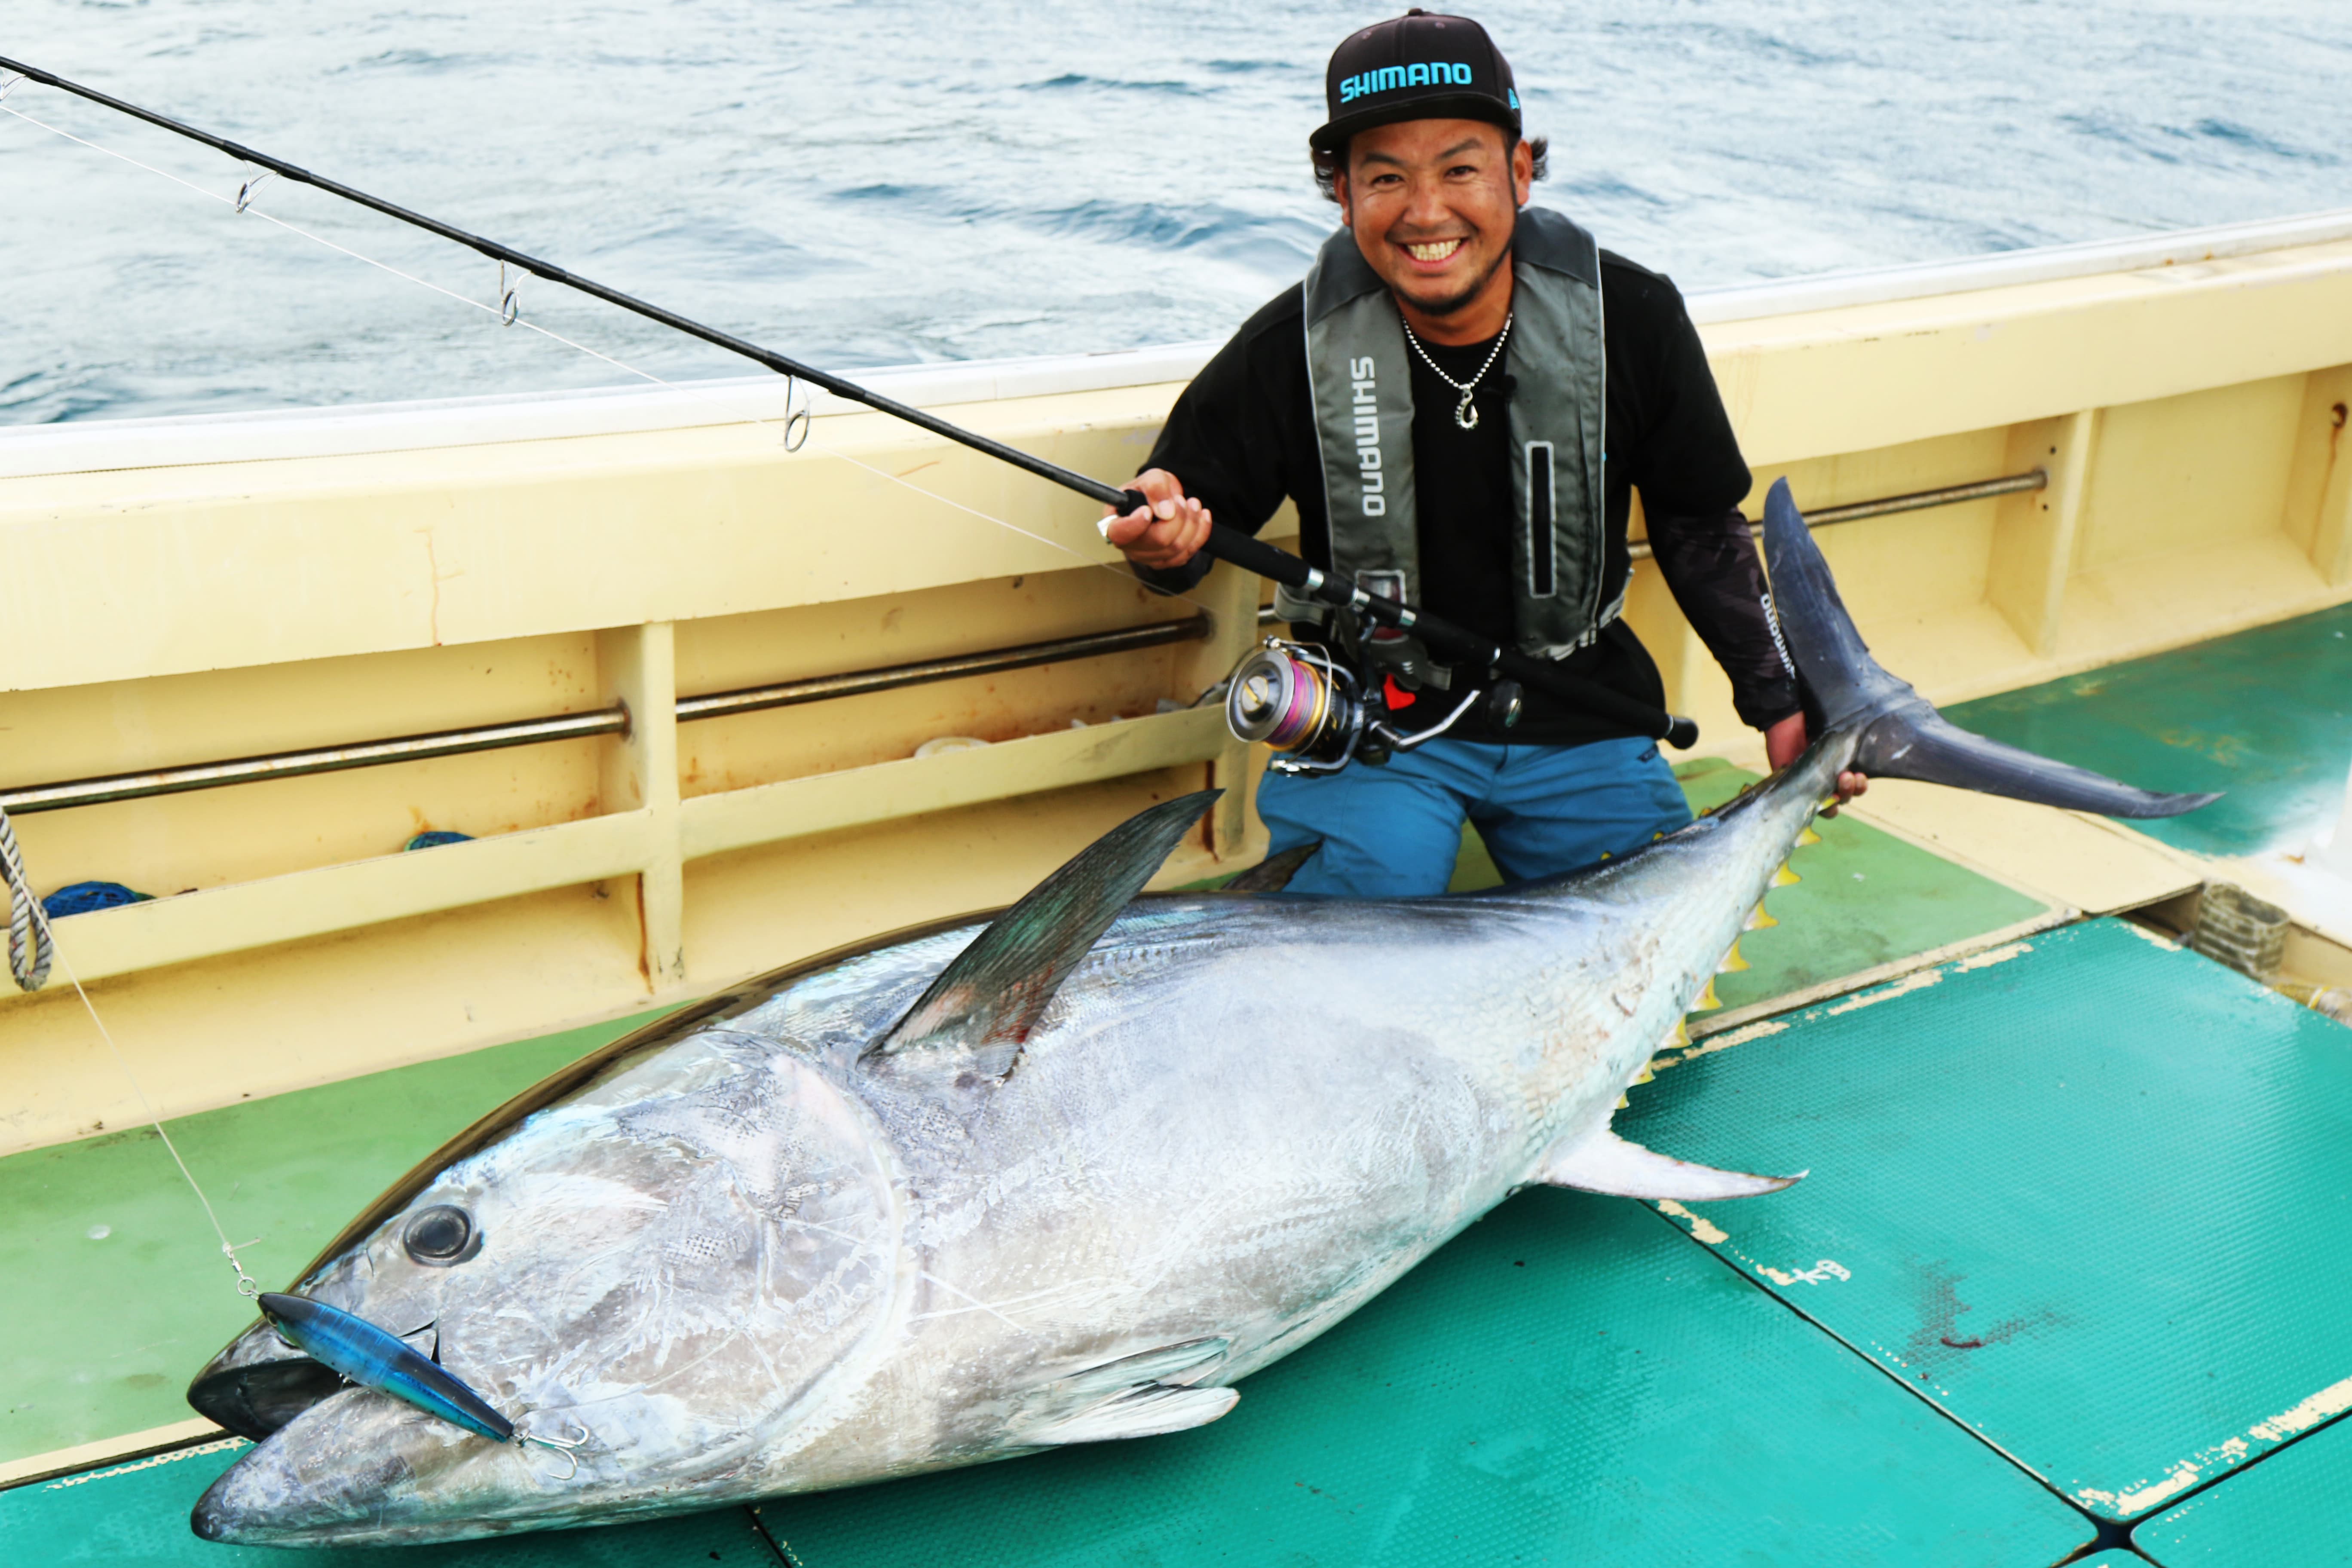
Photo courtesy: Shimano ※Photos show catches from 2018-2019.
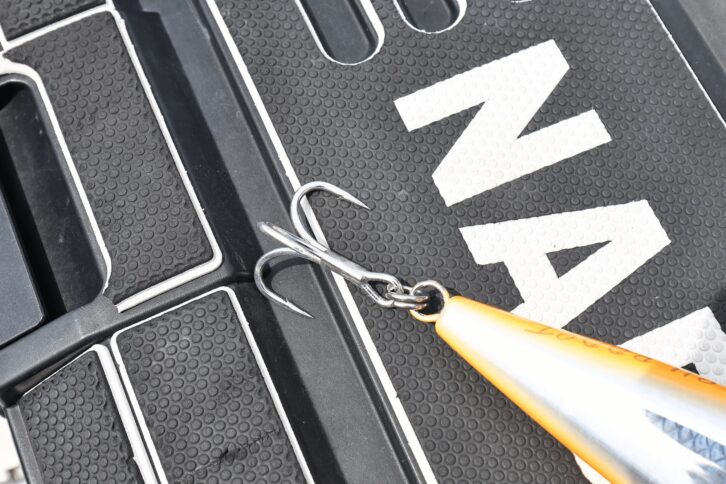
Suzuki is a proponent of triple hooks. The main reason is the higher hookup rate. He selects straight-point hooks designed for quick penetration, specifically the thicker wire XH type.
Bites and Strikes
Now, onto the actual fishing. When you spot a school of bluefin tuna, grab your tackle, carefully observe your surroundings, and cast. If a bluefin bites your lure, it’s crucial to stay calm and handle it steadily. First, the hookset. Suzuki advises against an immediate, hard hookset.
“Be careful not to set the hook too quickly the moment it strikes. Pause for a breath, then apply a light hookset. Once you confirm the hook is set, apply the full hookset.”
The reason for the light hookset is that sometimes the tuna strikes the lure without actually hooking up. If you apply a hard hookset at that point, you risk dislodging the lure, which is likely in a good position. First, you need to see if the tuna has properly taken the lure.
“The hookset also depends on the hook you’re using. Triple hooks have a higher chance of hooking, and if any point is hooked, you can confirm the hookup with a test hookset. If hooked, go straight into the full hookset. On the other hand, with a single hook, the point often isn’t set, so it’s better to wait until the tuna has fully taken the lure before setting the hook. It’s like sliding the hook already in the mouth into the barb to set it.”

When you get a bite, don’t immediately set the hook hard. Use a light hookset to confirm the fish has taken the lure firmly. If it has, then set the hook properly. The light hookset prevents moving the lure too much if the fish hasn’t taken it.
Handling the Hit
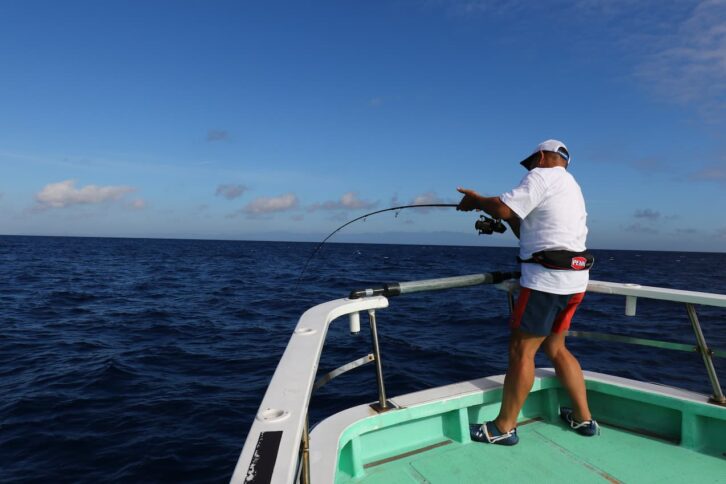
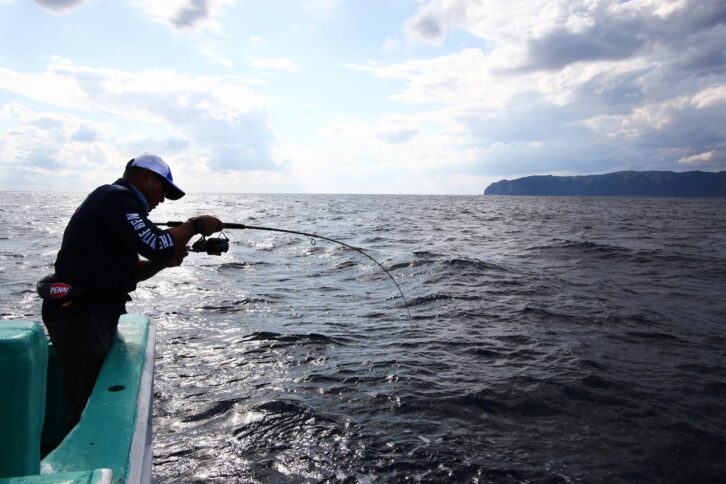
When hooked, bluefin tuna will start running due to the sensation of something foreign. Their runs vary: some charge powerfully downward, others run diagonally, and some don’t cover much distance. In any case, anglers must respond calmly.
“When the tuna starts running, don’t suddenly set the drag to a high value. Instead, gradually tighten the drag to apply pressure. When it stops, tighten the drag further and start reeling. If it takes more line on a second run, tighten the drag further to apply pressure. When it stops again, start reeling in. My fighting technique involves alternating between bending the rod → straightening it → bending it → straightening it. I start by reeling in with the rod straight. However, if the fish weakens or surfaces, causing the line angle to become slanted, I raise the rod and reel in aggressively. Using only a straight rod makes it difficult to close the distance. Watch the line angle to decide whether to keep the rod straight or raise it. If drag engages when you raise the rod and pump, your drag setting is too loose. That won’t bring up a large tuna. Tuna recover their strength while swimming. You might think a long fight will tire them like other fish, but tuna don’t work that way. Ultimately, you need to tighten the drag to around 19-20kg to win the fight. If the line is running diagonally, having the boat follow along is also effective. If it runs too far, the fight becomes extremely difficult. Ideally, keep the line run to around 100-150m.
A key point during the fight is to cool the reel by pouring water on it when the tuna is running. Even though modern reels have improved drag heat resistance, the intense runs of a tuna under high drag can still cause the drag to heat up. High temperatures can lead to drag issues, so ask your fellow anglers for support. Also, don’t forget to pace your own stamina. If you hook a large one, expect a long fight. You need to save your strength for the battle once the tuna is in sight.
Incidentally, prolonged fights with tuna directly below the boat are extremely taxing for anglers. In such cases, you might ask the captain to back the boat slightly to create an angled line. Once the tuna is within sight, hold the rod straight for the final showdown.
“If you can tighten the drag further, do so. Increasing drag at the end often ends the fight quickly. It’s often difficult to get it to surface, but when the circling tuna swims toward you, reel in as much as possible. Repeat this to close the distance.”
There are also important points to note during the final battle with a bluefin tuna.
“Most tuna circle and come up, but if you keep backing the boat out of fear of line breakage near the hull, you end up dragging the tuna. This allows the tuna to gradually recover. Therefore, it’s crucial to stop the boat and let the tuna circle at the end. If it’s circling, you can gradually reel it in. When the tuna enters under the boat, lower the rod to handle it. At this point, position the rod blank side toward the boat (with the guides facing outward) to prevent the line from hitting the hull. If it absolutely seems like it will hit the hull, ask the boat to back up slightly.”
The real battle begins once the tuna comes into view. In most cases, it resists here, putting the angler through a tough time. Conserving your strength for this moment is crucial. While monitoring the tuna’s turns, retrieve line whenever it swims closer, gradually closing the distance.
Once the tuna’s head surfaces, it’s time for landing. Finally, guide the tuna from the bow to a lower position (easier for landing). Have someone grab the leader for release, or have them spear it if keeping it. Calling out cues like “Here we go!” is also important.
“It’s essential to decide beforehand whether the landing will result in a catch or release. If releasing, the captain and crew should prepare accordingly. Also, assign specific tasks to individuals. It’s best to have someone experienced handle the leader. Extreme caution is necessary to avoid injury.”
If release is the plan, consider the tuna’s survival rate post-release. Keep the fight time short and ensure a smooth release process; minimizing time spent is crucial.
“If the tuna are highly active and not selective about lures, it’s better to choose stronger tackle. Stronger tackle allows for a quicker fight, which is gentler on the angler’s stamina and on the tuna being released.”
Once it surfaces, guide it for landing. Hold the spool and bring it to the landing position. Stay alert as it may struggle violently.

If releasing the fish, thorough coordination is essential. Have the captain and crew prepare and assist.
Preparing Other Equipment for Bluefin Tuna Fishing
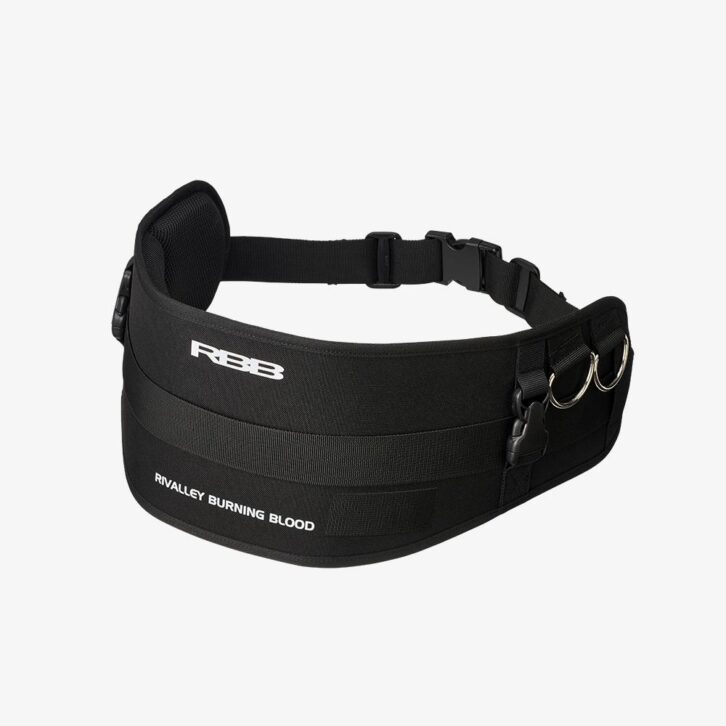
I asked Mr. Suzuki about other gear to prepare. First, a gimbal is an essential item. Gimbals come in large types that cover the thigh and smaller, more portable types. Mr. Suzuki chooses the smaller type, which doesn’t get in the way even when worn constantly.
“Tuna fishing isn’t a style that involves frequent casting, so large gimbals tend to get in the way and you end up taking them off. Then, when the tuna suddenly jumps, you might find yourself without the gimbal and in trouble. That’s why I always wear the compact one.”
Regarding gloves, he says wearing them is advisable for safety, but Suzuki often fishes barehanded once in the casting position to respond to the moving tuna.
“If casting straight ahead, gloves are fine. But sometimes, when a bluefin moves sideways during the cast, you need to quickly cast sideways. At that moment, I need to control the timing of releasing the line, and that’s easier barehanded. Also, during the fight, even just one glove makes my grip feel looser. Plus, when changing lures, hooks can snag on the glove, and it’s frustrating to get them off—that’s another reason I don’t wear them. This is just my personal opinion; for safety, I recommend wearing them. For high-volume casting for yellowtail amberjack or GT, I only wear a glove on my right hand to prevent finger pain.”
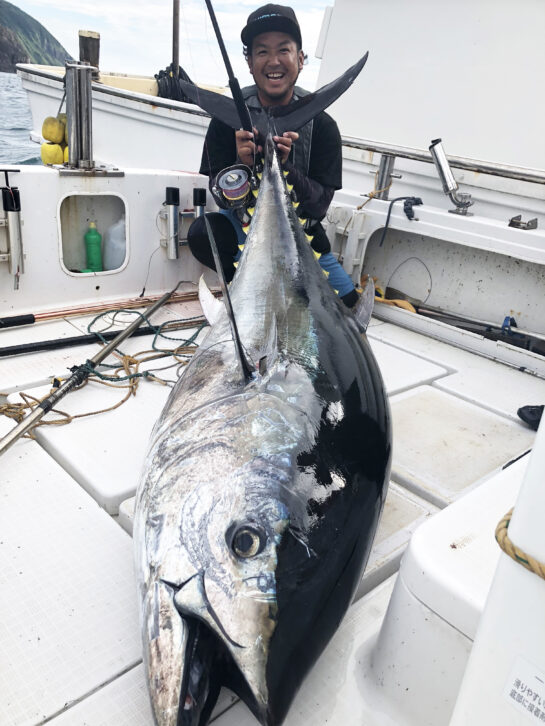
Photo courtesy: Shimano ※Photos show catches from 2018-2019.
For Anglers About to Take on the Challenge
As of 2025, depending on the season, the fishing window can close just days after opening at the start of the month. With such a short window, you can’t make multiple attempts, so you’ll want to land every hooked tuna more reliably. For that, the first crucial step is maintaining your tackle. Ensuring the overall balance of your gear is also vital. I often see anglers with mismatched PE line and leader thickness. Many use leaders that are too thick, likely thinking thicker equals safer, but this sacrifices casting distance. Tackle selection is also crucial. When targeting large tuna or during high activity periods, don’t immediately choose thin line like PE #8. If you have heavier tackle available, opt for that. Heavier gear ensures a more secure catch, and landing the fish faster reduces fatigue. It’s wiser to switch to lighter tackle only after encountering a situation where the fish aren’t biting. Drag control can be tricky for beginners, but visualizing the right timing to tighten it is important. Also, what bait are they feeding on? How should you approach tuna feeding on that bait? It’s wise to ask the captain these questions. While seeing tuna leaping everywhere is thrilling, it’s crucial to stay calm, assess the situation, and carefully observe the fish’s movements before approaching. Planning your setup throughout the day is also vital. For example, if there’s wind, lures will fly farther, but if it’s calm, selecting larger, flying lures is a good strategy. Bluefin tuna populations have increased, tackle has improved, and catch rates have risen, but they remain the ultimate challenge—not easily caught. Hone your skills and stamina, prioritize safety, and take on the challenge.
関連記事
-

Ranbu for big sea bream Musou for quick hooking
-

The world’s PENN, Kei Hiramatsu. Created to catch the big fish of Japan. Offshore jigging rod PENN SLMMER JIGGING
-

A high-response rod that can be used at depths of over 200m to attract jigs with action
-
Effective for vertical jigging with heavy-weight jigs! Drag Force bait model now on sale!
-

The latest Shimano STRADIC SW with more combativeness!
-

Finish it off with a fall! Jigging for Bluefish off Irago in Winter
-
The Blue Safari 35 is used to catch Targeting the super quality red crucian carp in the mid to deep sea Slow Pitch Jerk
-
STAINSHIELD wipes away anglers’ frustrations
-

Tail Lobster Game off Oshima Island, Fukuoka Prefecture
-
Offshore actual fishing. Jigging fishing off Izu-shichijima and Hachijojima. Targeted kampachi and yellowfin tuna.
-

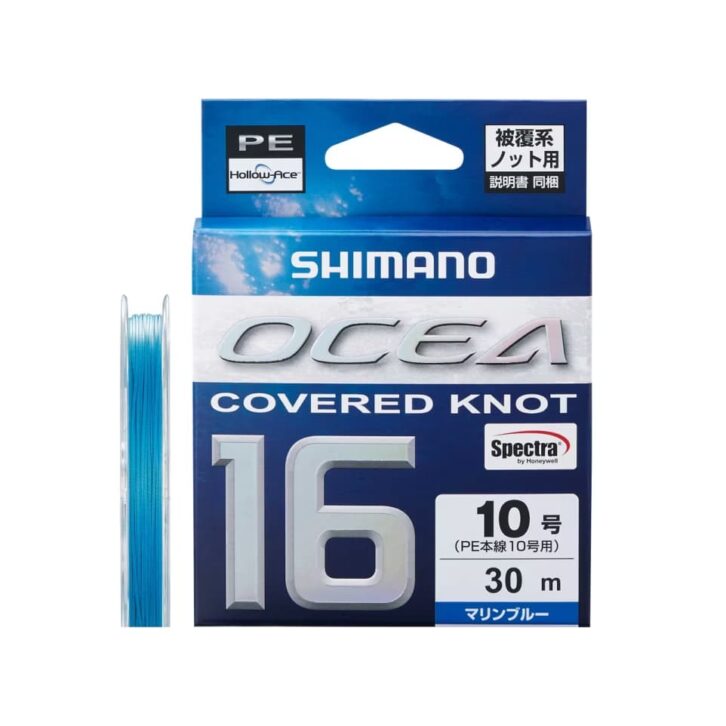
Protect PE line to avoid trouble SHIMANO OCEA COVERED KNOT 16 PE
-
The big gamer’s waist equipment is perfect with this!
-

Reeling in fishing line without damaging it Uoya x Studio Ocean Mark “Thread Winding Factory・ITOMAKI KOUJYOU” NEW Model for 2023
-
Blade Tuning “It’s good even when you reel it in! TG bait that is “good even when rolled up!
-

tailwalk’s serious mark! Offshore Casting Rods
-
Attention! A NEW flashing-oriented lure for sunfish and GT! Diving pencil “OCEA DIVE FLAT 240F” is now available!
-

Tail Walk 2024 Spring Release Accessories Dino skeleton pliers & washable jig bags
-

Firm hooking and quick avoidance of trouble!
-
Studio Ocean Mark
Hook Remover Additional Models hr260l-th & hr250m-th -

Captain Seiichiro Tashiro’s Bluefin Tuna Game on the Sunrise
Explaining Tactics as Both Captain and Angler!