[The Expert's Secrets to Bluefin Tuna]
Answers Derived from Years of Experience
The 2025 [Hiromu Sano] Bluefin Tuna Game
Experts targeting bluefin tuna have, through years of pursuit, arrived at definitive answers regarding tackle and fishing techniques. This stems from extensive trial and error, research, and proven results. This time, we interviewed Hiromu Sano, who has pursued various big-game fishing challenges, about his own bluefin tuna game. We hope you find it useful.
![Answers Derived from Years of Experience<br>The 2025 [Hiromu Sano] Bluefin Tuna Game](https://anglers-time.com/wp-content/uploads/2025/10/001.jpg)
(Photo provided by: Hiromu Sano)
(Photo provided by: Hiromu Sano)
INDEX
- Hiromu Sano and Bluefin Tuna Fishing
- Target Size and Tackle Overview
- Line System
- Leader Tip Connection
- Rod Selection and the Fight
- Tighten the drag gradually, conserving energy as much as possible.
- Should you stand the rod upright or keep it horizontal?
- Final Showdown
- Reason for choosing the Saltiga reel
- When winding line onto the spool
- The Necessity of the Handle Big Mouth
- Lure Selection
- Hook Selection Based on Experience
- About Releases
2025 Bluefin Tuna Game
For recreational bluefin tuna fishing within Japan, monthly catch limits are set for 2025, totaling 60 tons annually, or 5 tons per month (3 tons per month starting September). (Limits may fluctuate if the previous month’s quota is exceeded.) The 2025 season begins April 1st. Anglers must report any catches. Fishing is prohibited for tuna under 30kg. For tuna over 30kg, the limit is one fish per person per month, and reports must be submitted within one day of landing.
The quota starts at the beginning of each month, and tuna fishing is prohibited once the quota is reached. Due to this system, the quota is often reached within the first few days of the month. To allow more people to enjoy fishing, some boats encourage catch-and-release. Release should be done in consultation with the captain, who is experienced in release procedures, and fellow anglers on the boat.
Furthermore, fishing for tuna, which are vastly larger than humans, carries risks of accidents during the fight or landing, as well as unexpected damage to equipment. Actual injuries and equipment issues are reported. Recognize that fishing is undertaken at your own risk and enjoy it while ensuring adequate safety. For tuna fishing, approach it with solid knowledge and the physical stamina required to handle large fish.
Hiromu Sano and Bluefin Tuna Fishing
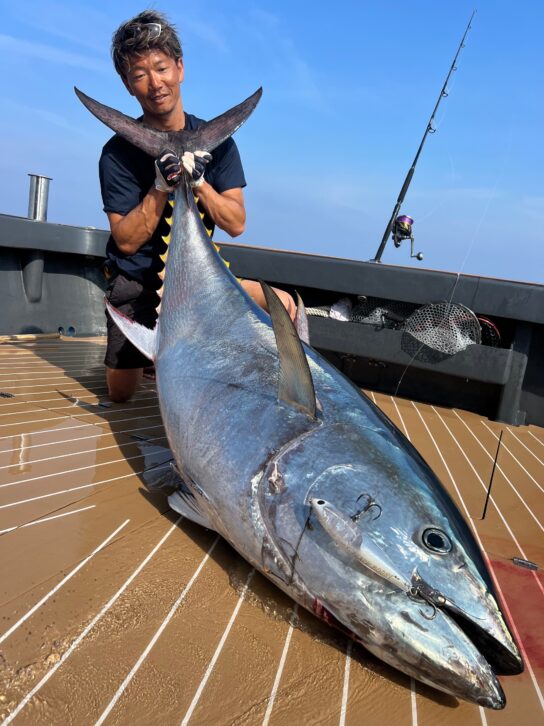
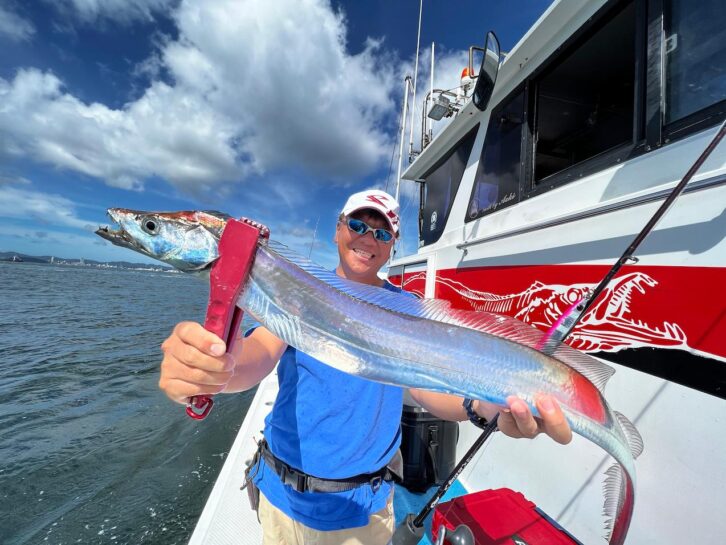
Hiromu Sano has pursued large fish like bluefin tuna, yellowfin tuna, amberjack, GT, and Amberjack for many years. Among these, he has challenged bluefin tuna across Japan and overseas, achieving numerous results including catches over 200kg. Currently, for domestic bluefin tuna, he begins his fishing activities when conditions permit. He first targets bluefin tuna at the mouth of Tokyo Bay at the start of the spring season. He then travels to the Sea of Japan side, Hyogo, Hokuriku, Aomori, and Hokkaido, achieving catches in each location. Sano began pursuing bluefin tuna about 25 years ago.
“Actually, when I was younger, just before the year 2000, I developed a life-threatening illness. At that time, while thinking about my family’s future, I also wanted to leave behind photos of myself landing large tuna. Later, I learned that bluefin tuna could be targeted around Izu Oshima. So, while undergoing treatment, I started traveling to Oshima. That was the start of my pursuit of bluefin tuna. A fishing tackle manufacturer learned about my situation and became my sponsor. That was CB ONE. After that, I fully recovered from my illness. While enjoying various types of fishing, I started challenging myself with yellowtail amberjack, bigeye tuna, bluefin tuna around Oshima, bluefin tuna in the Genkai Sea, and bluefin tuna off Aomori. However, due to the decline in bluefin tuna stocks, even when I went fishing, chances to encounter them became scarce. I felt my skills weren’t improving much, so I decided to challenge bluefin tuna overseas. Since the tuna overseas are larger, I trained my body and researched and developed my gear. Now, domestic bluefin tuna stocks are recovering, and I target them in various locations during the designated season. Bluefin tuna has become the target I pursue, staking my life on it. If I were told to choose just one type of fishing right now, I would say ‘targeting large bluefin tuna.’”
(Photo provided by: Hiromu Sano)
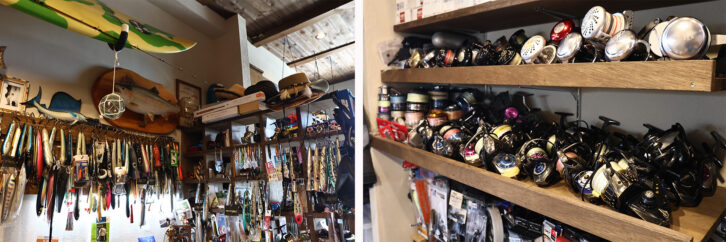
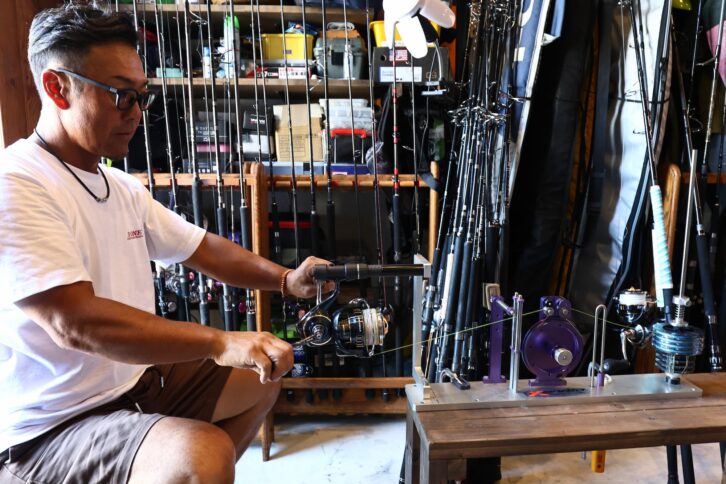
The interview took place in Mr. Sano’s tackle room at his home. It was a space any angler would envy, filled with tackle that spoke to his long history of fishing.
Target Size and Tackle Overview
Bluefin tuna can reach truly enormous sizes. In recent years, their numbers have increased, and they seem to grow larger with each passing year. Currently, it’s often difficult to select a target size for a fishing trip. Even if information indicates many 50-60kg fish are present, there are also 100kg+, 200kg+ specimens there. How does Mr. Sano prepare his tackle in such conditions?
“I want to catch the biggest fish possible, so I prepare for the largest size. That means over 100kg, over 200kg, and the dream of 300kg.”
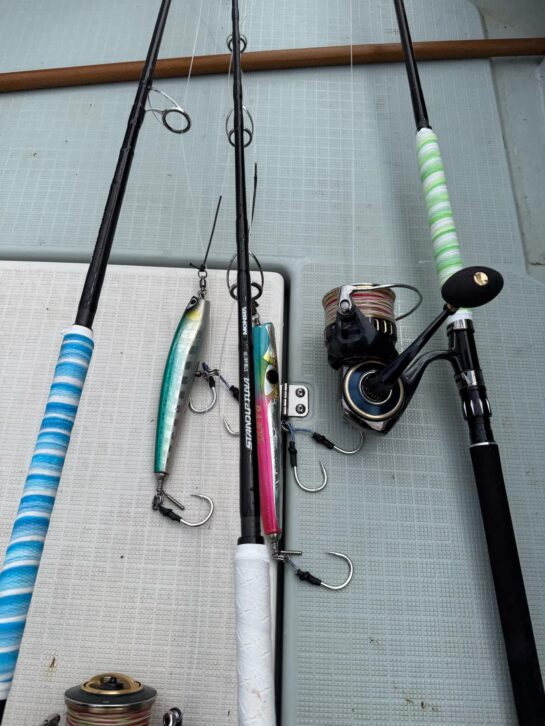
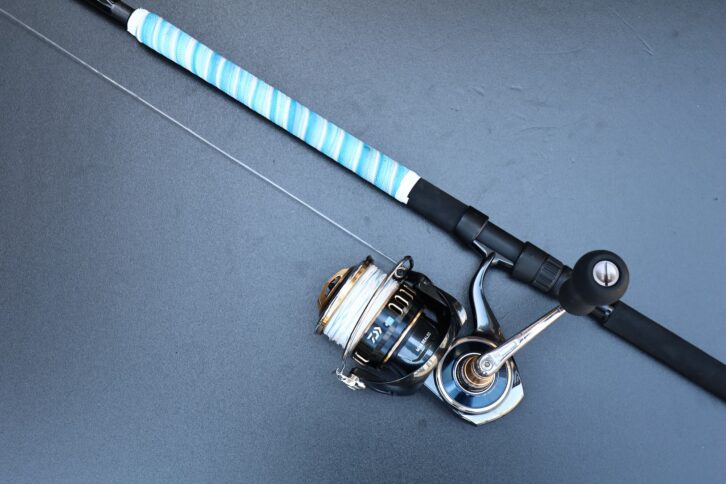
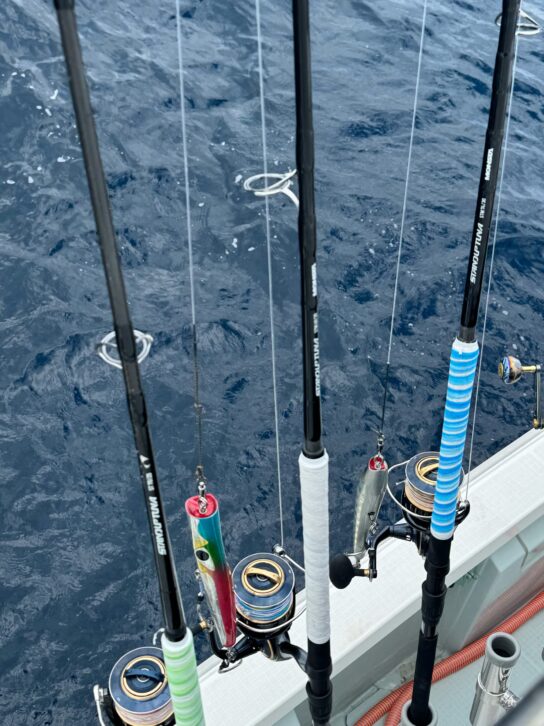
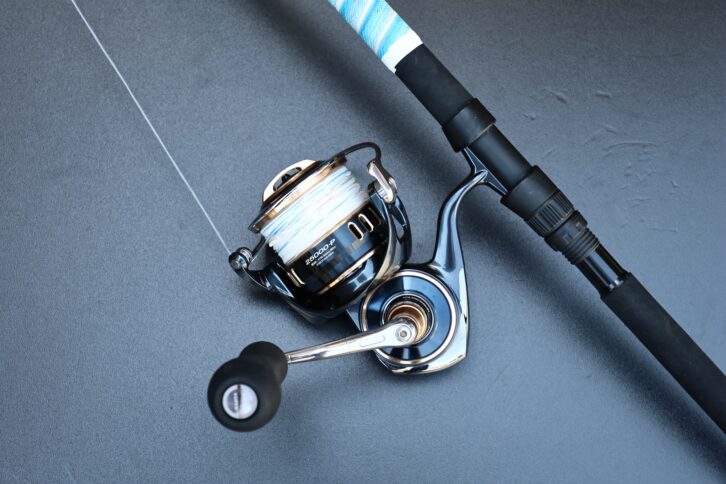
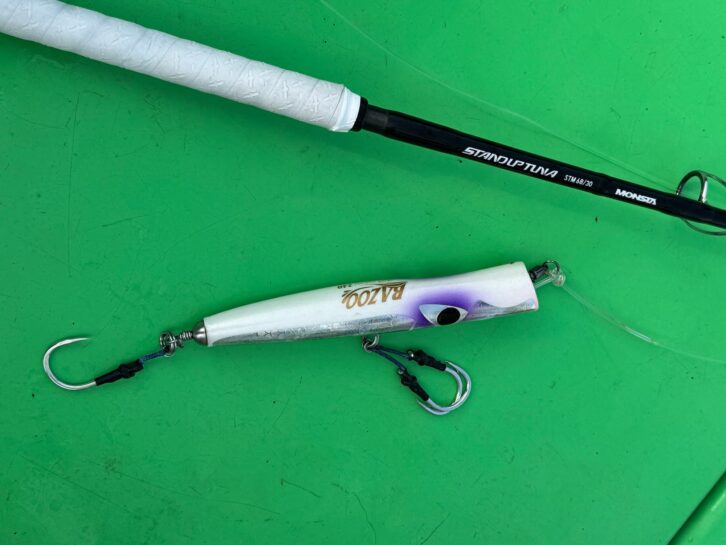
To target such sizes, his current main rod is the CB ONE ‘STAND UP TUNA MONSTA’. The MONSTA series has three models, all designed to handle large bluefin tuna.
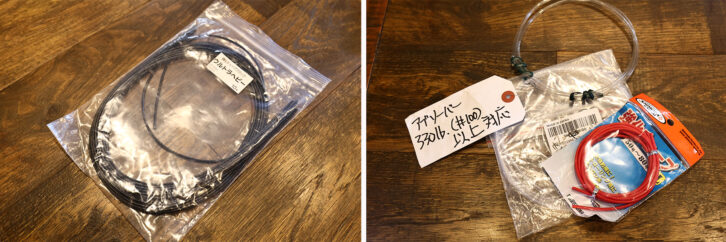
“For the reel, I use a DAIWA 25 SALTIGA 25000PG. The main line is XBRAID Odds Port PE #12, spooled with a Full Drag TSR X8 #15. When targeting fish over 150kg, I choose this line thickness. For the leader, I use XBRAID Castman Absorber ranging from 270lb to 330lb. For the connection, I use an FG knot with XBRAID Scrum 16 placed above the connection point.”
The rod, reel, and line are currently selected this way. From here, I’ll explain each tackle item and fishing method in detail.
(Photo provided by: Hiromu Sano)
Line System
First, how is the line system set up?
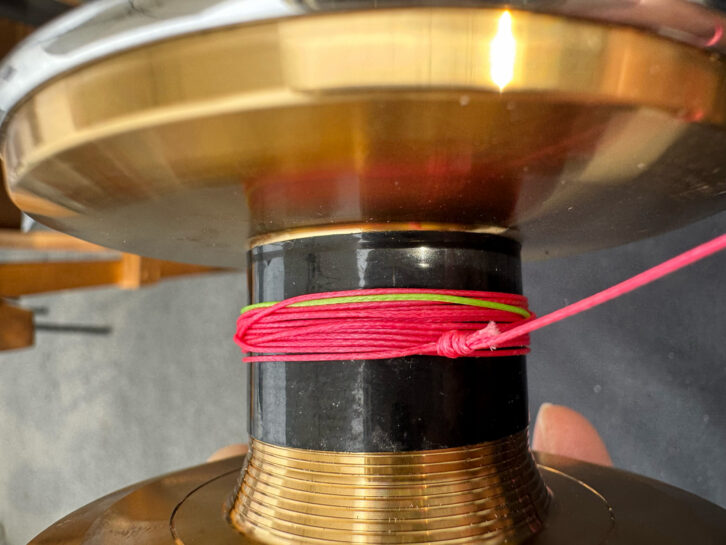
“The leader and PE line connection uses an FG knot, similar to other casting games. Additionally, XBRAID Scrum 16 is placed over the PE line above the leader. For bluefin tuna, this is 1 to 1.5 Hiro. Leader length is 1.5 to 2 Hiro. Regarding knots, while some use a wrap-around knot where the PE line is wound around the leader, I trust the FG knot, which is woven and tightly secured to the leader. I make more wraps than for yellowtail amberjack or yellowfin tuna and tighten it much more firmly than usual. After threading the Scrum 16 through the main PE line, I use the Studio Ocean Mark (SOM) Ocean Notter OK105H, applying SOM’s silicone oil, KS Liquid, to soak into the line before braiding the FG knot. After braiding, I usually tighten the knot with the line still set in the notter. However, for bluefin tuna, I temporarily secure it with a half hitch, then remove the PE line from the notter. I wrap it around a thicker tightening tool (homemade) for a firmer tightening. After that, I re-set the PE line in the Ocean Notter, braid it with a half hitch, and then pull the Scrum 16 close to the knot section and secure it with a half hitch. Keep the Scrum 16 slightly slack. Secure the opposite end using the tail section with 10 half hitches. When braiding, avoid tightening excessively as it reduces main line strength. It’s crucial to tie gently, just enough to prevent the Scrum 16 from moving.
Incidentally, for the FG knot braiding: yellowtail amberjack and bigeye tuna require 18 wraps, but bluefin tuna requires 26 wraps (13 sets on each side). The half hitches after tightening also require 26 wraps. Securing the Scrum 16 with PE requires 10 wraps. The Scrum end also uses 10 wraps.
Main line: XBRAID Odds Port PE #12, Full Drag TSR X8 #15. Since #15 isn’t available in the Odds Port lineup, Full Drag TSR is used. When targeting fish over 150kg, select this line thickness without hesitation. Connect using a carefully tied FG knot with the SOM Ocean Notter OK105H, cutting the leader’s barbs slightly longer than usual. This accommodates slippage during prolonged fights. (Photo courtesy: Hiromu Sano)
【XBRAID Oddsport WX P-18】
https://xbraidygk.jp/products/oddport/
【XBRAID Full Drag TSR X8】
https://xbraidygk.jp/products/fulldragtsr/
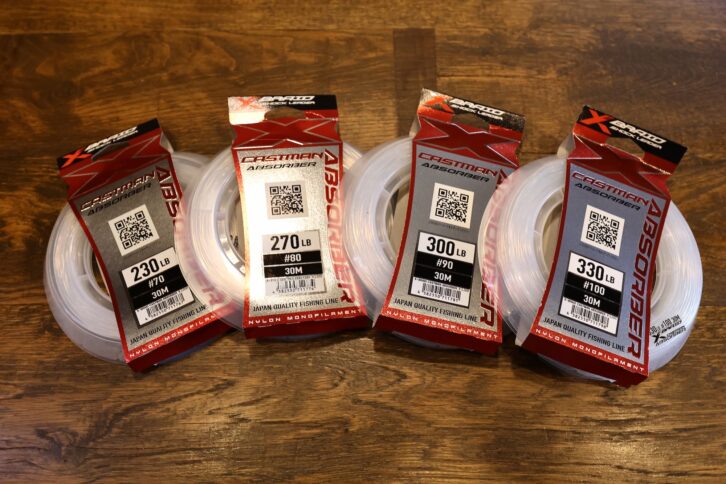
The leader uses XBRAID Castman Absorber. PE #12 is 270lb, #15 is 330lb.
【XBRAID Castman Absorber】
https://xbraidygk.jp/products/castmanabsorber/
Tools for tying knots between the leader and PE line. Top left is a homemade thick clamp. Wind the leader around this, then wind and tighten the PE line’s tail around a thin clamp. The knotter used is SOM’s Ocean Knotters OK105. Ensure the braiding is neat and secure.
【SOM・Ocean Knotters OK105H】
https://studio-oceanmark.com/products/ocean-knoter-ok105-ok70/
“Using Scram 16 reduces air knots. However, even with Scram 16, air knots can still occur in the PE line section beyond it, depending on the number of turns tied at the Scram 16 end. I experimented with different turn counts and settled on 10 turns. For me, this number is optimal; too many or too few turns makes air knots more likely. If an air knot forms here, it means changing the spool and retying. Also, while PE line twist often occurs at the leader-PE line connection point, adding the Scrum 16 provides stiffness, reducing twist. Since twist weakens the line, the Scrum system, though a bit tedious to tie, is recommended.”
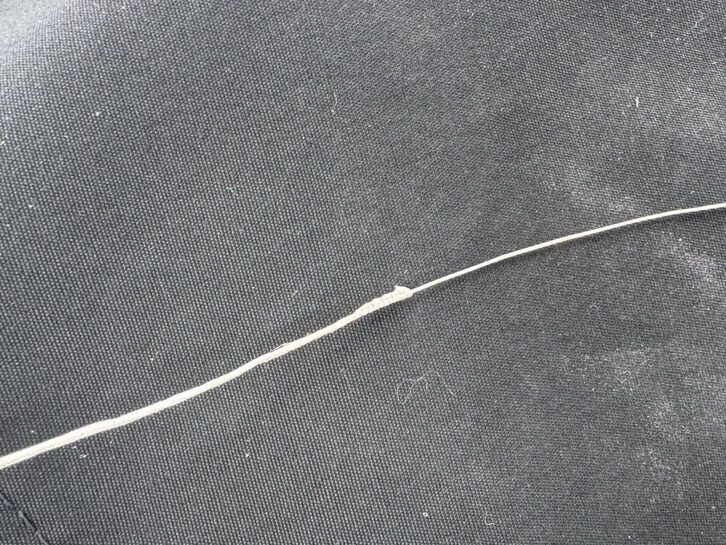
The Scrum System prevents line damage from hooking fingers during casting, reduces casting issues, and minimizes twists. It adds 1 to 1.5 Hiro beyond the FG knot. (Photo provided by Hiromu Sano)
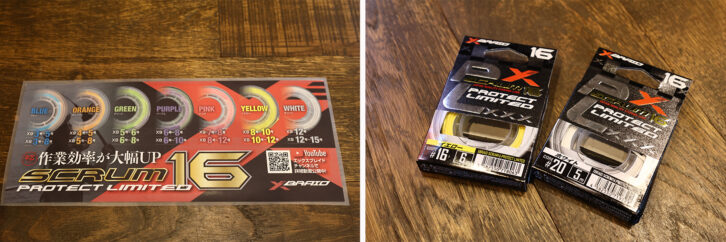
For XBRAID Scrum 16 Protect Limited, use white for larger sizes like 12 and 15.
【XBRAID・Scrum 16 Protect Limited】
https://xbraidygk.jp/products/scrum16pp/
Hiromu Sano・Scrum System
https://youtu.be/L1qF5PllgsA?si=pIi6w4RLEF116niw
Leader Tip Connection
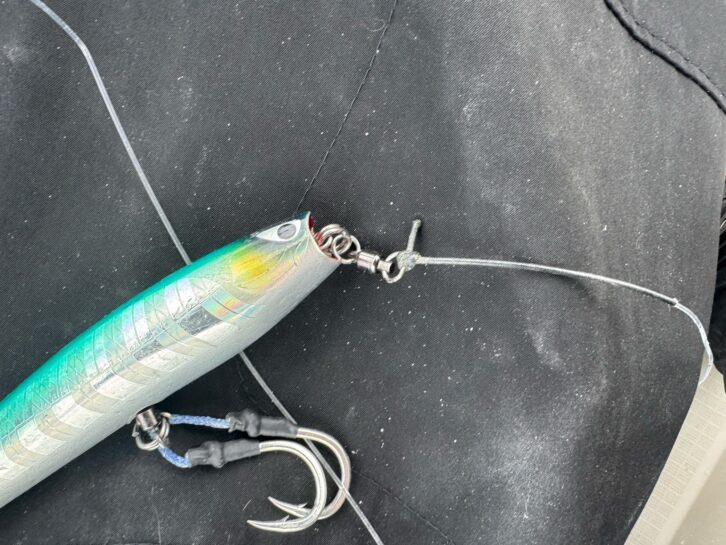
The connection point between the leader and Mr. Sano’s lure uses a split ring + ball bearing swivel. The swivel is always attached to prevent line twist. This ball bearing swivel is the CB ONE Max Power Swivel XX. It’s a model with a thicker, larger ring. However, he sometimes feels the popper’s bubble action is poor when using this swivel. In such cases, a custom-ordered swivel from Vains (online shop) is used. It has the same ring diameter but a smaller, lighter swivel body. The reduced weight slightly improves the head’s buoyancy, enhancing the bubble formation. The split ring primarily uses SOM’s Track Split Ring #10, with #8 used for smaller lures.
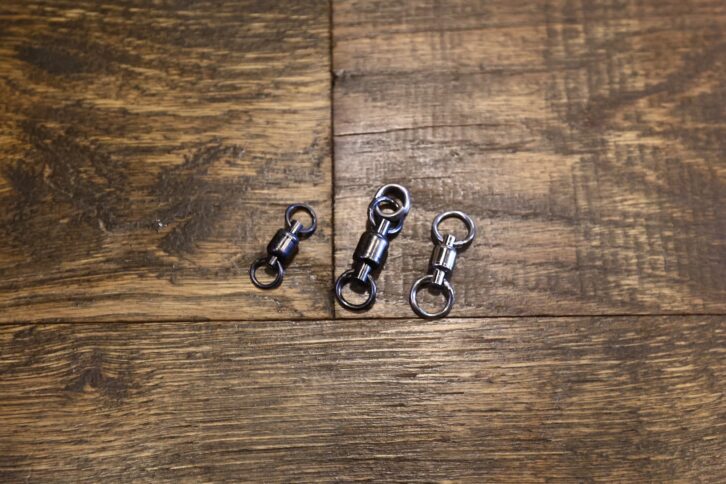
He also has specific preferences for ball bearing swivels. He primarily uses CB ONE’s Max Power Swivel XX, but for poppers, he uses a custom-ordered model with a smaller, lighter swivel section.
【CBONE・Swivel XX】
https://cb-one.co.jp/products/metal-parts/
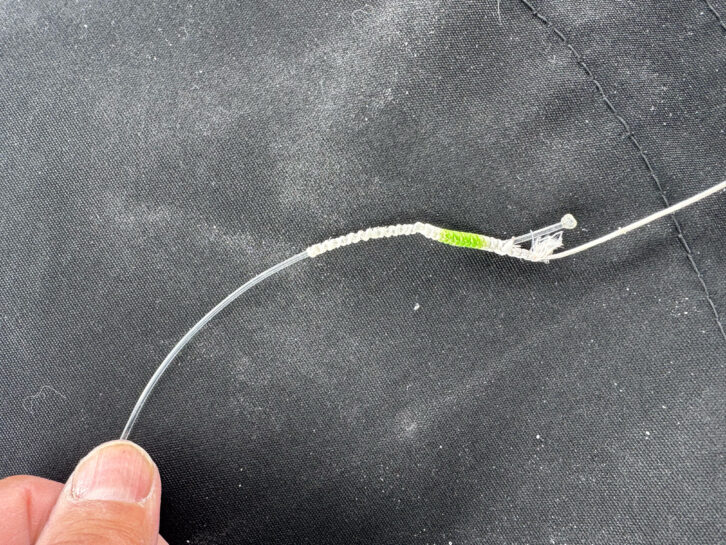
When targeting large fish like mahi-mahi feeding on big bait, I connect the swivel to the leader using an XBRAID Zylon knot with a size 70 leader threaded through, securing it with a figure-eight knot. The connection between the swivel and the Zylon knot is tied with a Lano knot. Incidentally, regarding the Zylon core, sometimes I remove it entirely. Other times, I only remove the core where the leader passes through, deliberately leaving the core intact in the unused sections to maintain stiffness. Lately, though, I’ve been researching tube knots. I use Lure Bank’s (online shop) Reinforced Tube Ultra Heavy, but this model only accommodates up to 270lb. So, I’m currently searching for tubes that can handle thicker leaders.”
Why did Sano-san arrive at the tube knot?
“In my case, since my lure hooks use a single hook with an assist hook setup, they tend to get snagged in the swivel. This means the leader is less prone to damage, so I thought maybe I didn’t need to tie a Zylon knot every time. However, tying the leader directly made me uneasy, which is how I arrived at the tube knot. I do use the Zylon knot for bonito bait patterns, though. By the way, I don’t use sleeves because once they stretch, they’re done for.”
Using XBRAID’s Zylon knot in size 70. For detailed tying instructions, refer to the video below.
【XBRAID・Zylon Knot】
https://xbraidygk.jp/products/zylonknot/
Still experimenting with tube knots. Top left photo shows Lure Bank’s (online shop) reinforced tube, Ultra Heavy. Currently searching for a good product that can accommodate the thickness for 330lb leaders. (Photo provided by: Hiromu Sano)
Hiromu Sano’s Lure Knot & Zylon System
https://youtu.be/krI2kwSw1Ag?si=WZ_2xpMI-zSsmvGf
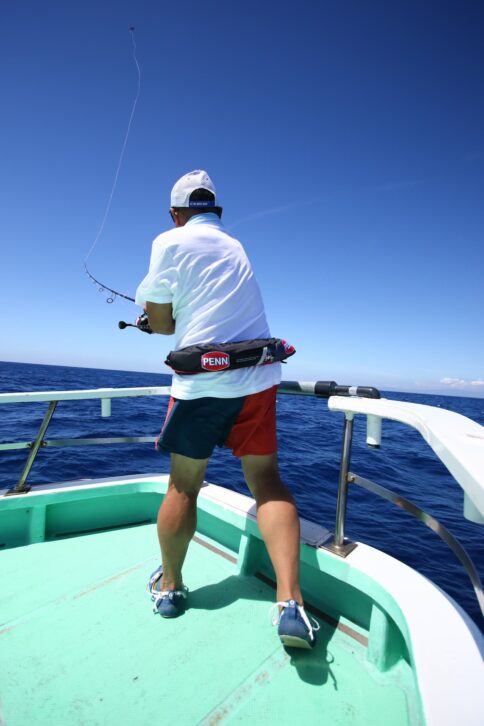
Rod Selection and the Fight
As mentioned earlier, Mr. Sano favors the CBONE STAND UP TUNA MONSTA rod.
“Lately, since I can’t pick the size and expect 100kg or 200kg+ fish, the MONSTA has become my main rod. There are three models: 74, 70, and 68, all paired with a 25 SALTIGA 25000P reel. Among these three, the 74 gets the most use. The reason is its casting distance. For reference, the 74 is the distance-focused model, the 70 is standard, and the 68 is the fight-focused model.”
In 2025, the STAND UP TUNA MONSTA captured the attention of tuna enthusiasts at fishing shows and other exhibitions. This rod was designed with a higher glass fiber content than previous STAND UP TUNA models. It allows anglers to set their reels to high drag settings while still achieving a solid bend to apply pressure to the fish. The toughest part of tuna fishing is the resistance when the fish gets close to the boat. At that moment, bending a stiff rod set to high drag is a real struggle. However, this rod is designed to bend more easily and apply pressure. It makes landing a 200kg-class bluefin tuna in a single fight a more realistic possibility.
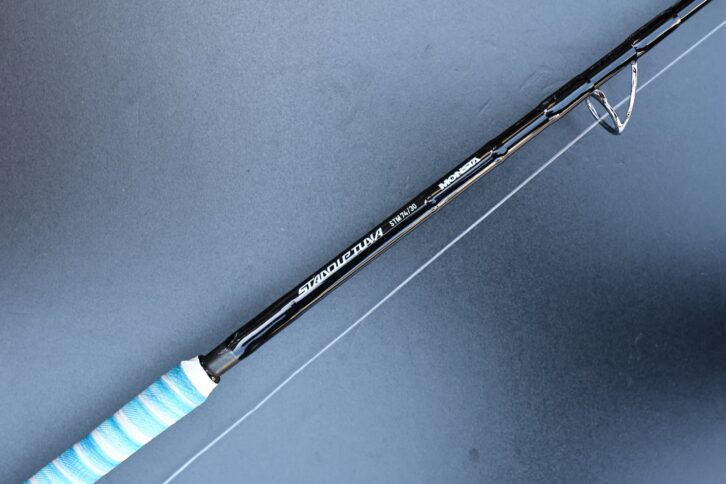
The CBONE・STAND UP TUNA MONSTA comes in three models: 74, 70, and 68. All models feature specifications for PE line sizes 10-15, lure weights up to 300g, and maximum drag of 30kg / 90 degrees.
[Product Explanation Video]
https://youtu.be/TQHYfQiOGV4?si=Cr8qCpu52If_anCc
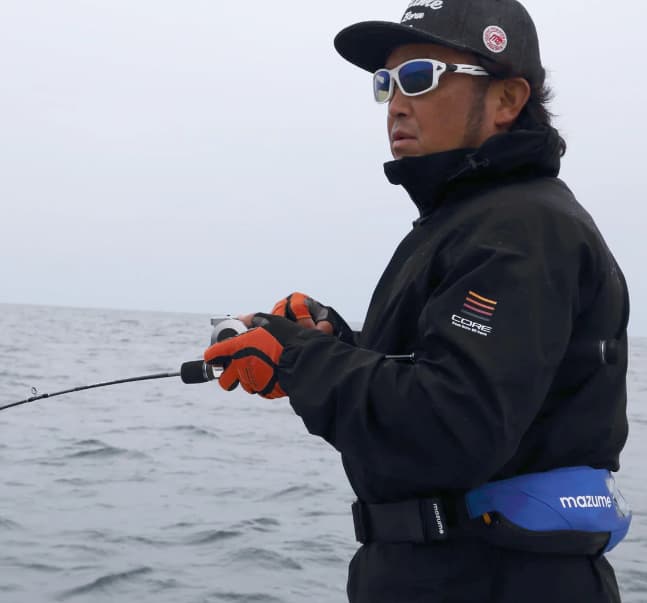
Bring all three CBONE STAND UP TUNA MONSTA models aboard the boat. Each rod is paired with a DAIWA SALTIGA 25000P reel. The most frequently used is the 74 model for its casting distance. Anti-slip tape is wrapped around the grip for use. (Photo provided by Hiromu Sano)
“This is my personal theory, but when using Oddsport, I keep the rod upright. Tuna take off running the moment they hit, and during this run, the line exits the spool while twisting. This twist doesn’t easily straighten out, even with a swivel attached. At this point, standard 8-strand lines can flatten slightly due to the twist. However, the Oddsport line with its core doesn’t flatten even when twisted. I believe that if the line is flattened and you hold the rod upright, the line is prone to damage from guide interference. But if the line isn’t flattened, the damage is minimal.”
By holding the rod upright and using the rod’s bend to continuously apply pressure, the tuna tires out. Therefore, the style of bending the rod to land the fish has become mainstream, but line selection during this process also warrants consideration.
“I ensure I can maintain my stamina during long fights. I also fight while considering factors like line strength degradation. First, when the fish hits, I position the line roller as high as possible and feed line while preventing the guides from creating an angle. At this point, the rod is held under my arm, but I maintain a slight angle. This is because if it’s held straight, the line roller takes the full impact directly. Relying solely on the stretch of the main line and leader means there’s no give when the tuna shakes its head, leading to hook-outs.”
By keeping it slightly angled, the line load is distributed through the guides. Furthermore, when the fish shakes its head, the bend of the rod acts as a cushion.
“This is where the MONSTA rod, a composite of glass and carbon, excels. It has the stiffness to cast lures far, yet retains the unique suppleness of glass, allowing it to follow the fish’s movements perfectly.”
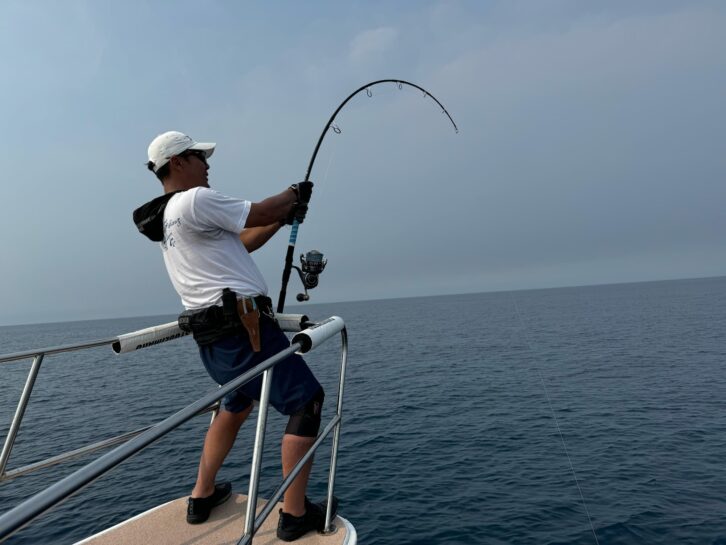
Fighting with the CBONE・STAND UP TUNA MONSTA bent. However, you don’t keep the rod upright all the time. You switch between fighting with the rod tucked under your arm and fighting with it upright, depending on the fish’s movements. The fight style also changes depending on the line selection. (Photo provided by: Hiromu Sano)
Tighten the drag gradually, conserving energy as much as possible.
When approaching a tuna school, Sano aims to land the lure ahead of the feeding frenzy’s path. Thumbing the reel upon landing is essential to minimize slack. This allows for quick action and prevents issues like line snags later.
“Unless it’s a violent feeding frenzy forming a bait ball, I select poppers or floating pencils. For action, hits often come right after the lure hits the water and I give it one jerk, timing it with the rise. That’s the moment it either hooks up or doesn’t. After that, whether to stop, jerk again, or start retrieving is always the tricky part.”
After the hit, he always sets the hook. This is because Sano uses VANFOOK’s single assist hooks designed for casting. After that, he holds the rod grip against his side for a while to observe. There’s a first run and a second run, and during this time, he slightly increases the drag to watch the tuna’s movements. For Sano, the initial drag setting is around 15kg. He gradually tightens it from there, but he emphasizes that it’s crucial to know beforehand how much turning the drag knob increases the drag force by how many kilograms. How much does it increase per half turn? Per full turn? Once you know that, you adjust the drag while keeping track of the current drag setting (in kg) and how much you’ve turned the knob, adapting to the fish’s movements.
“First, I increase the drag setting to around 20kg. By letting it run, not only does the drag engage, but the water pressure from the line also acts on the fish. Water pressure builds. Letting it run and dive wears down the tuna’s stamina. For 10 or 20 minutes, keep the fish running while holding it under your arm, watching its condition. At this stage, it’s crucial to “conserve your own energy as much as possible.” If you reel aggressively early on and use up 20% or 30% of your stamina, you’ll run out of energy when it matters most. Once you confirm the fish is weakening, start reeling in. If it shows no signs of weakening, tighten the drag further.”
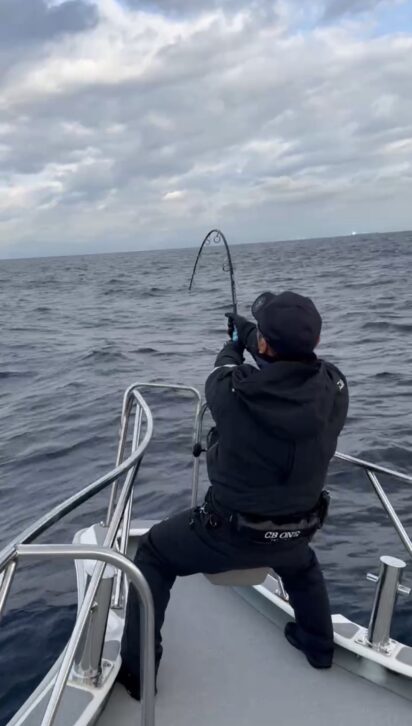
Standing the rod upright is easier when the fish is facing you, when the line angle is favorable, and during the decisive moment when the fish is near the boat’s edge. (Photo courtesy: Hiromu Sano)
Should you stand the rod upright or keep it horizontal?
Incidentally, the drag strength increases by only about 10-15% when the rod is straightened compared to when it’s upright. For a 20kg drag, raising the rod might get you 22 or 23kg. That’s why anglers don’t keep the rod upright constantly. They raise it when it’s easier—like when the fish is facing you or the line angle is slanted. When keeping the rod straight and increasing drag seems more likely to tire the fish, they choose that option. It’s simply easier on the angler.
“If you keep the rod upright in every situation, you’ll exhaust your stamina. You need to judge the most efficient state, choosing between holding the rod upright or straight while watching the tuna’s movements and reeling in. When holding the rod upright, leaning forward tires you out, so consciously keep your arms extended while standing upright.”
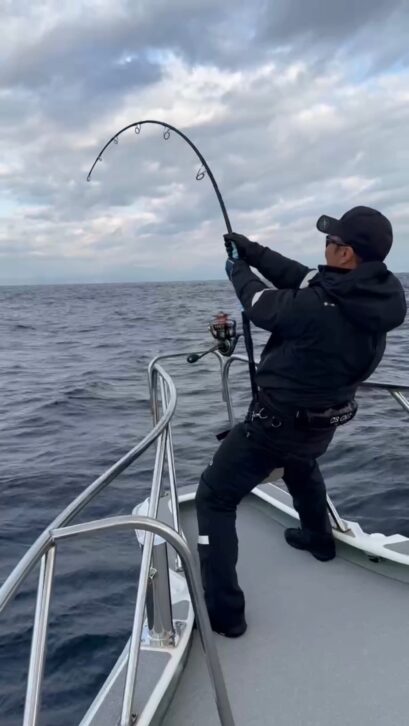
The real battle begins once the distance closes and you see the tuna. How much stamina you conserve up to this point is crucial. Once the tuna is visible, it often puts up strong resistance. Stay calm here and steadily reel in the line, bit by bit. Fight with the rod upright; if the angle is bad, use the underarm hold. The STAND UP TUNA MONSTA makes this upright rod fight easier.
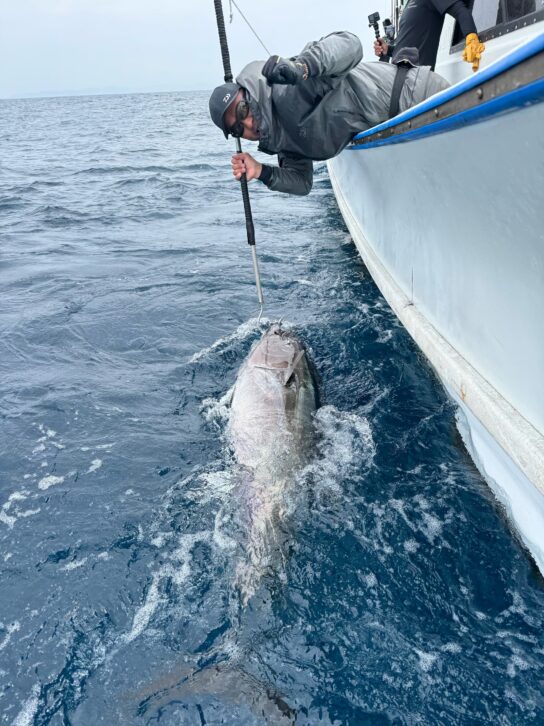
Final Showdown
“Yellowfin and amberjack are exciting, fast-reeling fights, but bluefin tuna is different. It’s not a short-distance fight, but a marathon battle. You take your time, watching how it reacts and gradually closing the distance. By the way, I ask people around me not to look at the water surface when the tuna is coming up. I feel that if the tuna sees people on the boat, it will run. Minimizing runs during the final retrieve is also crucial.”
Then, when the fish comes close to the surface, the tuna swims in circles, so you reel it in while guiding it around. When it turns towards you, reel in as much as possible.
“Sometimes it’s hard to close the distance at this point. If I’m at the bow, I might ask the boat to run backward briefly to spray bubbles at the fish. If I’m at the stern, I might ask them to run forward to spray bubbles. The goal is to get the fish to suck in surface bubbles and weaken it.”
Occasionally, the fish surfaces quickly. In those cases, even if my position is slightly disadvantageous, I might reel it in aggressively and go straight for the landing.
“When I get excited during the fight, the person who strikes the spear, the person who lands the fish, and the person who helps with the release tend to get flustered, so I try to fight in a way that shows I still have plenty of energy left. But when the fish actually comes up, I get excited and yell (laughs).”
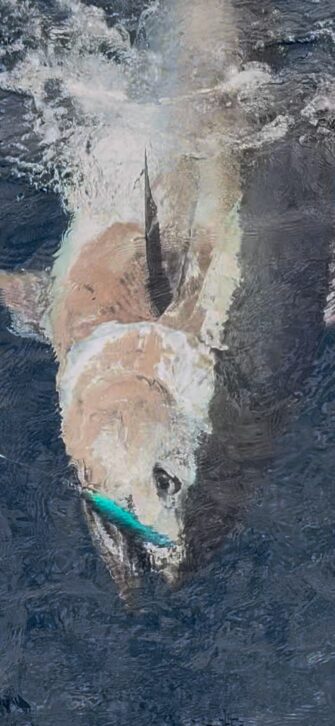
It’s best to stay calm and not rush when landing the fish, but this type of fishing is so exciting that you can’t help but yell when you see it. (Photo courtesy of Hiromu Sano)
Reason for choosing the Saltiga reel
The DAIWA Saltiga spinning reel was redesigned in 2025. Not only does it have larger gears than the previous model, increasing its power and performance, but a new size, the 25000, has been added. The Saltiga 25000P is an indispensable item in Mr. Sano’s current tuna fishing game. We asked him about this model.
“I can now catch fish that I couldn’t catch before. When the previous 20 SALTIGA was completed, I thought it was an amazing reel, but this one surpasses it. The previous model had gears that didn’t break and plenty of power. The rotor, which was previously made of ZAION, is now made of aluminum, increasing its strength. However, I wanted an even larger size. Then I heard that there would be a model change in 2025, so I conveyed several requests, and the product that came out was one I was satisfied with. The handle knob was redesigned to be smoother, the gears were enlarged and thickened, improving tooth engagement, boosting power, and making retrieval lighter. Furthermore, the spool features a tapered design on the casting surface, significantly improving line release. And above all, the drag is in a league of its own.”
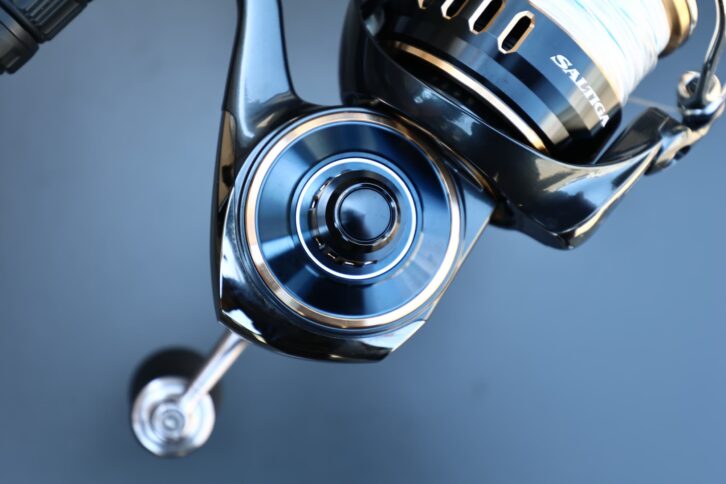
The enlarged gears and gearbox encased within the monocoque body. Gear size is 10% larger than the 20 SALTIGA, with thickness increased by 6%.
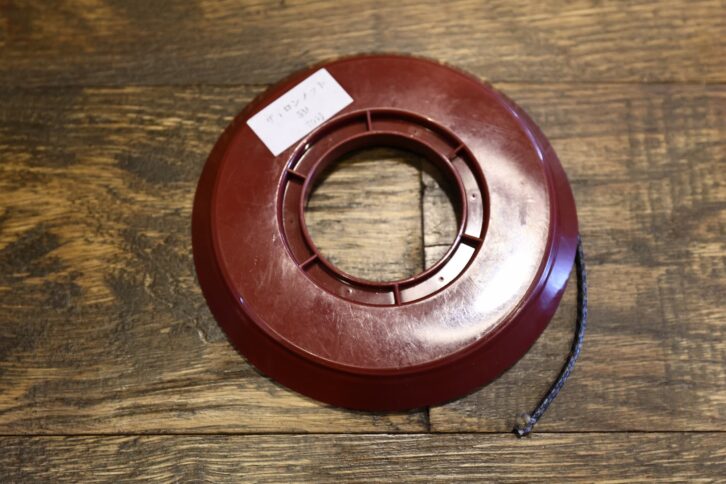
Before the 25 SALTIGA’s release, Mr. Sano favored the Studio Ocean Mark custom spool “NO LIMITS 20ST” model “23000MB” for big-line tuna fishing. This special model boasts a line capacity of 300m of PE12 and a maximum drag of 25kg. He expressed anticipation for a new model developed specifically for the 25 SALTIGA. Currently, he prefers and uses the standard spool with its DRD drag system.
“I’m amazed by the performance of the new ‘DRD’ drag system on the SALTIGA. Even fighting fish with 30kg drag set, there are no drag issues. It’s in a class of its own compared to other drags. The feel when it starts slipping is also different from before. It engages smoothly, not just with metal washers but through a metal plate with metal rollers. This smoothness contributes to its ability to prevent line breaks even under high drag. What’s even more impressive about this DRD is that it operates smoothly not only at high drag settings but also at drag values like 4kg, 5kg, 8kg, and 10kg, which are ideal for targeting yellowfin tuna and amberjack. Furthermore, since it’s constructed entirely of metal parts, it’s highly durable. With carbon drag systems, high drag settings can lead to wear, breakage, or overheating. However, I’ve used the DRD on numerous fish over 100kg, and so far, there have been no issues whatsoever. However, it does generate heat. If it gets hot during the fight, we cool it down by pouring water over it. Being metal, it cools down quickly.”
The DRD drag system is highly praised for its strength and smooth operation. Mr. Sano has personally experienced its excellent performance during his fishing.
Incidentally, for targeting large tuna using PE 12 or 15 line, the SALTIGA 25000P is recommended. Since large tuna are highly likely to bite in 2025, the 25000 size is almost always used. However, depending on the tuna size, a 20000 size might be used for 10-pound line, or an 18000 size for 8-pound line.
“Also, not just for bluefin tuna, but for yellowfin and amberjack too, the key is this: after the lure hits the water, quickly take up slack line and start retrieving with jerks. It’s crucial that this retrieving action is light, that you can impart good speed to the lure, and that when you stop, the rotor doesn’t keep spinning from inertia but stops firmly. The 25 SALTIGA makes these movements much easier. I feel this is one aspect contributing to the catch results.”
【DAIWA・25 SALTIGA】
https://www.daiwa.com/jp/product/i25pggl
When winding line onto the spool
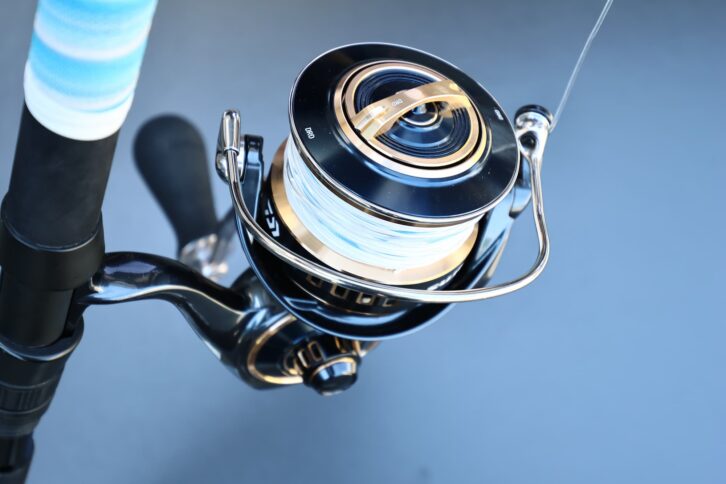
Mr. Sano winds line onto the reel spool using 4-5kg of tension.
“The 25 SALTIGA 25000 is designed to hold 300m of PE12 line even with 2kg of tension. First, I wind 100m using 4-5kg of tension. As winding becomes heavier, gradually reduce the tension while winding about 120m. For the final 80m, wind with only about 1kg of light tension. This section is the line that comes out during casting, so winding it too tightly can cause casting problems.”
When winding line onto the spool, use UOYA’s line-winding factory. Attach handles to both sides of the reel and wind at a constant speed. Adjust tension as you go. Sano always winds manually himself. This is because he needs to check how the line is being wound.
He admits that in the past, he sometimes wound with stronger tension to try to get even a little more line on. However, winding too tightly damages the line. Also, since Oddsport line has a core, it stretches without breaking, so sometimes he couldn’t wind as much as the standard amount. Incidentally, he brings many spools to the fishing spot, each spooled with new line and set up as a line system. This is not only for line troubleshooting but also to replace it after landing a fish over 100kg. Line that has fought a large fish may have reduced strength, so he never uses it again.
“Even though tuna have become more common, the days you can target them are limited, and opportunities are scarce. To avoid regret, it’s best to spool fresh line and tackle them in perfect condition.”
I wrap vinyl tape around the spool before spooling line. This ensures the line adheres tightly to the spool and prevents it from slipping when the spool shrinks due to cooling. Incidentally, during hot periods, I chill the spool in the refrigerator to shrink it before spooling line. Wrapping tape also protects the initial spooled section of line from damage when the spool heats up during high drag fights.
“In fact, after a high-load fight, when I later pulled line from the spool, the innermost part of the tape had melted from the heat, but the line itself showed no changes.”
On the spool, tape is wound first, then line is wound about 10 times over it before securing with a Uni knot.
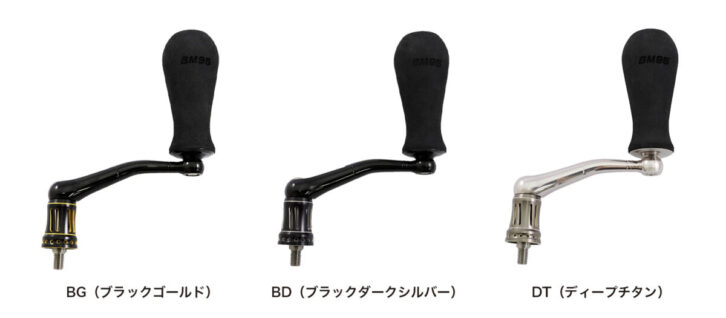
The Necessity of the Handle Big Mouth
The reel is fitted with SOM’s custom handle, the Big Mouth BM95. This model was developed in collaboration with SOM, designed by Mr. Sano to distribute arm muscle fatigue during prolonged fights with large fish by allowing the angler to change their grip position.
“While its primary purpose is to reduce fatigue, it’s also gentle on the reel. Data shows that despite my reel handling numerous large fish, manufacturer inspections found no damage. We discovered that when fighting big fish, pulling the handle outward while retrieving can break the gears. The BM95 pushes the handle toward the reel body instead of pulling, allowing the gears to mesh firmly without stress. It also features a grip that won’t slip out of your hand.”
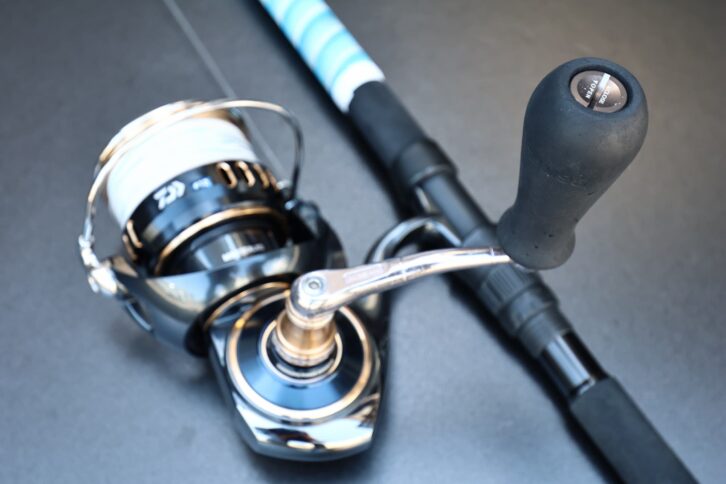
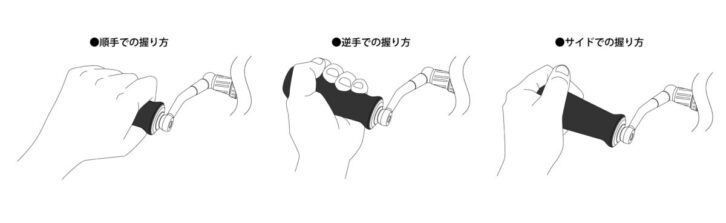
 SOM Big Mouth BM95. A handle knob born from Mr. Sano’s experience with long fights. By allowing different grips—like holding it like a bicycle handlebar with your whole hand, gripping it reverse, or pinching it from the side—it distributes arm muscle fatigue.
【SOM・NO LIMITS 20ST Big Mouth 95】
https://studio-oceanmark.com/products/no-limits-20st-custom-handle/
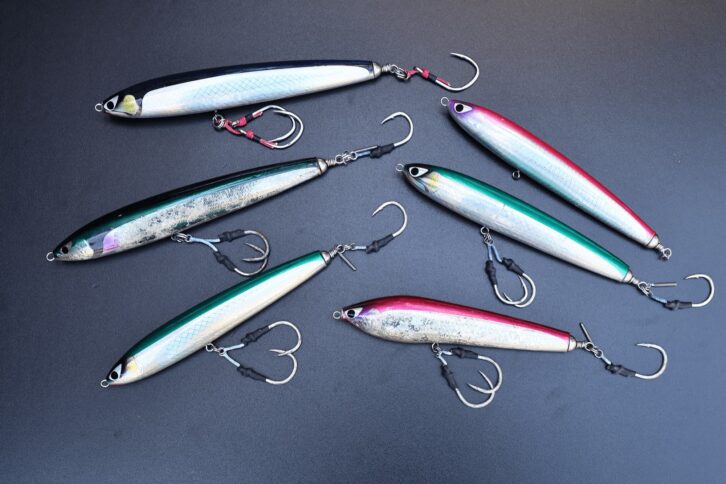
Lure Selection
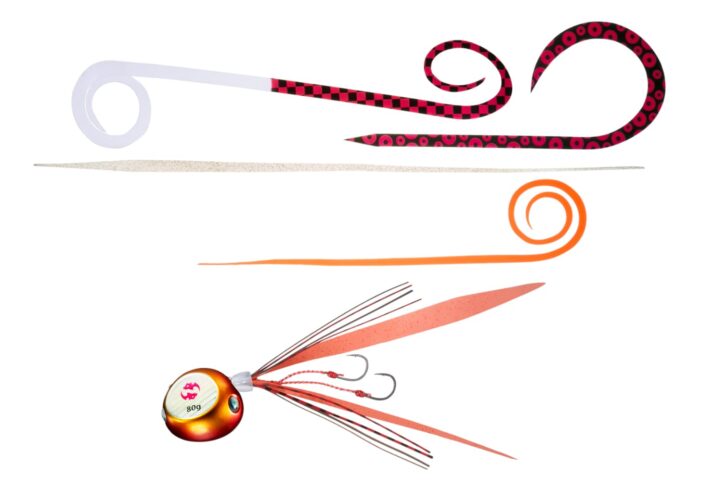
Lures should be selected based on the situation at hand. However, since fish often strike after the first jerk or second jerk upon landing, lures with high appeal are preferable.
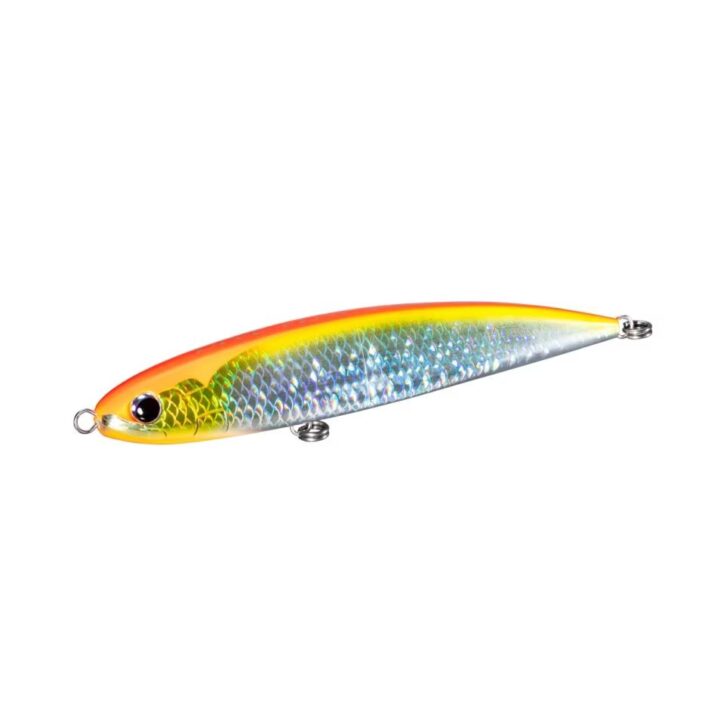
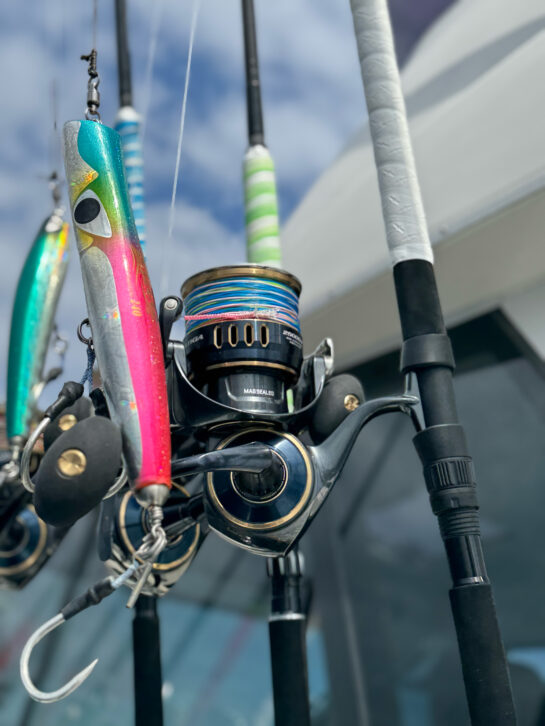
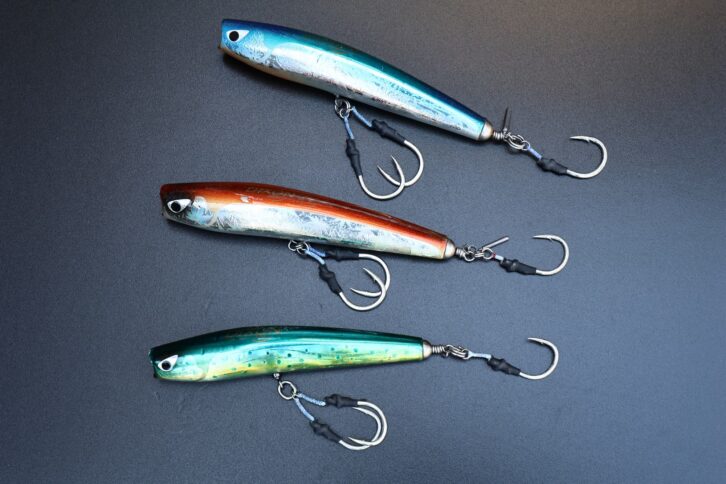
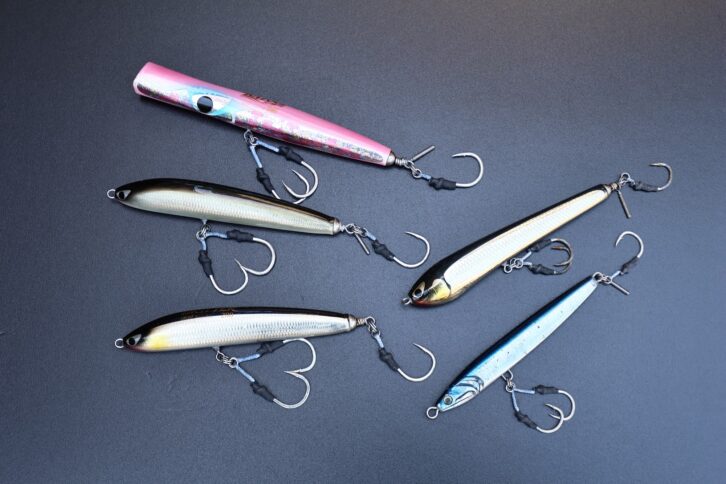
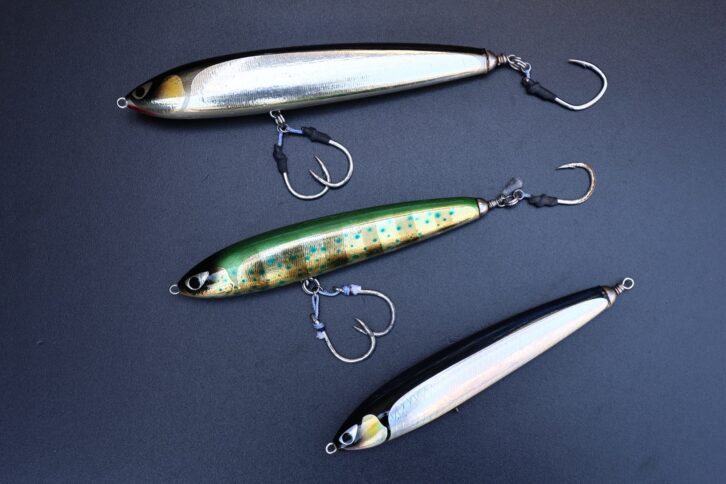
“I primarily use large BAZOO and Dixon lures. I choose these because I like their vibration pattern, and they’ve proven effective in my recent tuna fishing. Considering the initial rise after landing, the rise after a single jerk, and casting distance, the BAZOO , Dixon, Rudolf, and Ryan models come to mind. I choose sizes like 260 and 240, but since bait can be small, I also prepare 200 and 220 sizes. For Pacific saury bait, the Zorro works well too, and I also use sinking lures like the Drifter and Ozma 180.”
A good initial rise is crucial. Lures that can deliver quick, solid action after landing are preferred, with “light retrieval triggering movement” being ideal. This light retrieval aspect is where the 25 SALTIGA’s smooth, light retrieve shines.
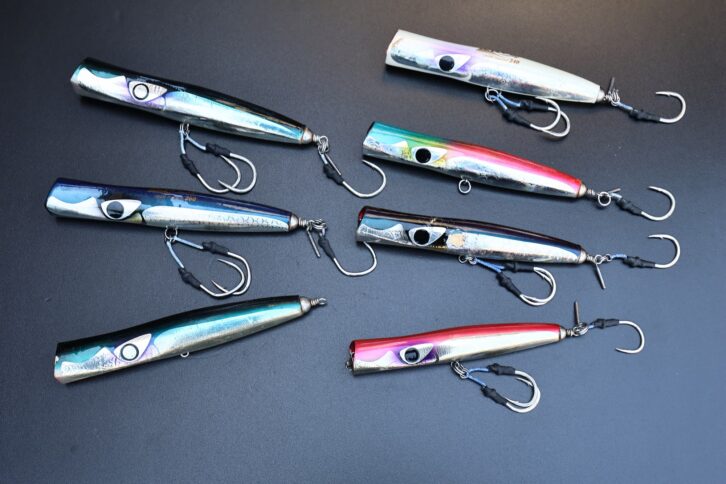
My go-to BAZOO. Sizes 260, 240, 220. “I’ve had great success with larger Buzz models like the 240 and 260.”
【CBONE・BAZOO】
https://cb-one.co.jp/products/bazoo/
Another frequently used plug: Dixon. Sizes 240, 220.
【CBONE・DIXON】
https://cb-one.co.jp/products/dixon/
Lures that come into play when Pacific saury or mackerel are the bait. Top left: BAZOO Slim 240, Drifter; Top right: ZORRO, Ozma 180.
【CBONE・BAZOO Slim】
https://cb-one.co.jp/products/bazoo-slim/
【CBONE・ZORRO】
https://cb-one.co.jp/products/zorro/
【CBONE・Ozma】
https://cb-one.co.jp/products/ozma/
The GILLA appeals in the layer just below the surface. Its wide flat face also makes it highly visible. Its stable swimming action makes it recommended even in rough sea conditions.
【CBONE・GILLA】
https://cb-one.co.jp/products/gilla/
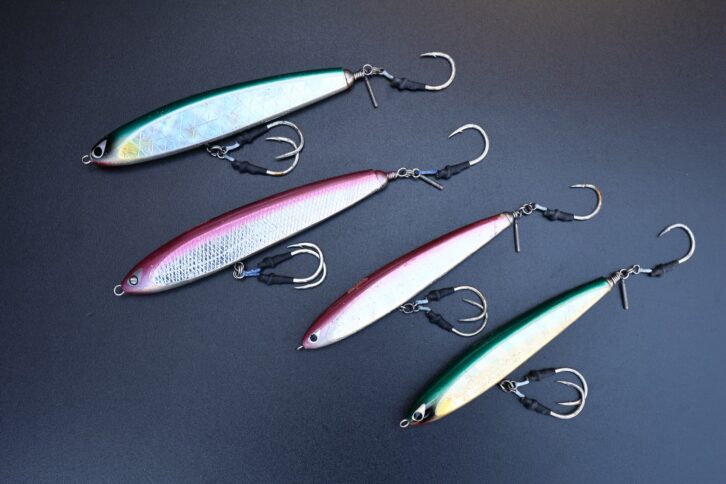
From top left: Rudolf 300, Rudolf 260. From top right: Rudolf 260, Rodeo. For large bait imitations, the Rudolf 260 and 300 excel. Slim profile with low drag resistance and excellent casting distance.
【CBONE・Rudolf】
https://cb-one.co.jp/products/rudolf/
【CBONE・Rodeo】
https://cb-one.co.jp/products/rodeo/
Ryan 300 (prototype), Ryan 250. User-friendly models that attract fish with strong water displacement. Responds well to various jerking techniques.
【CBONE・Ryan】
https://cb-one.co.jp/products/ryan/
Hook Selection Based on Experience
Sano-san’s plugs use assist hooks designed for casting plugs. The body section has two hooks, and the tail has one. This setup is the result of his experience casting for bluefin tuna, yellowfin tuna, and amberjack. So, what kind of hooks does he choose for bluefin tuna casting?
“First, I choose hooks with thick, strong shanks. Incidentally, I reference strength test results sent by VANFOOK staff—showing the strength when fully embedded versus when load is applied to the point, and the weight with assist line rigged—to make my selection. My main hooks are VANFOOK’s ‘Beast Edge Placking’ and ‘Beast Edge Cut Barb Plucking’. I also prepare assist lines made with Beast Edge in different lengths. This is to select a length that won’t ride up on the lure, depending on the lure size. Beast Edge is a model I was involved in developing, and my selection reasons are that it’s less likely to be swallowed, doesn’t stretch once fully hooked, and is designed to be resistant to breaking. The main size is the thick-shank 7/0. I use it with confidence. Furthermore, an even thicker shank version is currently under development.”
For the fishing spot, I bring VANFOOK Beast Edge hooks in sizes 4/0, 5/0, 6/0, and 7/0 to handle any situation, plus 8/0 and 9/0 for 300-size lures. Furthermore, when using smaller lures, I prefer ones made with bolt locks because the tubular Beast Edge makes it harder to get good action.
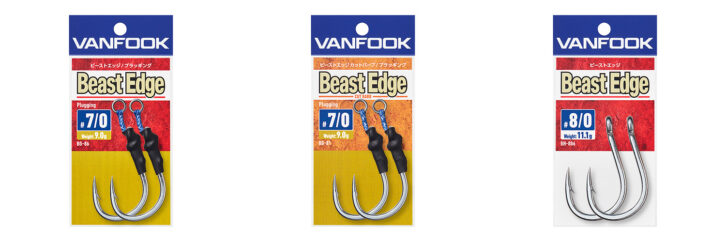
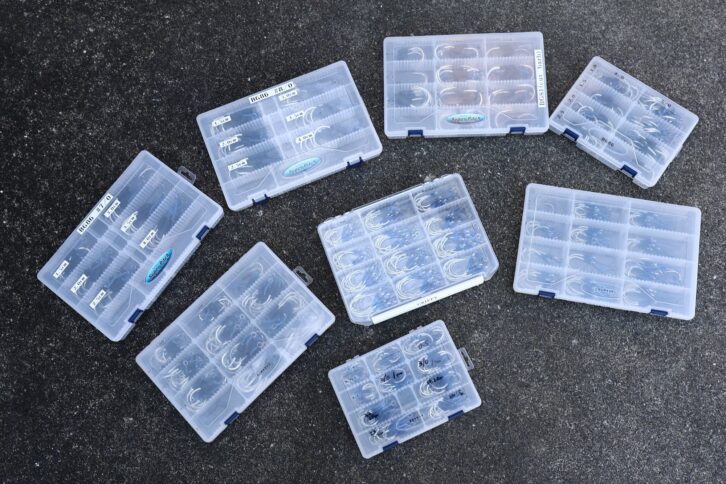
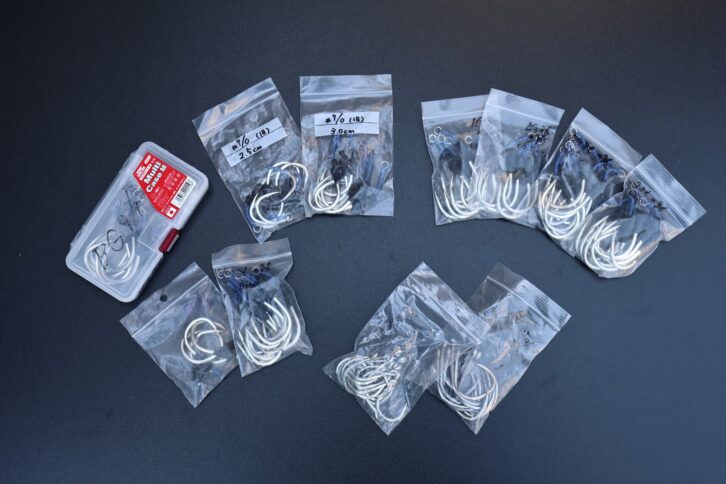
He brings numerous hooks to the fishing spot to handle various situations. His main hook is the VANFOOK ‘Beast Edge Plucking’ 7/0, but he also prepares different sizes, assist line lengths, and hooks made from other VANFOOK products.
【VANFOOK・Beast Edge Plucking】
https://vanfook.co.jp/product/bg-86/
【VANFOOK・Beast Edge Cut Barb Placking】
https://vanfook.co.jp/product/bg-81/
【VANFOOK・Beast Edge】
https://vanfook.co.jp/product/bh-806/
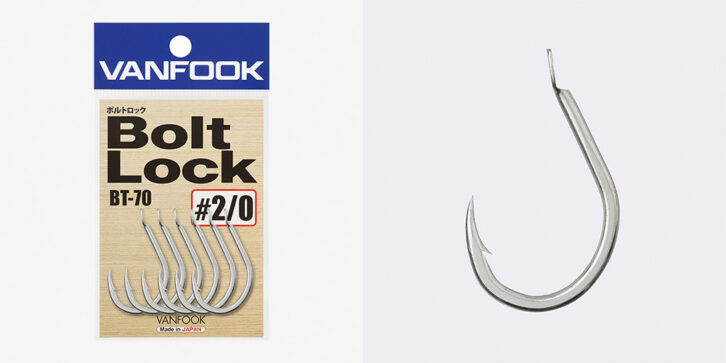
Small but thick-shanked Bolt Lock. Features a hammered finish, reducing weight by 15% compared to tubular hooks.
【VANFOOK・Bolt Lock】
https://vanfook.co.jp/product/bt-bolt_lock/
“I prefer using a single hook both front and rear, but considering hook-up rates, it’s still best to use two hooks in front and one in back. Since the tail uses a single hook, I attach weights to balance the lure.”
Mr. Sano uses tungsten weights previously sold by SOM. Unfortunately, these weights are now discontinued. However, since the goal is simply to achieve balance, sinkers from other manufacturers can also be used.
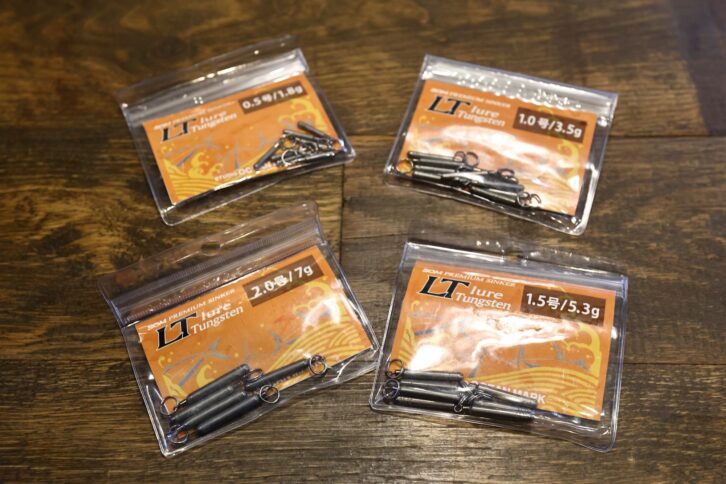
Adjustment weights attached to the tail eye. The product in the photo is discontinued. However, other weights can be used instead.

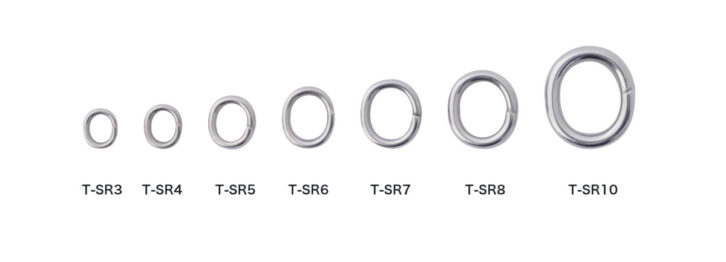
For hook attachment and between the lure and ball bearing swivel, SOM’s Track Split Ring is used. Its elliptical shape allows the double-layered section to bear the load during the fight, maximizing strength. Made from strong steel, it boasts 1.4 times the tensile strength compared to conventional SUS300 diameter rings. There have been no issues with stretching or other problems to date. The size 10 used is rated at 1200lb, and size 8 at 660lb.
【SOM・OTA Garage Track Split Ring】
https://studio-oceanmark.com/products/track-split-ring/
About Releases
Mr. Sano actively promotes releases, hoping more anglers can enjoy casting for bluefin tuna even during extended fishing seasons. Before releasing a fish, it’s essential to coordinate beforehand with fellow anglers and the captain. Deciding who does what role beforehand makes the process smoother. For release, once the tuna approaches and takes air, the person holding the leader should wear thick gloves and hold the leader without wrapping it around their hand. During this time, the hook is removed, and the release is completed. For weakened fish or large ones requiring a long fight, hook the gaff into the tuna’s mouth, then slowly move forward to allow it to recover strength before releasing.
“When a lure is swallowed, I use the SOULS ‘Releaser II’. Its specially shaped tip pushes the lure out to release the hook. However, since I use single-hook assists, the hook often catches on the barb. In those cases, the SOM ‘Hook Remover HR550L-PRO’ usually handles it. It’s an essential item for tuna fishing. Recently, I’ve been using two HR550L-PROs for removal. I secure it with one and then remove the hook with the other. I’ve released numerous tuna caught by companions this way, and it’s been remarkably smooth.”
Regardless, you’re dealing with a large bluefin tuna thrashing violently at the gunwale. Utmost caution is required. And with current catch limits in place, if more people release fish, it’s certain everyone can enjoy this sport for longer. Preparing release tools and embracing the challenge is essential for this purpose.
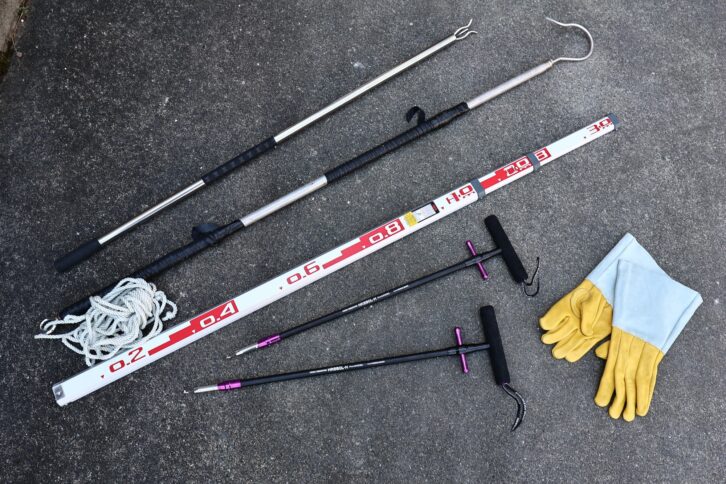
Items used for release. From top: SOULS・Releaser II, SOULS・Gaff, Measuring tape, SOM・Hook Remover HR550L-PRO, Heavy-duty gloves.

The SOM Hook Remover HR550L-PRO is a professional-grade model built for durability. While the standard model prioritizes lightweight design, portability, and ease of use, this rugged model was created for frequent users like charter boat captains, pro anglers, boat owners, and heavy users. Bluefin tuna are large fish, and since removal often occurs at the gunwale, the maximum length HR550L-PR (660mm) is recommended.
【SOM・Hook Remover HR550L-PRO】
https://studio-oceanmark.com/products/hook-remover-promodel/
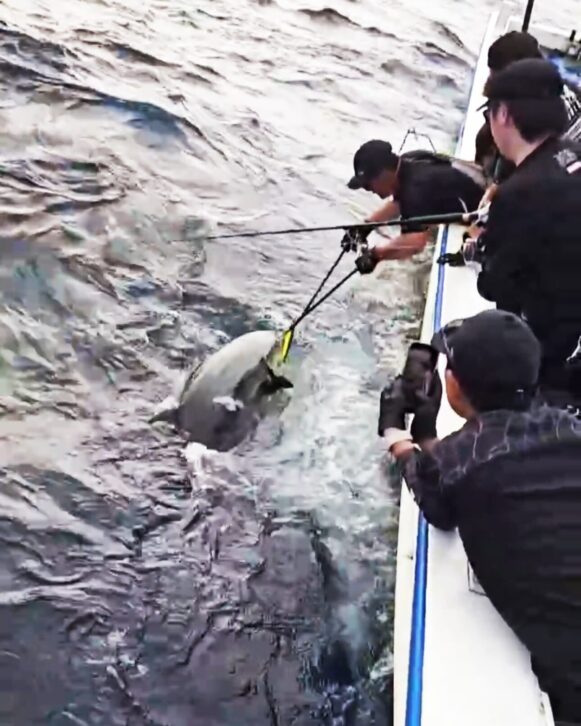
Image quality is rough as it’s a video still, but this shows the scene of removing a lure using two SOM・Hook Remover HR550L-PRO tools. Using two makes the process significantly smoother.
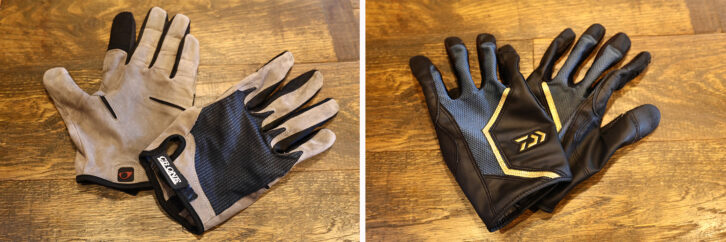
その他、グローブは釣行時の必需品。ファイト時に滑らない、かつ握り心地が良いもの、濡れても使いやすものをセレクト。怪我の防止にもなる。左はCBONE(プロト)、右はダイワ製。「この2つは最高です」。
【CBONE・Offshore Game Gloves】
https://cb-one.co.jp/products/gear/
【DAIWA・Offshore Leather Gloves】
https://www.daiwa.com/jp/product/t0ohi55

Also essential: polarized sunglasses and fishing shoes. Polarized sunglasses are DAIWA・TLX025 with TALEX lenses. Shoes are DAIWA・GORE-TEX Offshore Shoes Mid-Cut.
【DAIWA・TLX025】
https://www.daiwa.com/jp/product/7dg18q5
【DAIWA・GORE-TEX Offshore Shoes Mid-Cut】
https://www.daiwa.com/jp/product/jecknkv
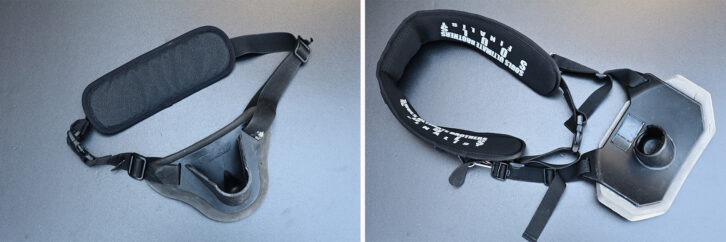
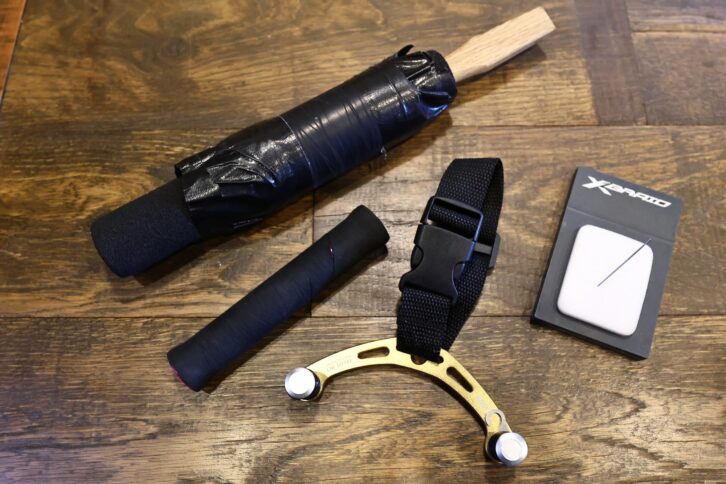
A gimbal is also an essential item for bluefin tuna fishing. “I’ve tried various gimbal models. For targeting yellowtail amberjack, bigeye tuna, and bluefin tuna under 100kg using rods like the STAND UP Tuna 74 (not MONSTA), or the Infinity 82/18 and 82/16 with 8-10 lb line, I select the CB ONE Fighting Belt 2 for its comfortable fit and light weight. When targeting fish over 100kg and using the STAND UP TUNA MONSTA, I currently use SOULS’ gimbal (initial model). I position it slightly lower because this gimbal allows me to spread my legs and brace myself in a comfortable stance.”
【CBONE・Fighting Belt 2】
https://cb-one.co.jp/products/gear/
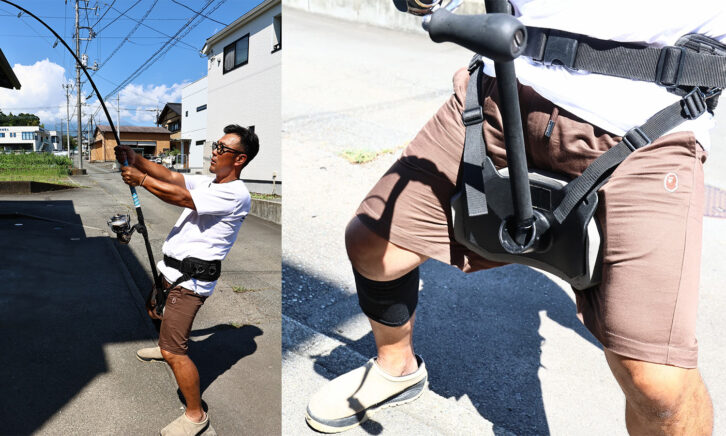
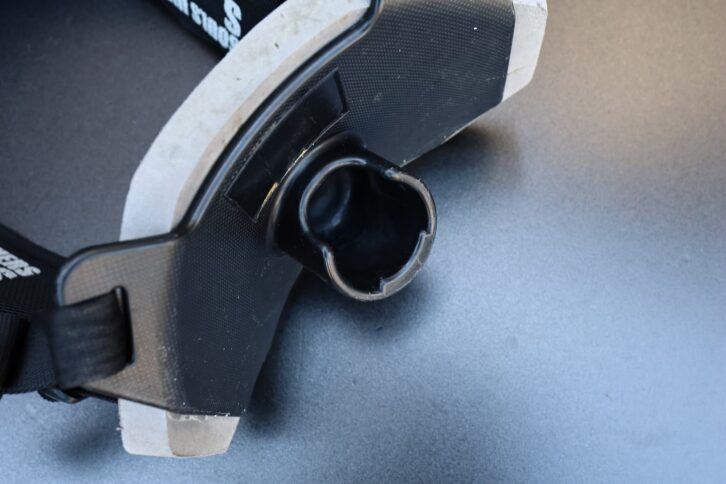
Its moderate size and shape allow it to fit snugly between the legs. The protrusion in the hole holds the rod end securely, preventing it from shifting during the fight, which is a plus.
“I work as a tester for manufacturers, but I feel truly happy when the gear I use performs flawlessly and looks cool enough that I genuinely want to use it. However, it’s also true that I’m not yet satisfied with my bluefin tuna fishing. I will continue pursuing new
関連記事
-

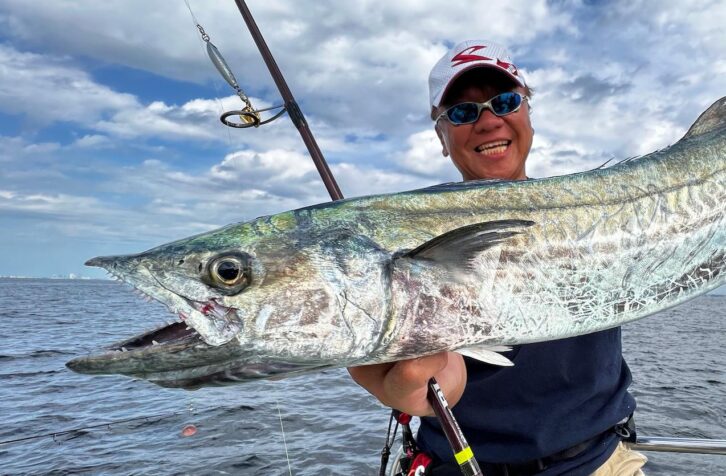
Shout! Makoto Ono explains! Blade Jigging Tackle Edition
-

A personal record of over 33.7 kg hit!
-

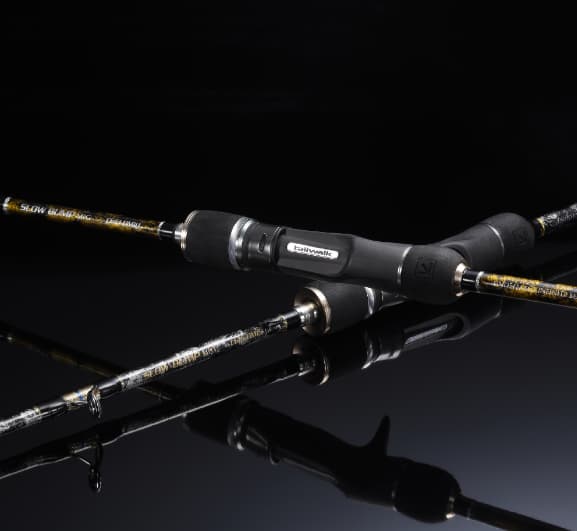
The rod is bent firmly. You can enjoy the fight! Tail walk rod for slow pitch jerking
-

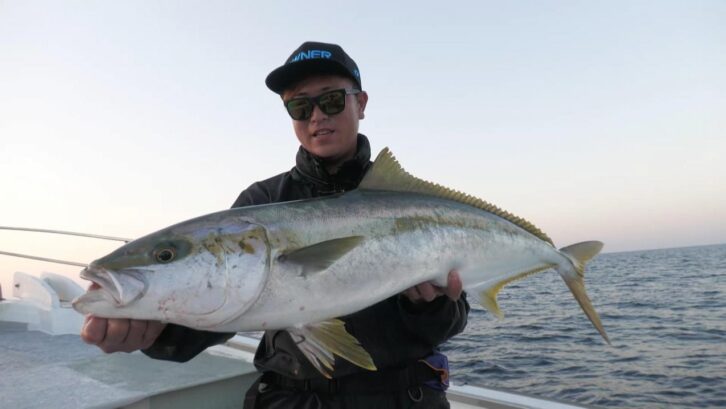
This rod is perfect for yellowtail(King Fish)fishing! Tenryu Field Tester Mitsutoshi Sato, Yellowtail Fishing in the Goto Islands
-

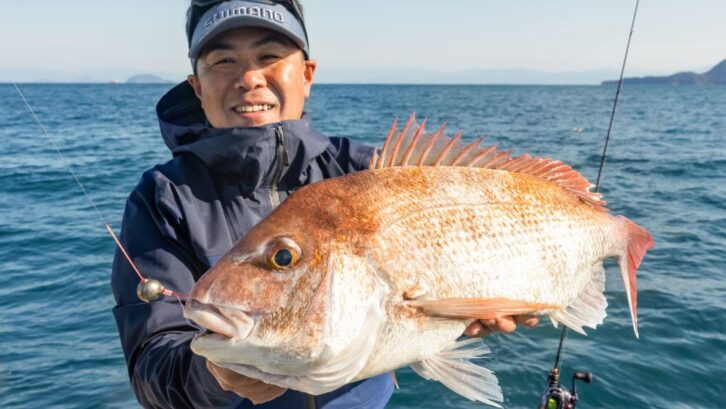
Captain Seiichiro Tashiro’s Bluefin Tuna Game on the Sunrise
Explaining Tactics as Both Captain and Angler! -

The most cost-effective! Lightweight Compact Designed exclusively for offshore light game
-

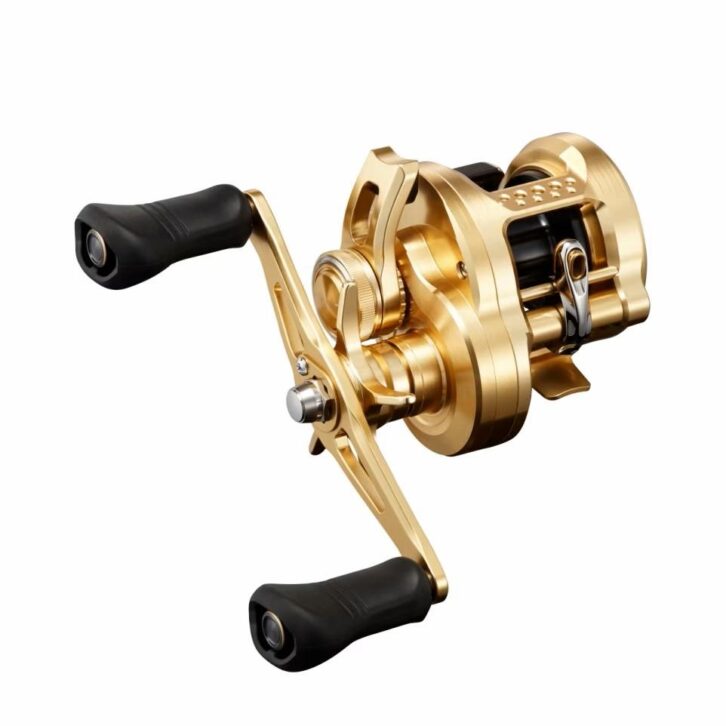
148cm in length for expedition fishing! PENN brand in the world Big Game Casting Rods Slammer Casting Rod
-

A set of tie rubber items! Convenient, Daiwa Red Fang Bay Rubber Free Beta Rubber Assortment Pack
-

Cultiva Hooks in 2025 Serious about large fish!
-

Ideal size for tilefish and light jigging O’Shea Conquest 200HG and 200PG released
-
Yasuhiro Akazawa and the planning and development staff reveal Engetsu Limited Development Story
-

Thoughtfully designed for use in fishing The 4th generation heater vest is now available!
-

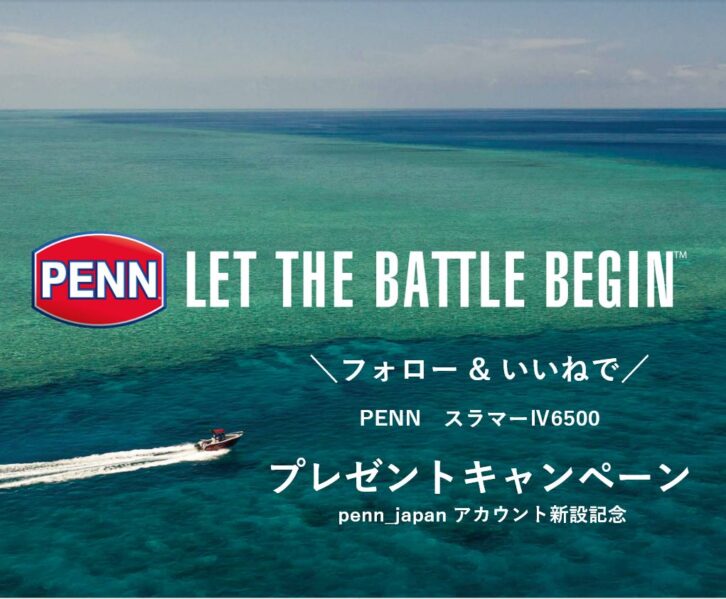
PENN JAPAN official instagram account newly established!
Present campaign is underway! -

Practical life jacket specialized for fishing! Inflatable Waist SP & Accessories
-
Attack with special hooks & jigs/shortels
-

No loss of manoeuvrability even at long lengths Can be jerked firmly without loss of control even at long lengths. NEW OCEA JIGGER ∞ MOTIVE
-
Attention! A NEW flashing-oriented lure for sunfish and GT! Diving pencil “OCEA DIVE FLAT 240F” is now available!
-
Fishing festival limited items now available for purchase! The New Yokohama Fishing Show
-

Find the fishing glove you’ve been looking for and want
-

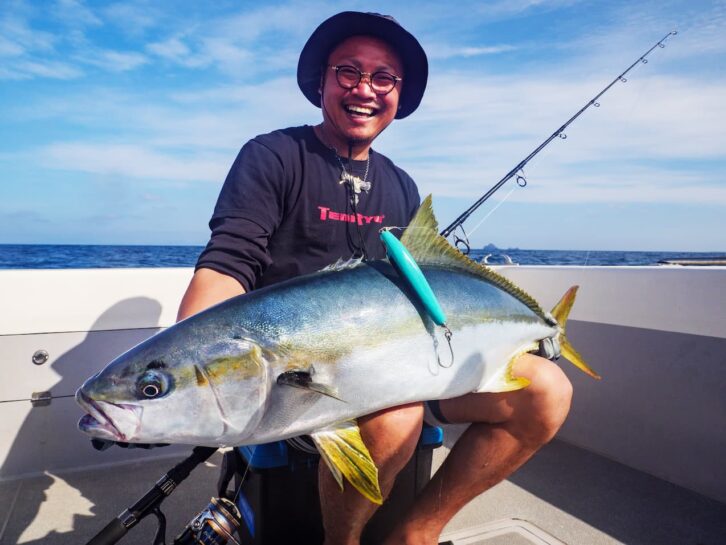
Hiramasa Casting in Genkai Sea ~Past, Present, and Future~! Who will get the trophy fish?