ANGLERS TIME impression
I used it! Reel line winding is a breeze with electric winding! Hapyson [Electric line winder].
Hapyson has developed a range of useful items, among which is the Electric Line Winder, which makes reel line winding easier with the help of electric power. Although the product has been on the market for several years, we thought it would be useful for anglers who need to wind a large amount of line. We would like to tell you what it is like to use it.
![I used it! Reel line winding is a breeze with electric winding! Hapyson [Electric line winder].](https://anglers-time.com/wp-content/uploads/2024/09/240920_1.jpg)
INDEX
- You have to wind the line onto the reel yourself.
- Equipped with all the important elements for reeling in yarn.
- Actual winding!
- Contents
- Fixing with clamps
- Each button and adjustment lever on the main unit
- Reeling the line wound on the reel onto the empty spool
- Preparing to wind the line onto the empty spool
- Start winding
- End of reeling
- End of rewinding
- Prepare the line to wind onto the reel
- The first step in winding a new line onto the reel is to tie the line onto the reel spool
- Adjust the tension lever and reel in the line
- Also wind in steps
- End
- general commentary
You have to wind the line onto the reel yourself.
Spooling reels is a necessary part of reel fishing. At first, you may have the reel wound at the shop where you bought the reel, but the line can become scratched or deteriorate during use. The line is then taken out of the reel and a new line is wound onto the reel. PE line is now the main line used for salt lures, although PE line is less susceptible to UV degradation and water absorption than other lines, and so a few metres around the tying area, where it is easy to get scratched, is cut every fishing trip. Some anglers may only cut a few metres of PE line near the tying area, which is prone to damage, on each fishing trip and do not change the line very often. However, there are times when line strength is reduced due to frequent fights with fish or line crossings. Therefore, regular line changes are necessary. The frequency of line changes varies from angler to angler, but the more often anglers target big fish, the more often they change their line to avoid regretting a trophy-class hit, as they never know when it will happen.
However, the process is surprisingly difficult: it is fine if the amount of line being rewound is small, say 200m, but if the line is being rewound over 300m on several spools, or if the angler is fishing in deep water such as mid-depth or deep sea, 600m or 1200m of line may need to be rewound. Just getting the line already on the spool out can be a challenge. Also, as PE line is expensive, some people may want to keep the unused part at the bottom of a large amount of line changes for use on another reel one day (in fact, the reporter always does this). In such cases, you want to make sure that the empty spool (the empty plastic spool of line that has been wound) is tightly wound. When I wondered if there was anything that could make this tedious task easier, the Hapyson Electric Line Winder, an item that can be done with the help of electric power, came to mind. So I immediately got one and put it to use.
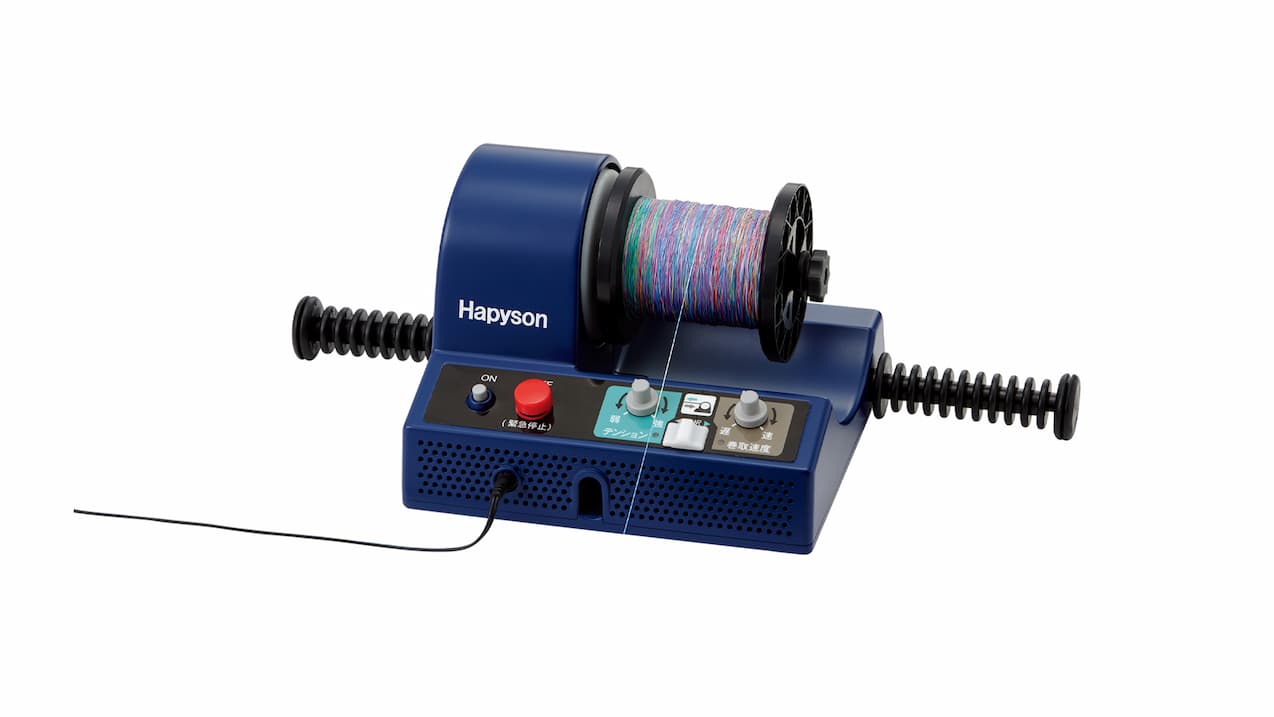
Electric line winder from Hpyson. It is an item that can be used electrically to take the line out of the reel and to wind the line with firm tension. Although it has been on the market for several years, I found it useful for winding a large amount of line.
Equipped with all the important elements for reeling in yarn.
The first important element when winding line on a reel is to wind the line while keeping the appropriate tension on the line. This is because if the line is wound on the spool in a fluffy state without tension, trouble may occur when casting or when the line bites on a hit, resulting in line breakage or other problems. Furthermore, when applying tension, avoid damaging the line. If tension is applied by directly gripping the line, the strength of the line will be reduced as it is wound. For this reason, various line winding items are sold by various companies. So what about electric line winders, the manufacturer’s website states as follows.
– Comfortable winding in both directions from reel to spool and from spool to reel.
– With speed adjustment function for quick electric rewinding of even long lines
– Compatible with PE No. 0.5 to No. 6. With tension adjustment function for up to 3 kg.
– Supports three types of fixing methods: clamp fixing, foot treadle fixing and cord fixing.
– Various spools can be used
A check of the contents shows that the line in the reel can be wound onto an empty spool and then tensioned when winding a new line onto the reel. The main unit can be fixed to a desk with a clamp, or a foot step can be attached to the main unit, or even fixed with a string to work with.
Furthermore, the speed can be adjusted when winding line from the second reel onto an empty spool. Being able to adjust the speed makes the work safer and prevents the reel from being damaged. Furthermore, if the speed of the line being wound onto the spool can be adjusted, it will be possible to rewind the line without damaging it as much as possible when considering re-use instead of discarding it.
The third item says ‘Tension adjustment up to 3 kg’, which means that the line can be tensioned firmly. When reeling in the line, the line comes directly from the attached line spool to the reel, so it will not touch anything along the way and cause a loss of strength. Incidentally, as for ‘maximum tension of 3 kg’, that figure is sufficient for up to PE No. 6. Line manufacturer Xbraid recommends ‘PE line number + 1 x 0.3’. This means that if a load of 2.1 kg can be applied with No. 6, the maximum number of lines that can be spooled with an electric line winder, there is no problem.
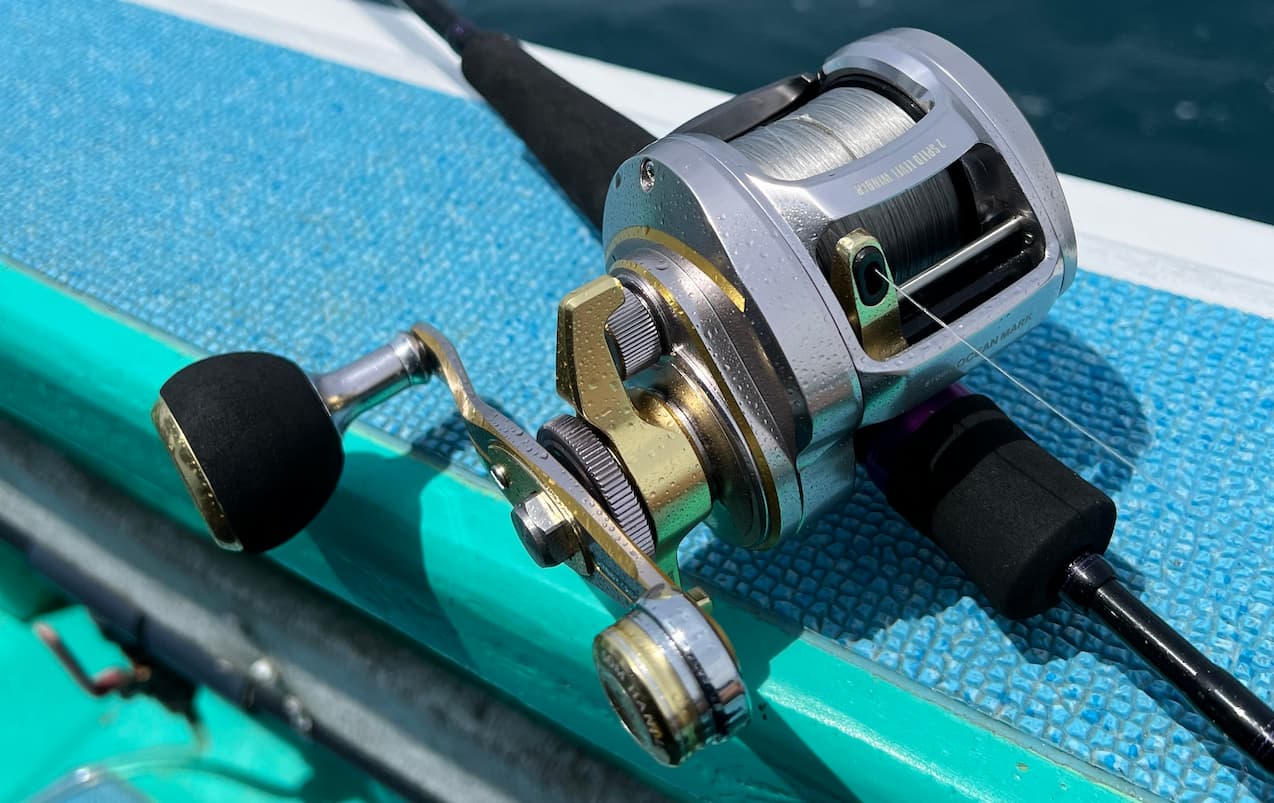
Line must be wound tightly or it will cause problems. When casting, the line can become soggy as soon as you cast, or the line can bite into the spool after a hit, causing a line break. To ensure that you catch the fish, you need to keep the line tightly wound.
Actual winding!
When we unpacked the product we received, we found it contained the main unit, an empty large spool, an adaptor, clamps (metal fittings for fixing the product to a desk or other surface) and steps. First, I tried working with the method of fixing the main unit to a desk. Incidentally, this time we used Studio Ocean Mark’s Blue Safari. The line being wound is electrically rewound onto an empty spool, and 600 m (300 m x 2) of new Sunline Soltimate Infinitive x4 No. 1 is wound, which is the full line capacity.
Contents
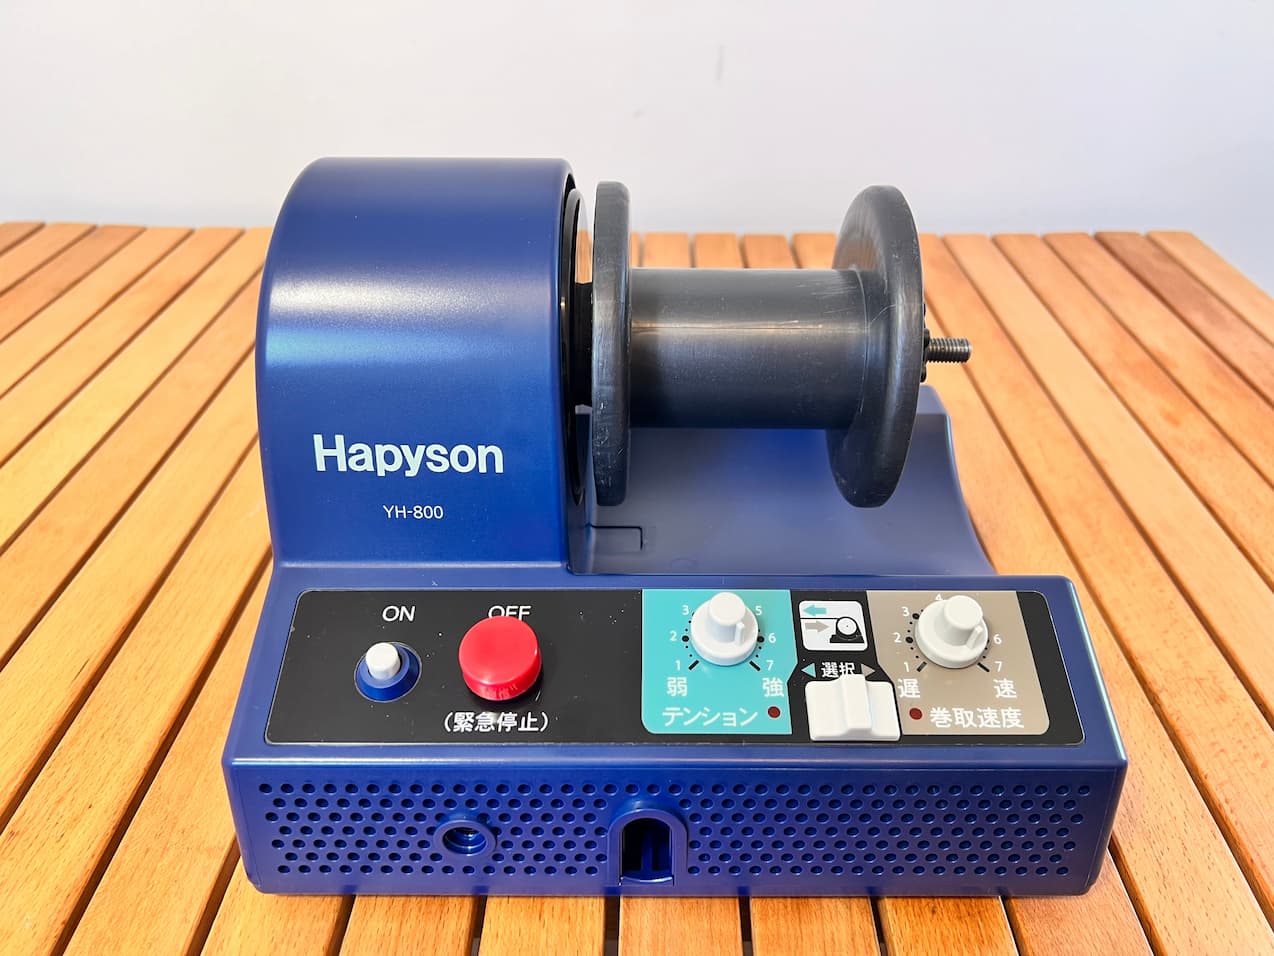
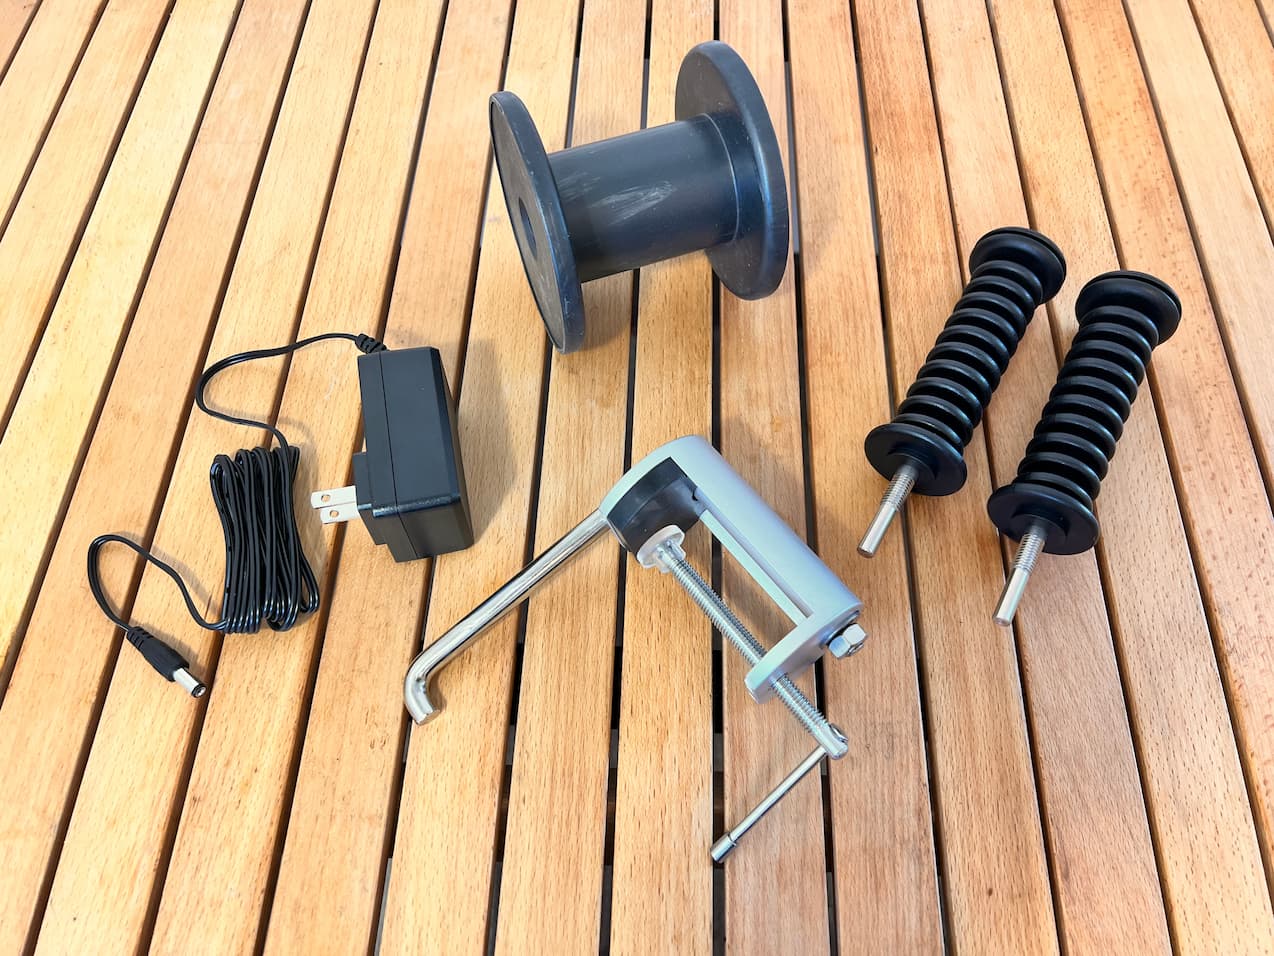
Contents. The main body (photo shows an empty spool already installed), an adaptor, a clamp (metal fittings for fixing to a desk, etc.) and a step are included.
Fixing with clamps
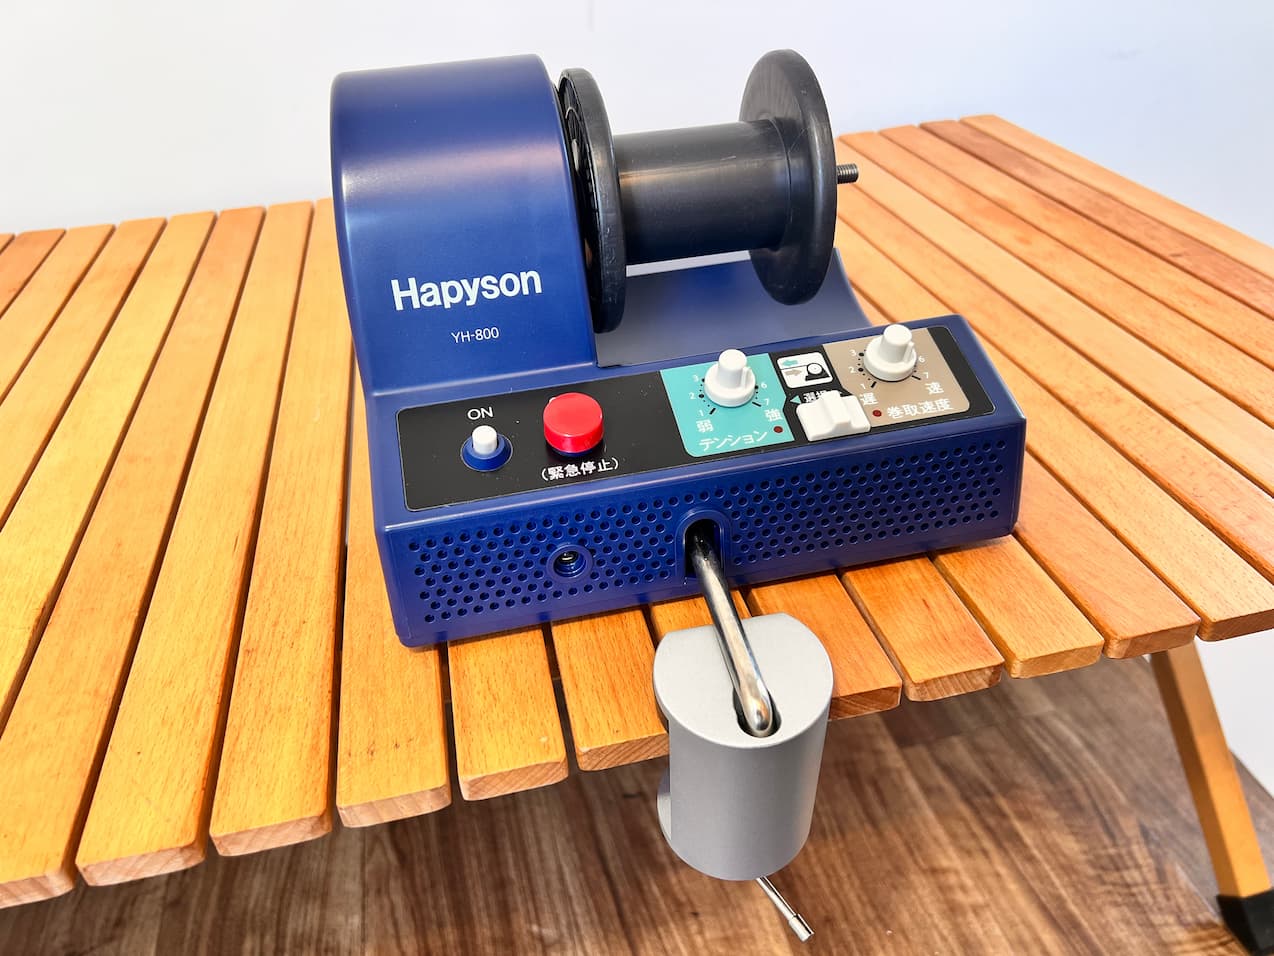
This time, we decided to work by first fixing it to a desk with a clamp. Hook the clamp’s tabs onto the main unit and turn the screw to fix it in place. The clamp can also be used on thicker desks.
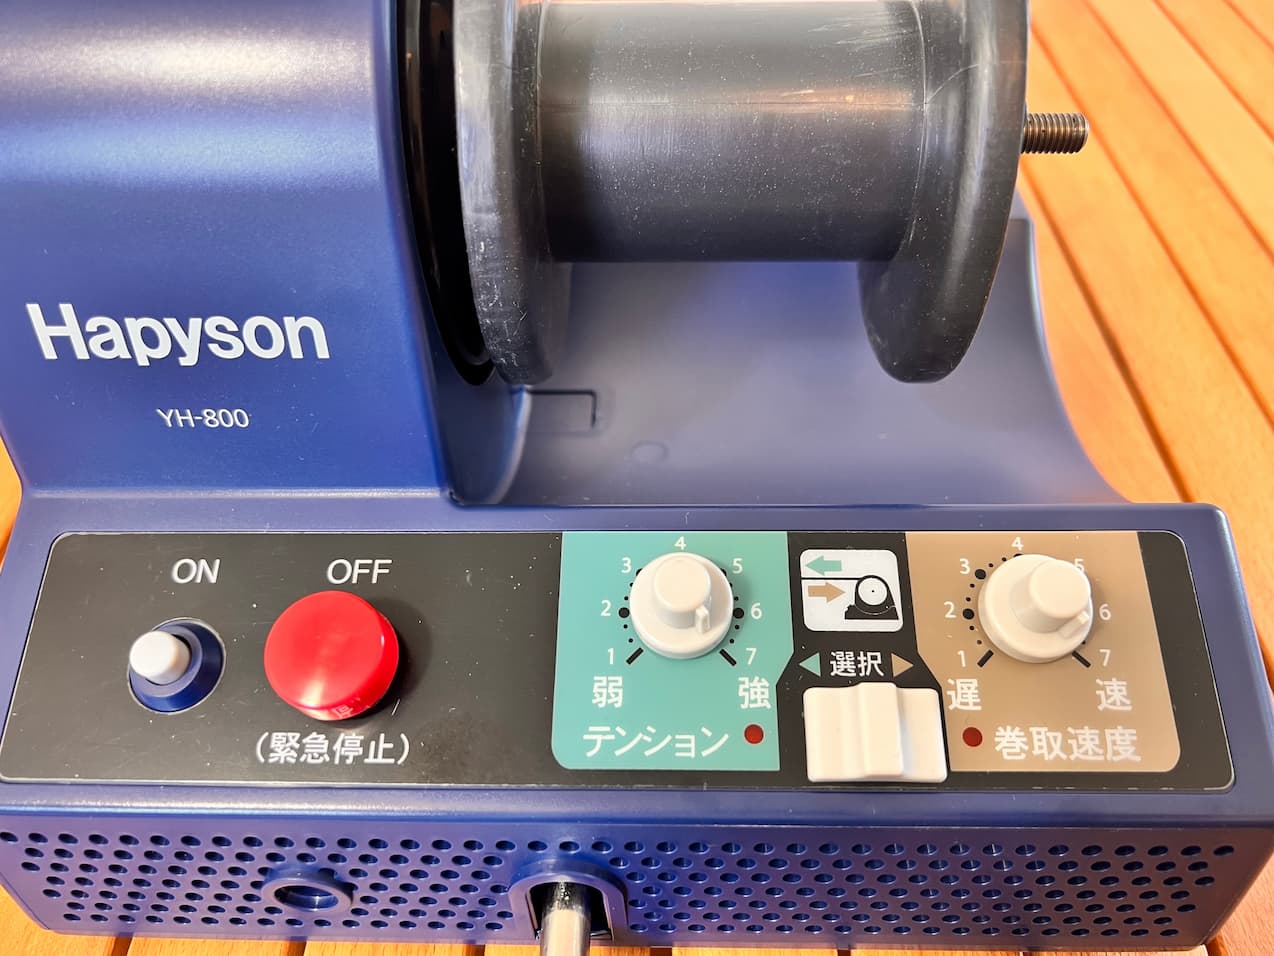
The buttons include an on/off button for winding line from the reel to the empty spool, a speed lever for winding line from the reel to the empty spool on the right side and a tension lever for determining the line tension when winding from the spool to the reel.
Reeling the line wound on the reel onto the empty spool
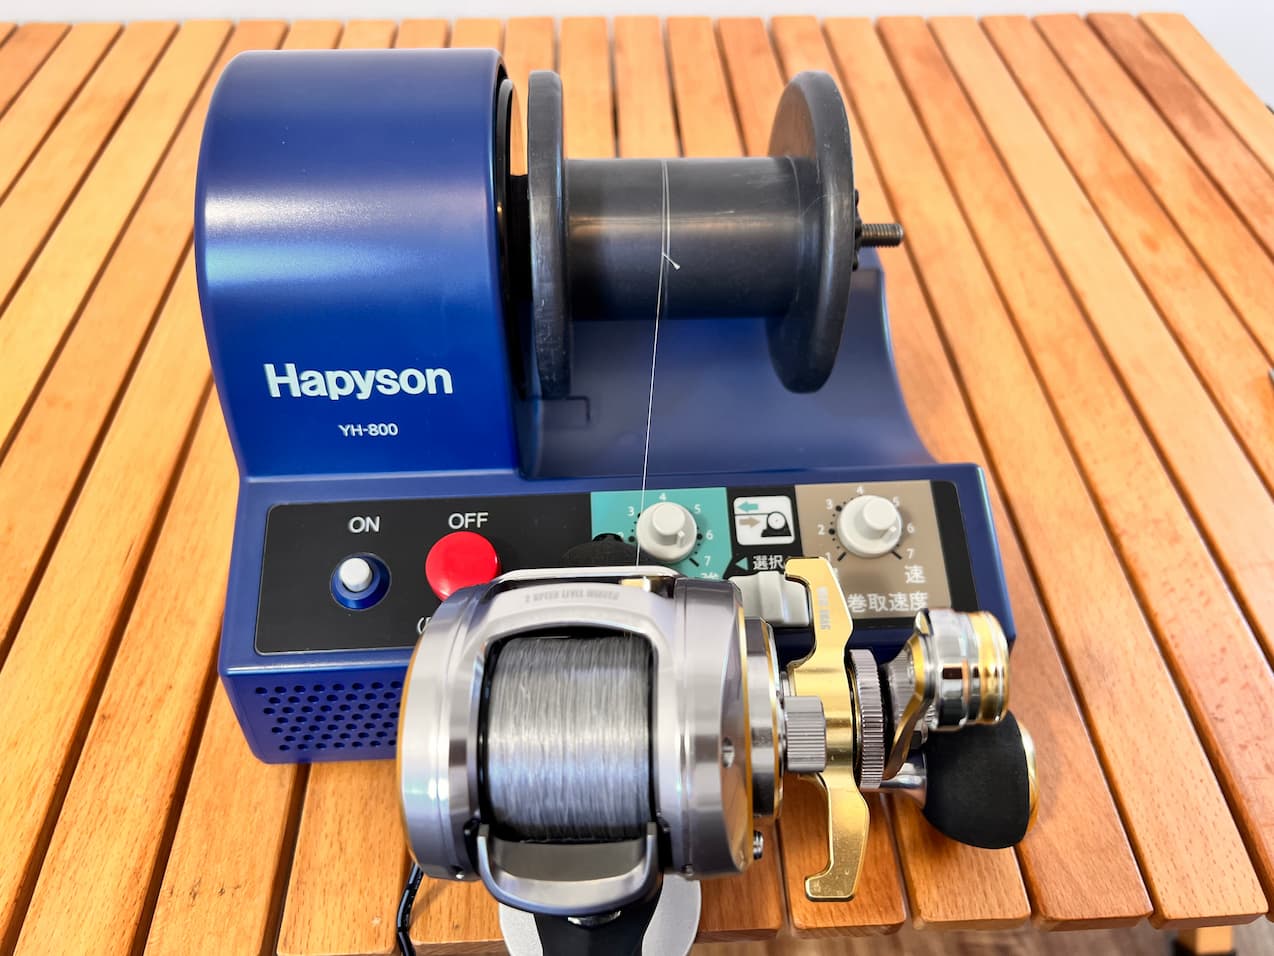
Tie the end of the line wound on the reel to the empty spool.
Preparing to wind the line onto the empty spool
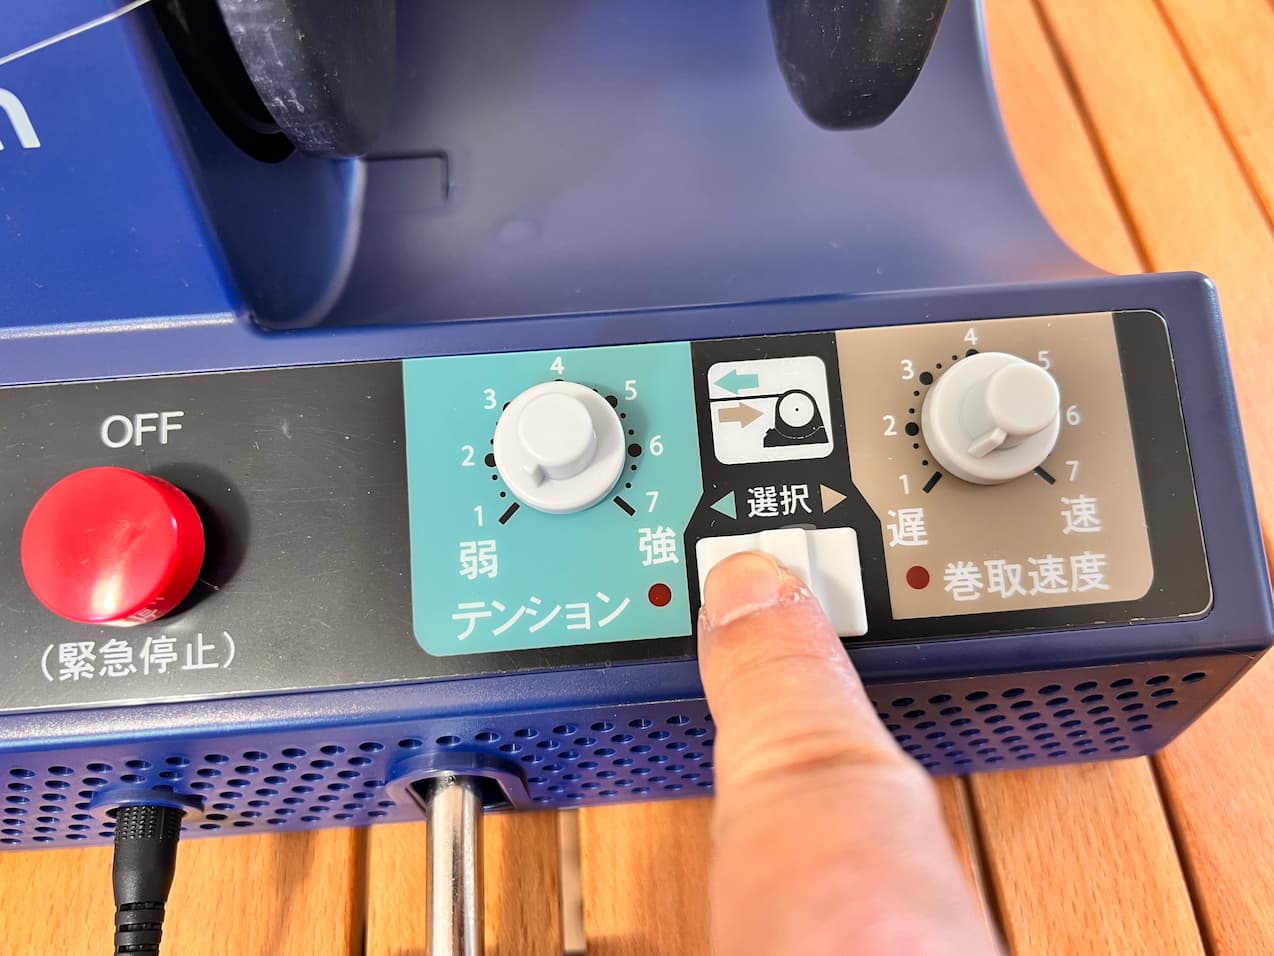
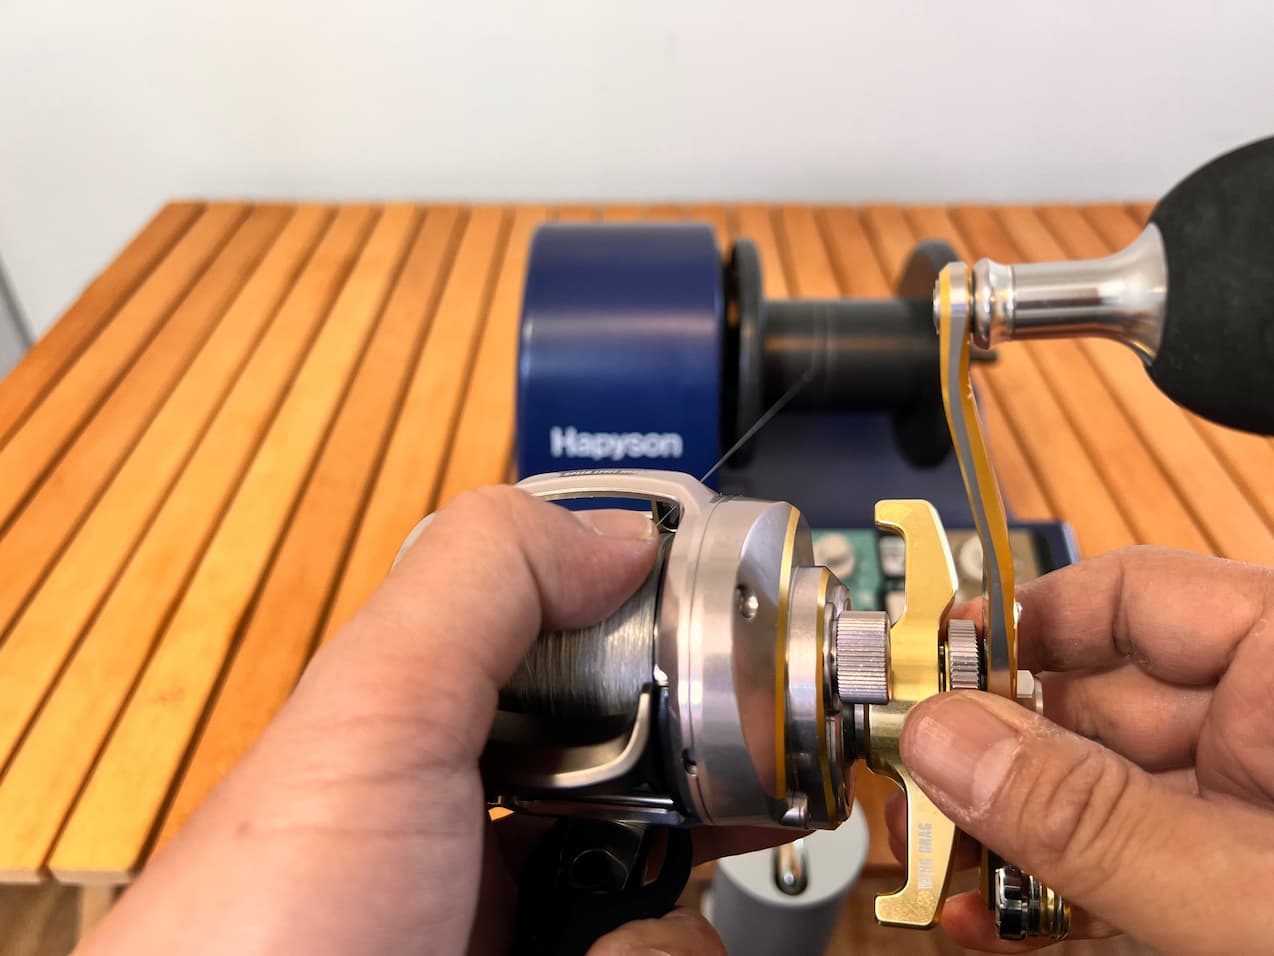
Set the selection switch between the tension lever and the rewind speed lever to the rewind speed side. Loosen the drag on the reel.
Start winding
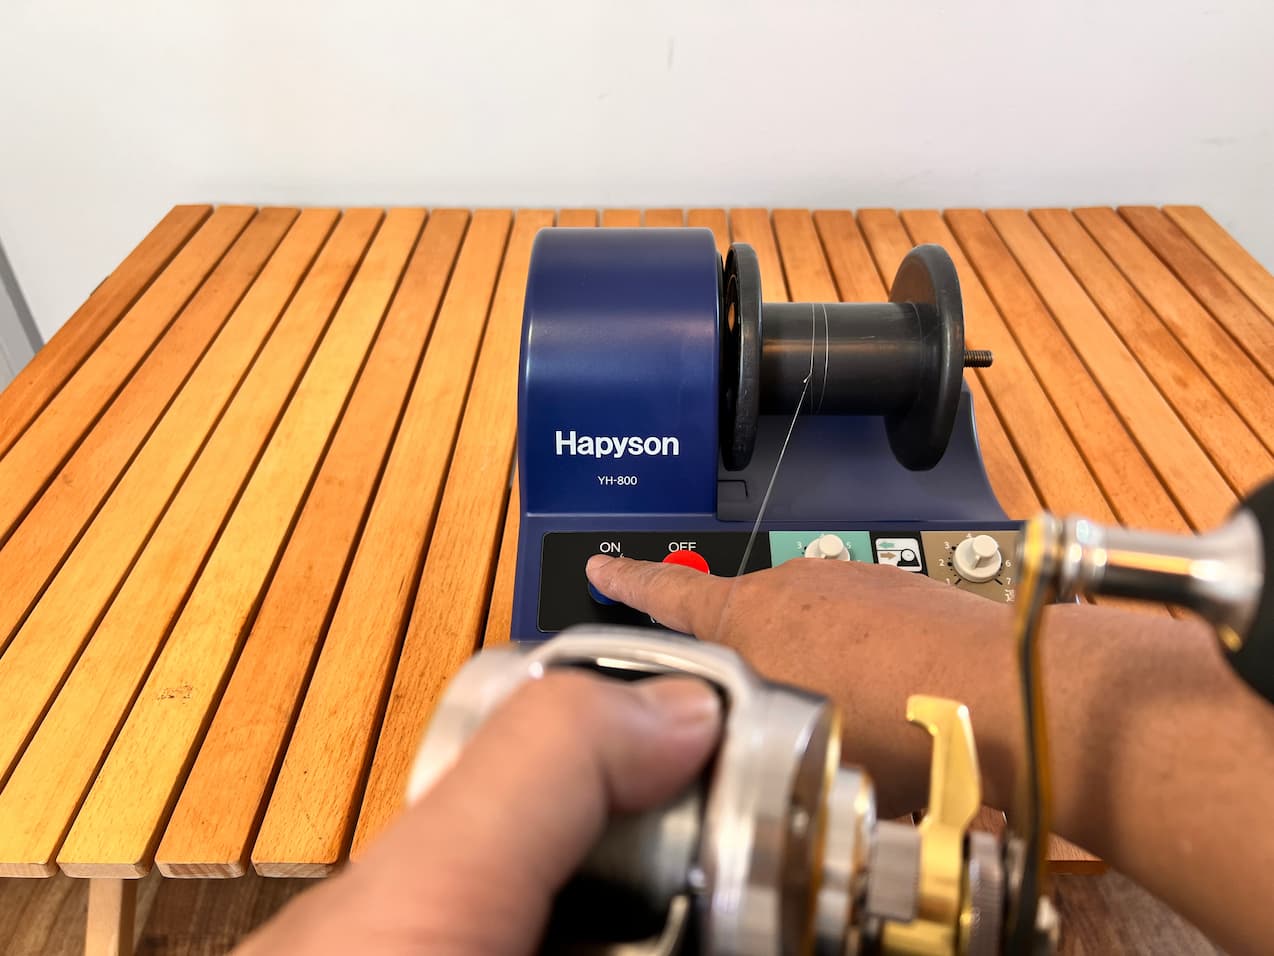
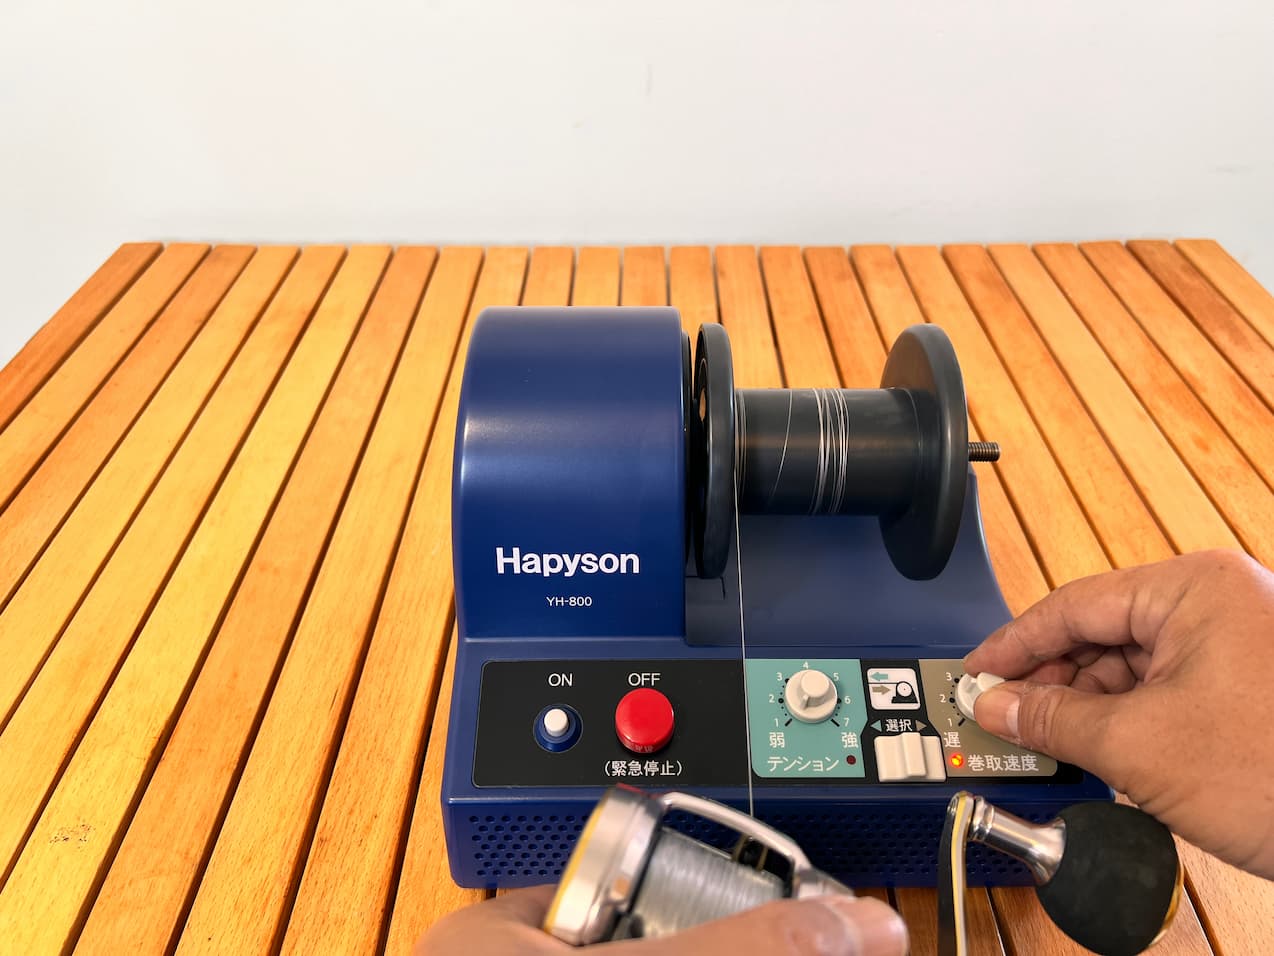
Press the ON button to start winding. If reeling is too fast or too slow, use the rewind speed lever to adjust the rewind speed.
End of reeling
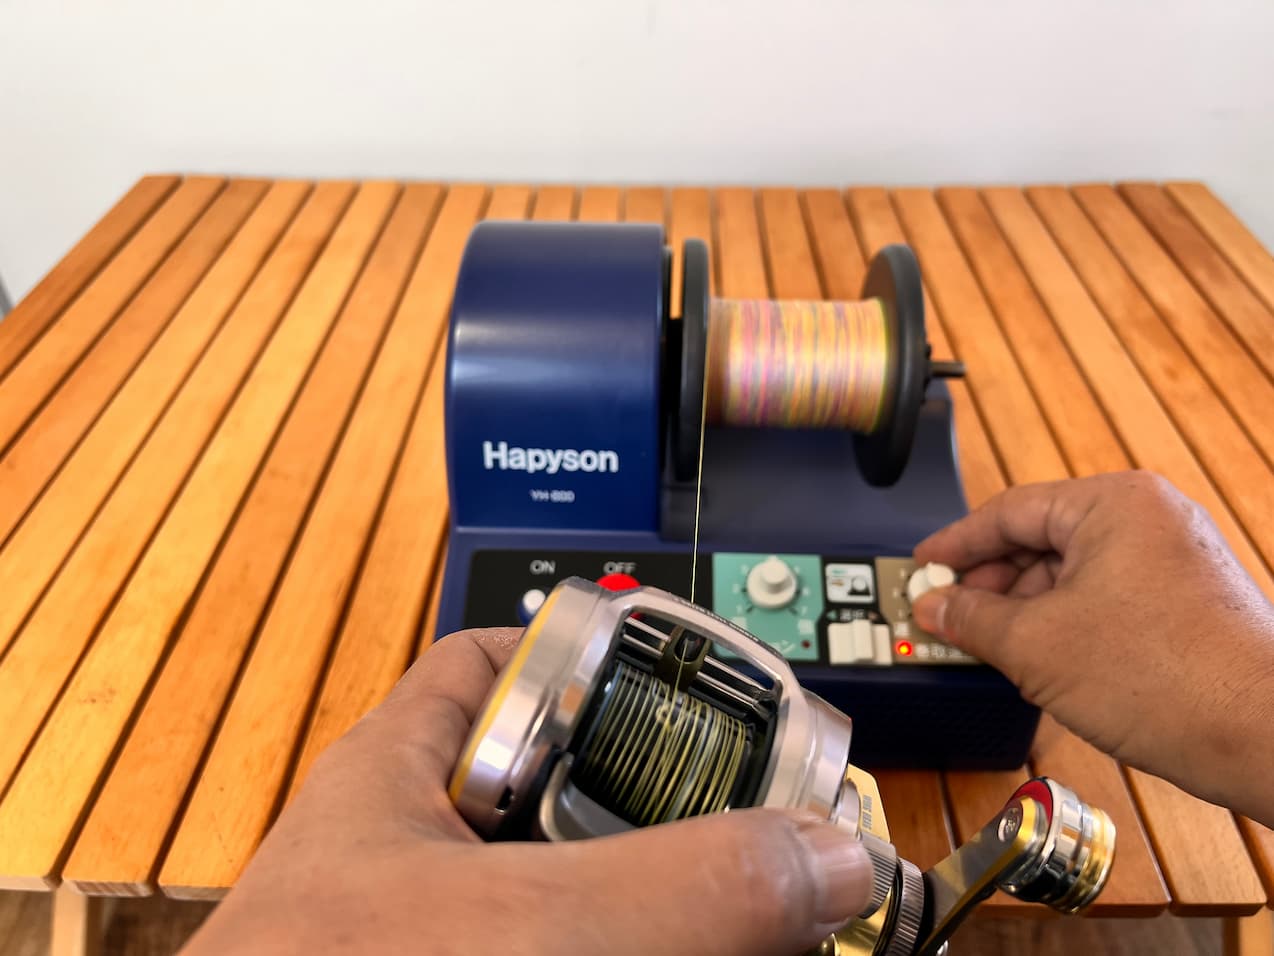
When the line is about to be collected on the empty spool, the rewinding speed should be reduced.
End of rewinding
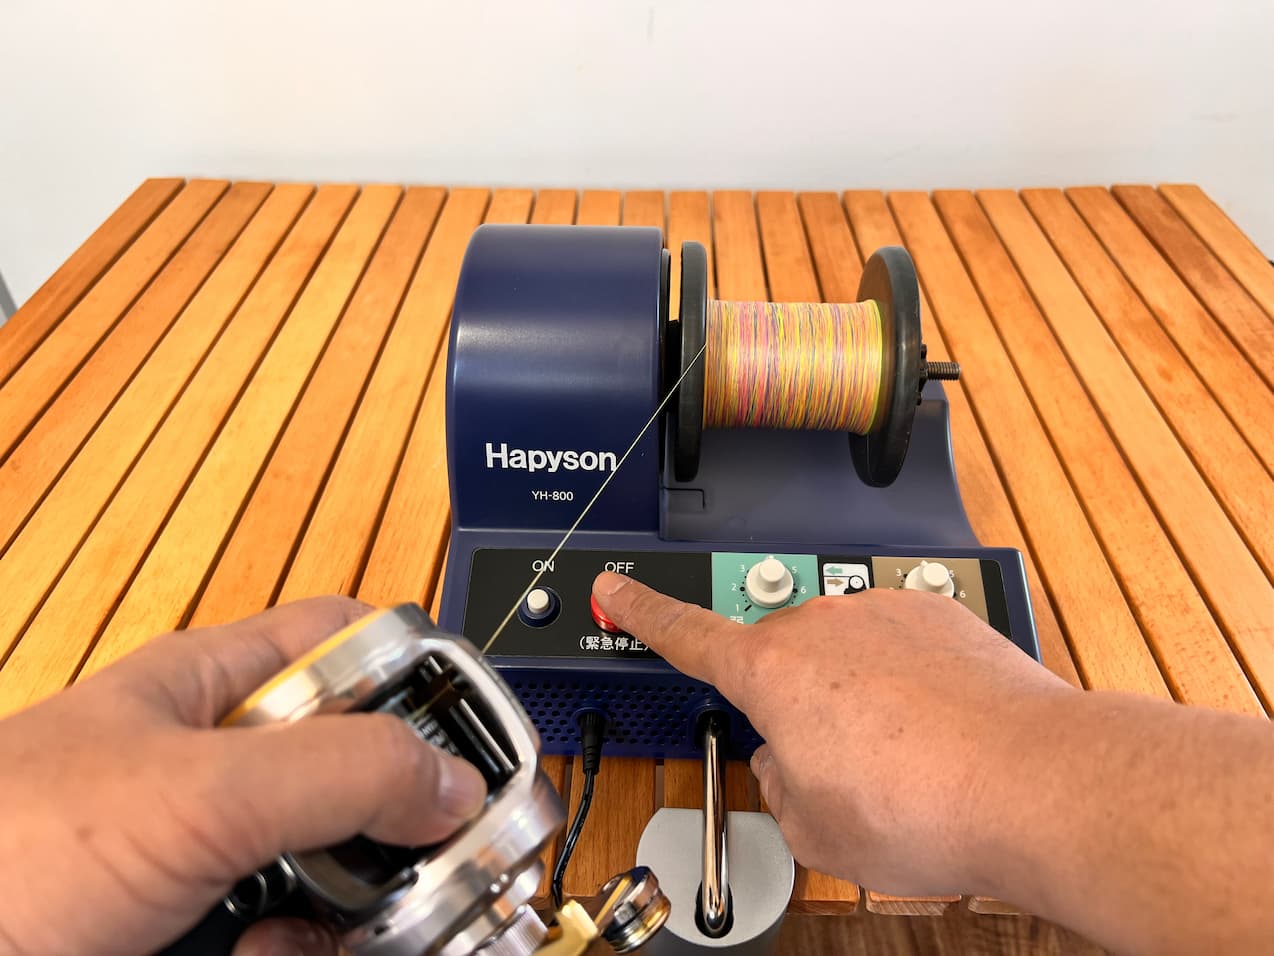
Press the OFF button at the same time as rewinding is finished. If a problem occurs during rewinding, such as the line biting the reel, you can stop the reel by pressing the OFF button. Incidentally, this was the process of taking 600 m of line out of the reel, but it was quite easy to do. This is good!
Prepare the line to wind onto the reel
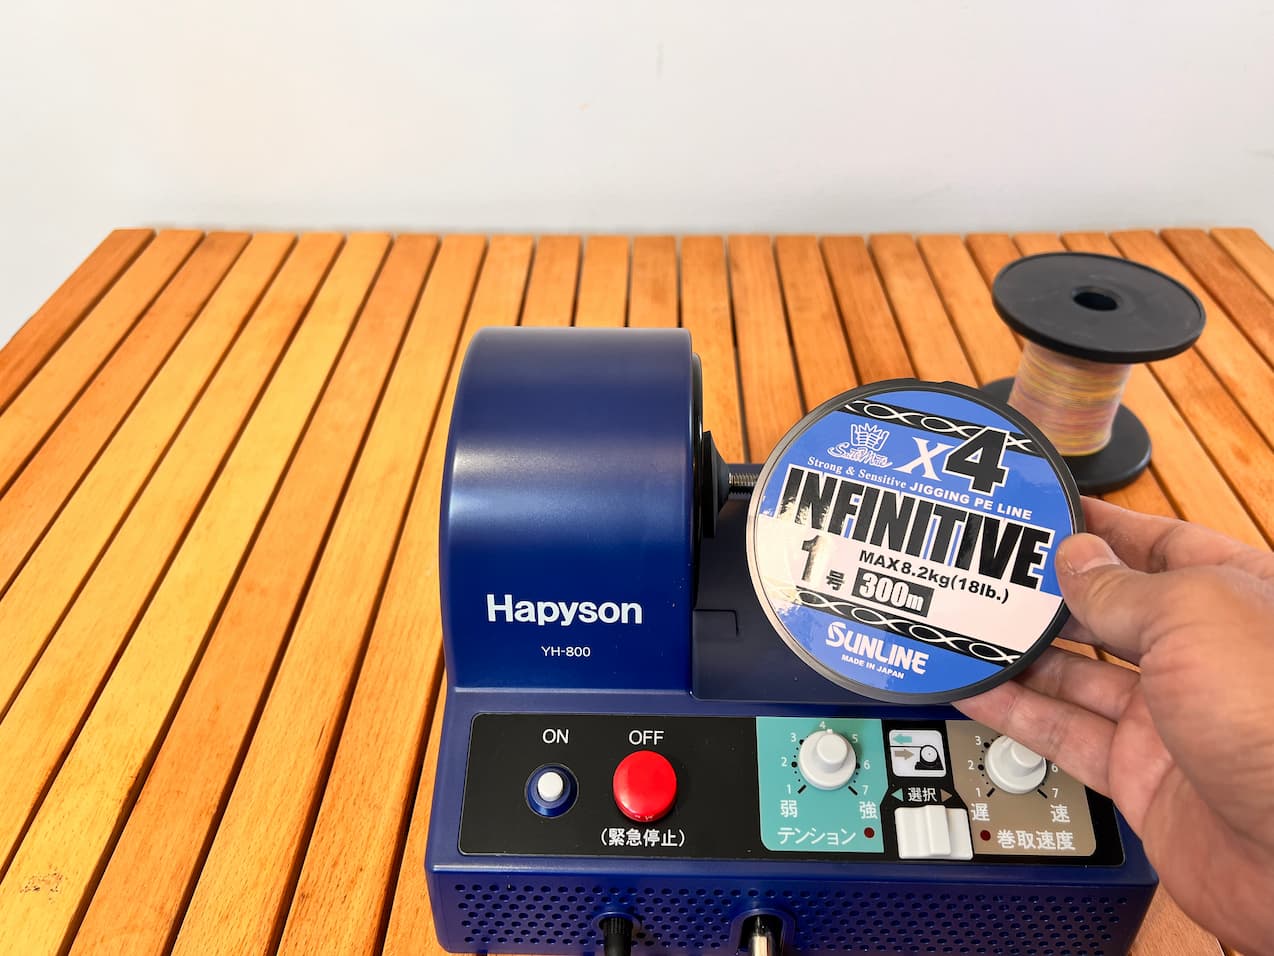
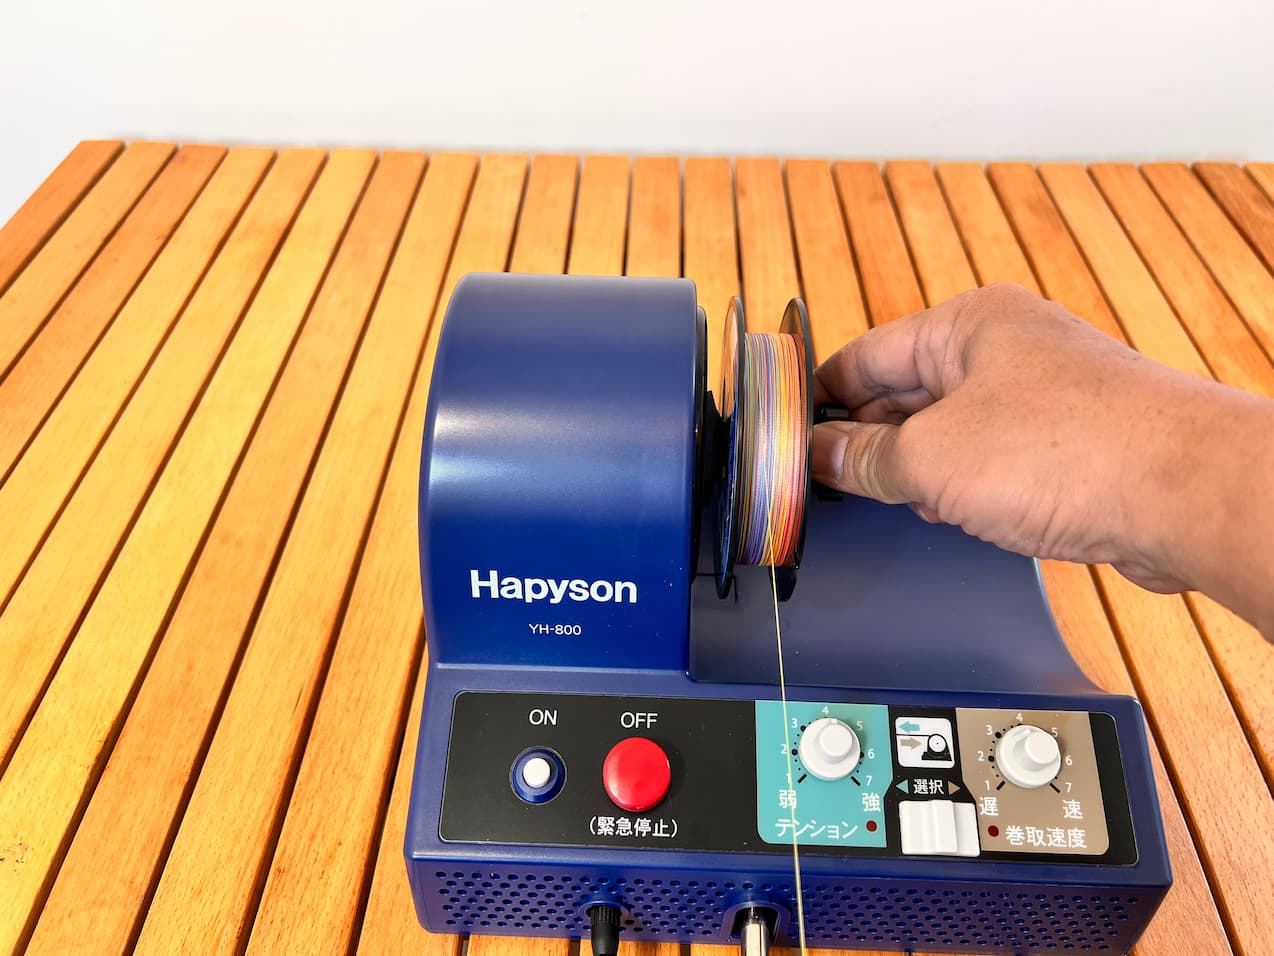
Remove the line that has been wound onto the empty spool from the spool and prepare a new line to wind onto the reel. The first time you wind a new line onto the reel, you must first wind the line onto the reel.
The first step in winding a new line onto the reel is to tie the line onto the reel spool
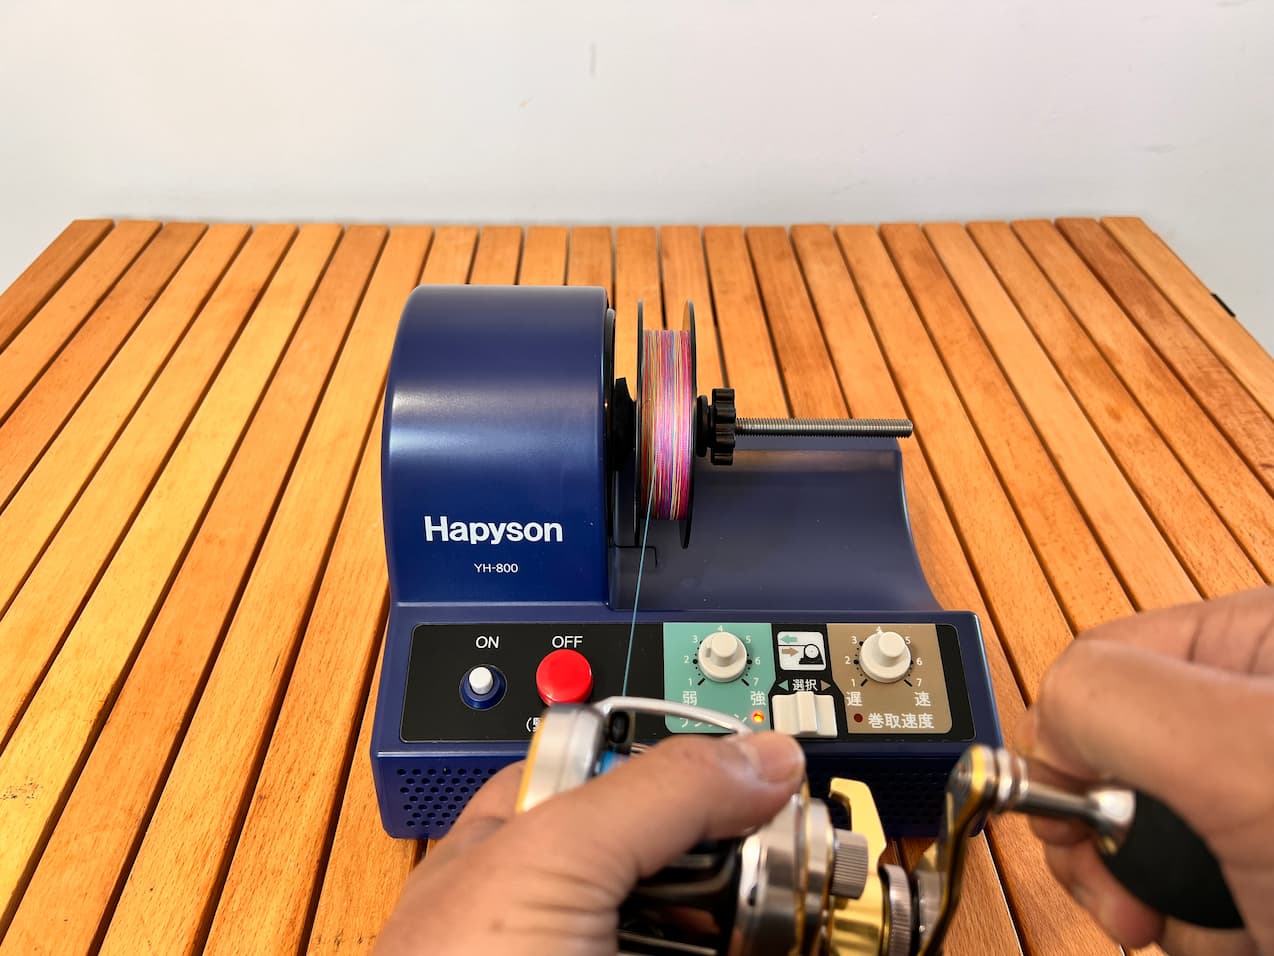
First, tie the line onto the reel spool. The first thing to do is to tie the line to the reel spool, then wind the line onto the reel several times to check that the line does not slip.
Adjust the tension lever and reel in the line
Press the ON button and check the tension lever. The tension is applied electronically. The recommended line tension is as follows.
PE No. 1/0.6 kg, PE No. 2/0.9 kg, PE No. 3/1.2 kg, PE No. 4/1.5 kg, PE No. 5/1.8 kg, PE No. 6/2.1 kg (the number of kg is calculated as PE No. + 1 x 0.3)
The above ㎏ numbers were then checked using a drag checker to see which number on the tension scale they were.
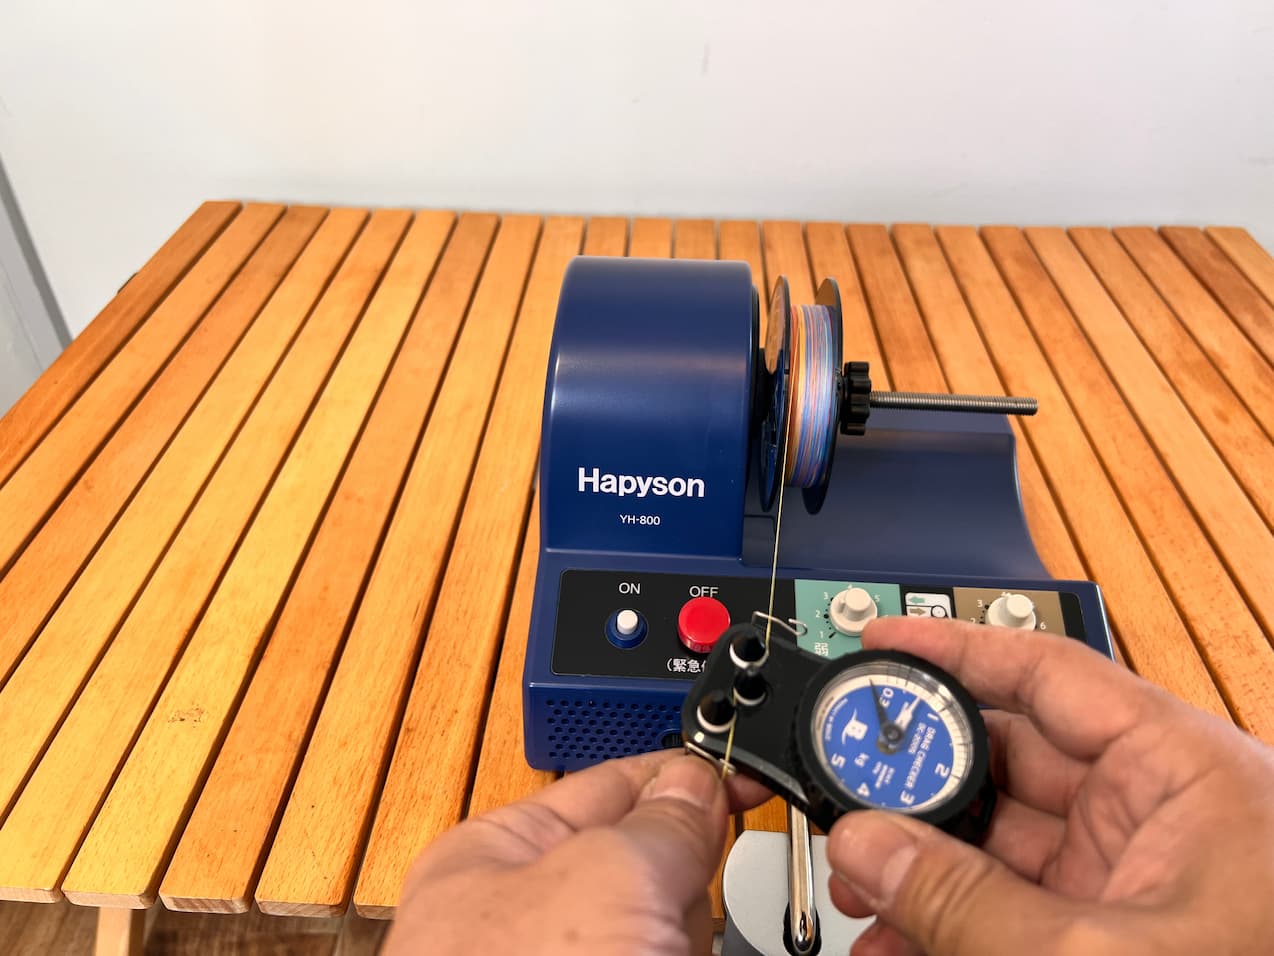
Memory 1/0,5-0,6 kg, Memory 2/about 0,8 kg, Memory 3/1 kg, Memory 4/1.3 kg, Memory 5/1.5-1.6 kg and Memory 6/2 kg. These figures for the products received. If you have purchased the product, you should first measure and understand the values. Incidentally, this time the value was set to 0.6 kg because of PE No. 1. The memory is set to 1. From here, manually wind the line at the same pace as far as possible.
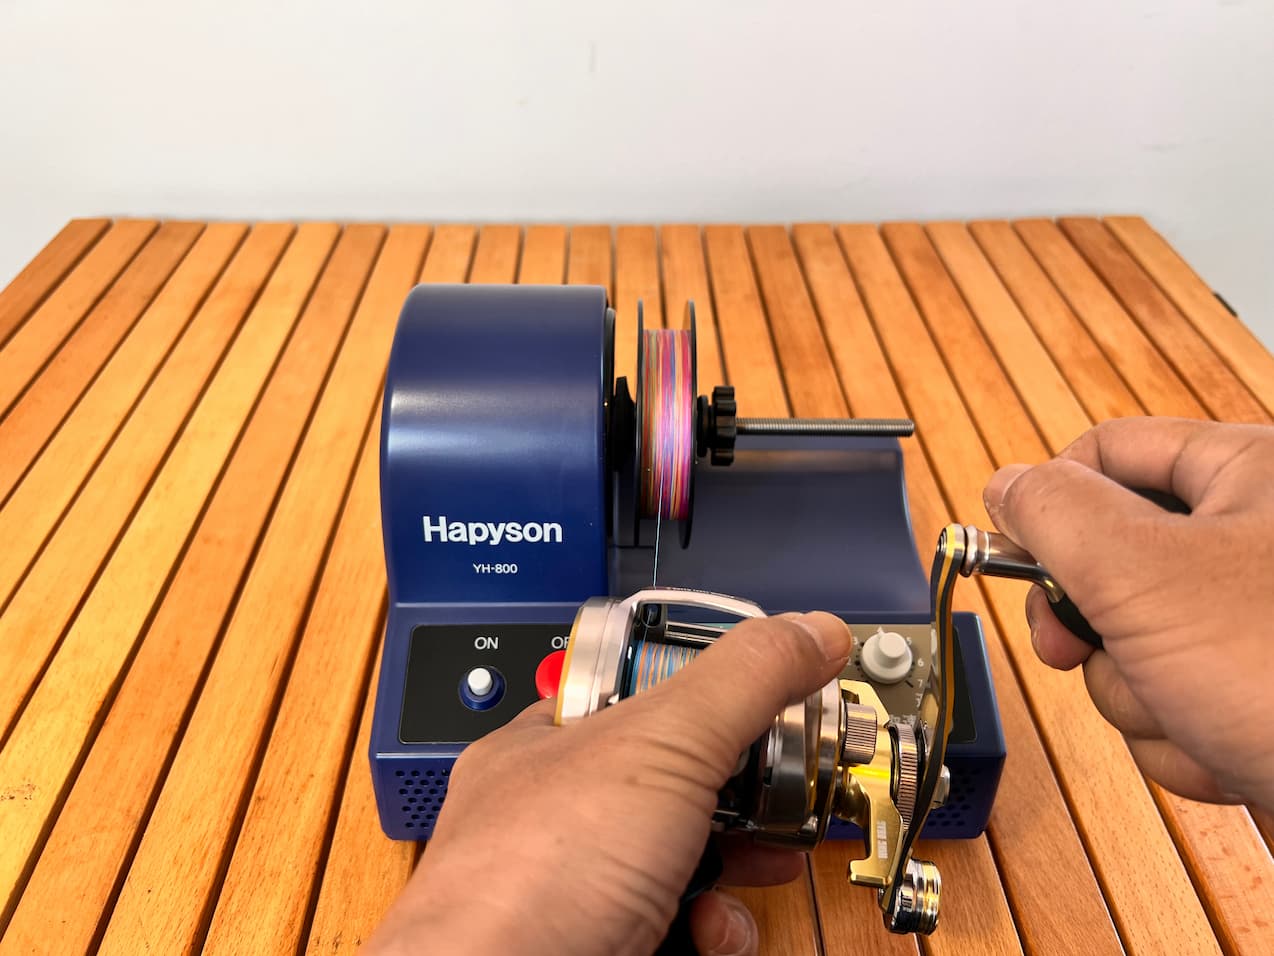
Also wind in steps
I also attached a step on the way and tried winding the line with my feet.
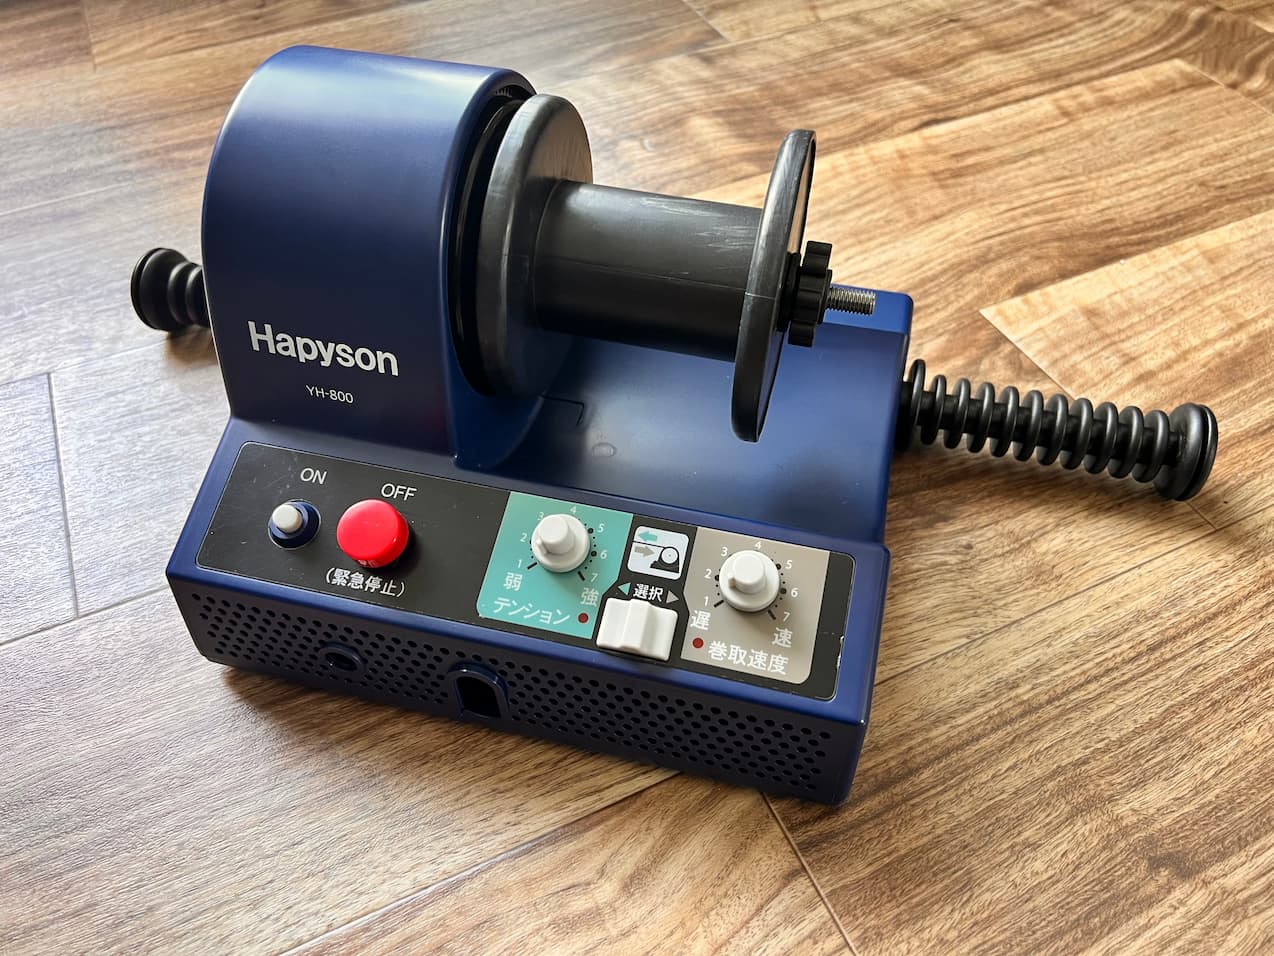
Photo of the step with the foot on it. The step can be easily attached with a screw system.
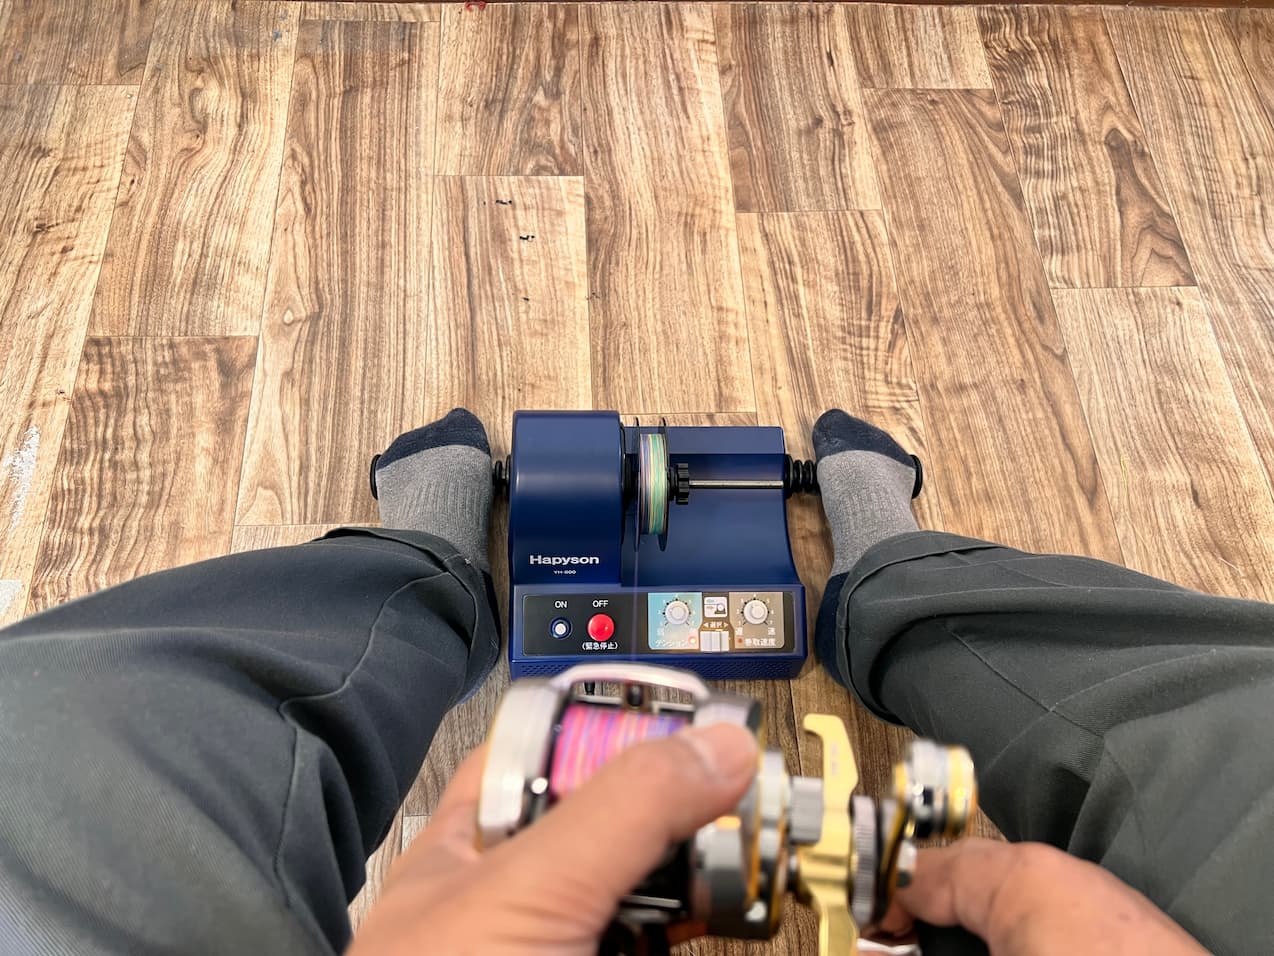
If you don’t have a desk, the step version is good if you don’t have space to put a clamp between the desk and the clamp. However, for those who wind with a reel attached to the rod, winding with a clamp is better.
End
When the line is finished winding, turn off the power and exit.The rod was wound with the tension firmly applied. With the leader attached, all that remains is to go fishing.
general commentary
After using the electric line winder this time, the process of winding the line from the reel onto an empty spool is much easier. Normally I would have used an empty reel or a manual line winder, but it is quite difficult to wind a large amount of line. It’s fine if you’re throwing away the line, but when you think about reusing that line, you want to rewind it properly. This can be done electrically. Also, winding new line onto the reel is manual work, but it is good that the same spooler can be used to apply firm tension to the line. The noise during the operation is a little loud, but it didn’t bother the reporter that much.
The line connects the fish and the angler. Salt lures can sometimes hit with unexpectedly large fish, and if you are targeting large fish from the start, that hit may be the only one you ever get in your life. For this reason, it is better to change the line frequently, and the line winding process needs to be done properly. To be honest, it can be a hassle, but the electric line winder makes the job a little easier.
Product information
https://hapyson.com/products/yarn-related/418/


